Website Plan Template

Website Plan Template, within the Milanote app

Map out each part of your new website

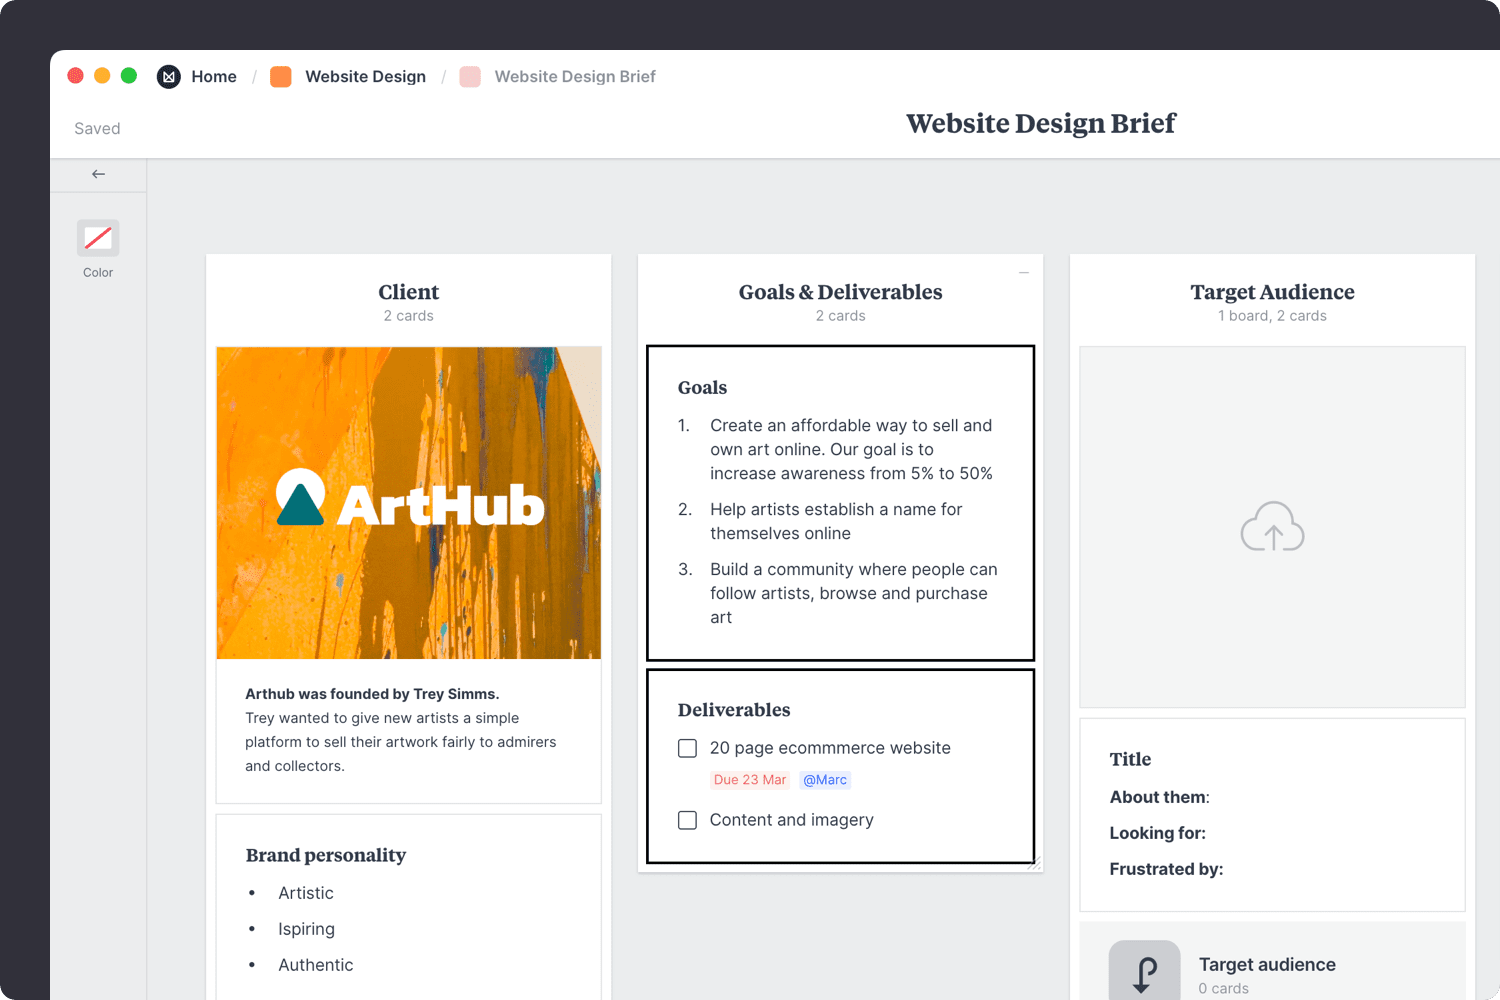
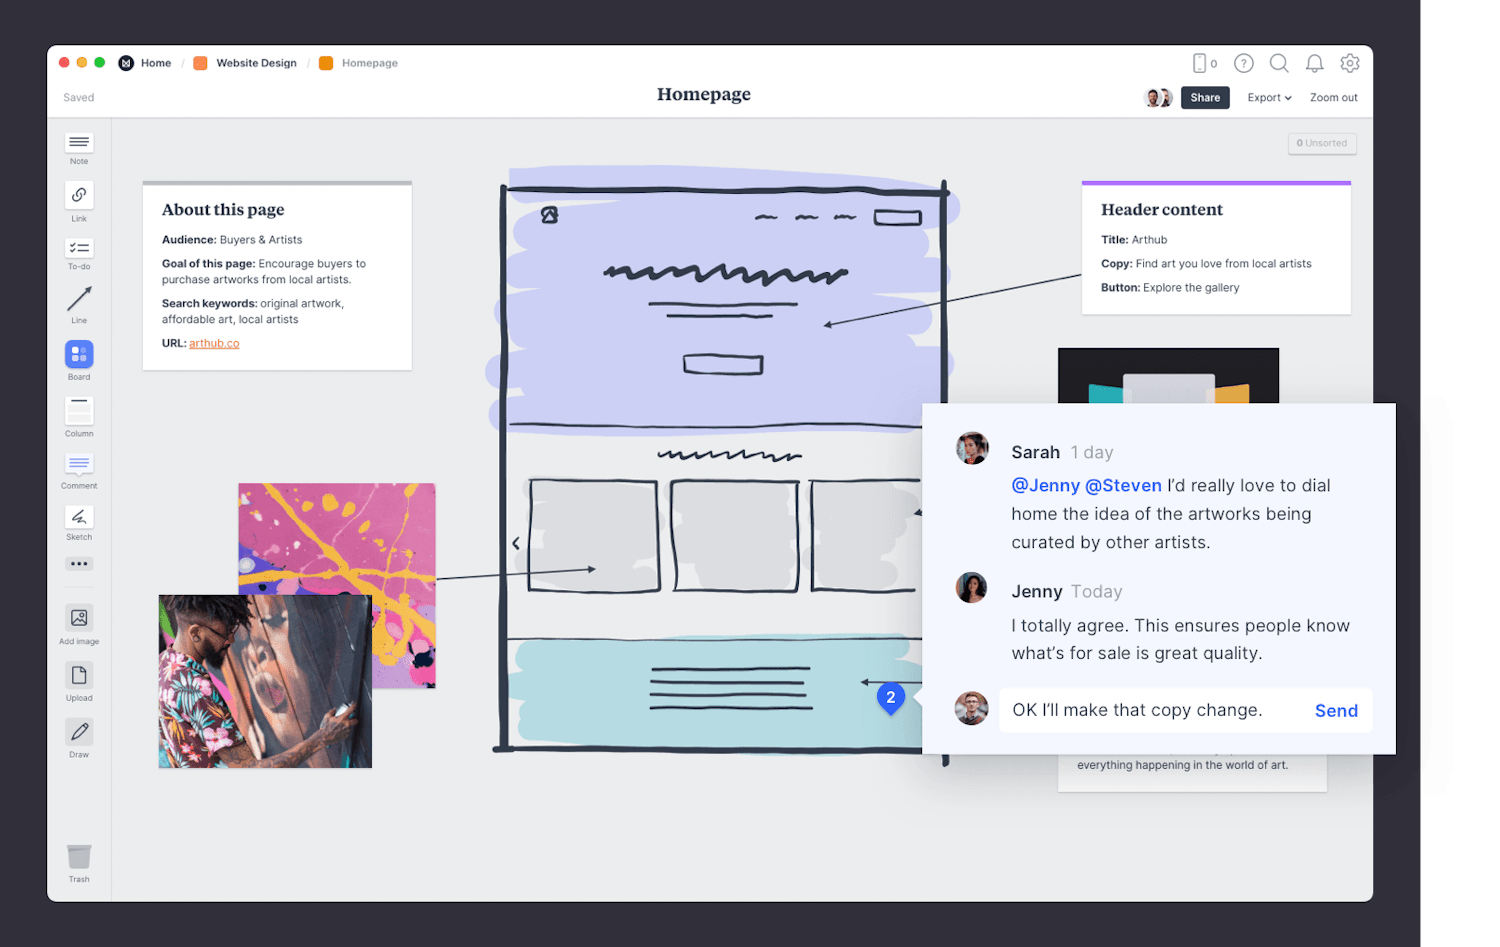
Before you start designing your new website, it's important to know what it should include and why. For example, who is your website for? What content do you need to create? How should your website look?

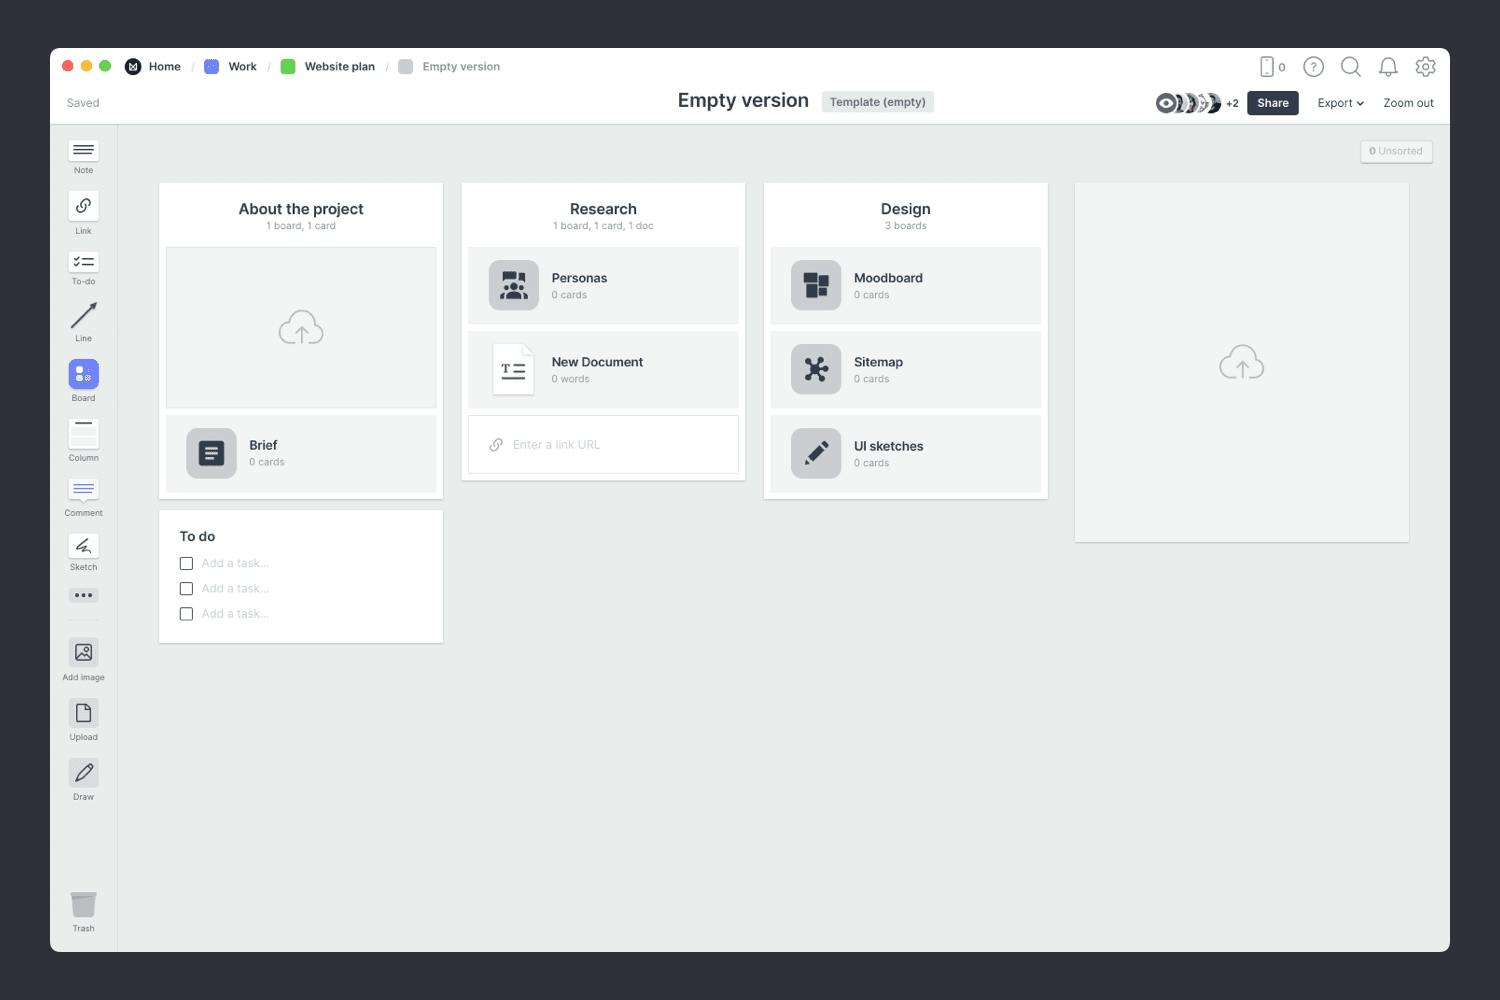
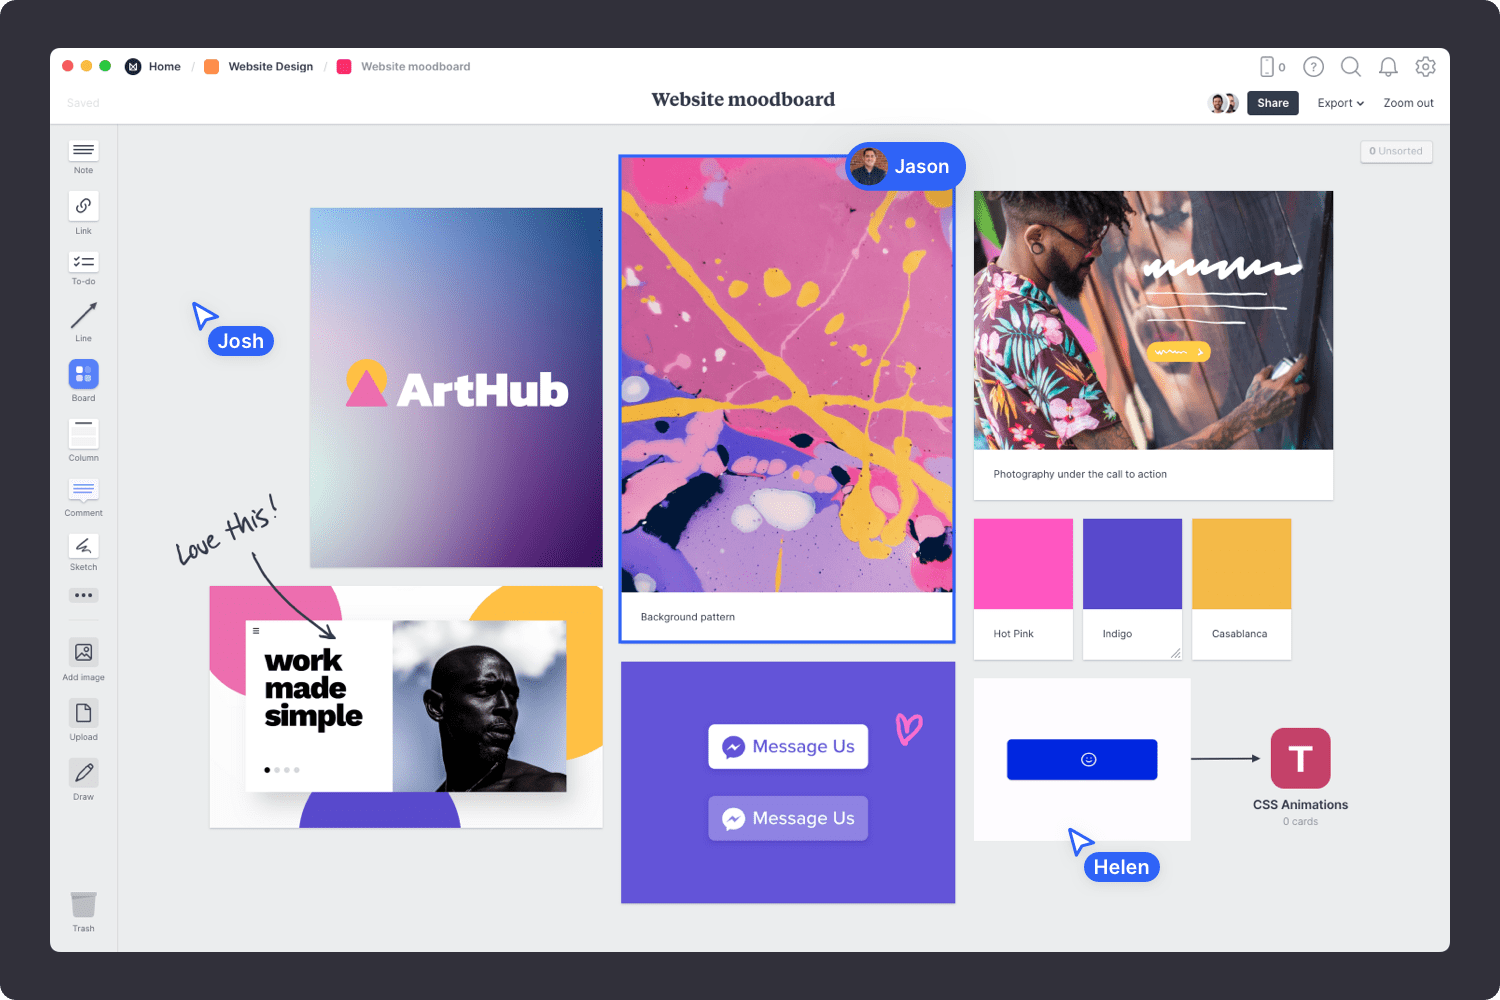
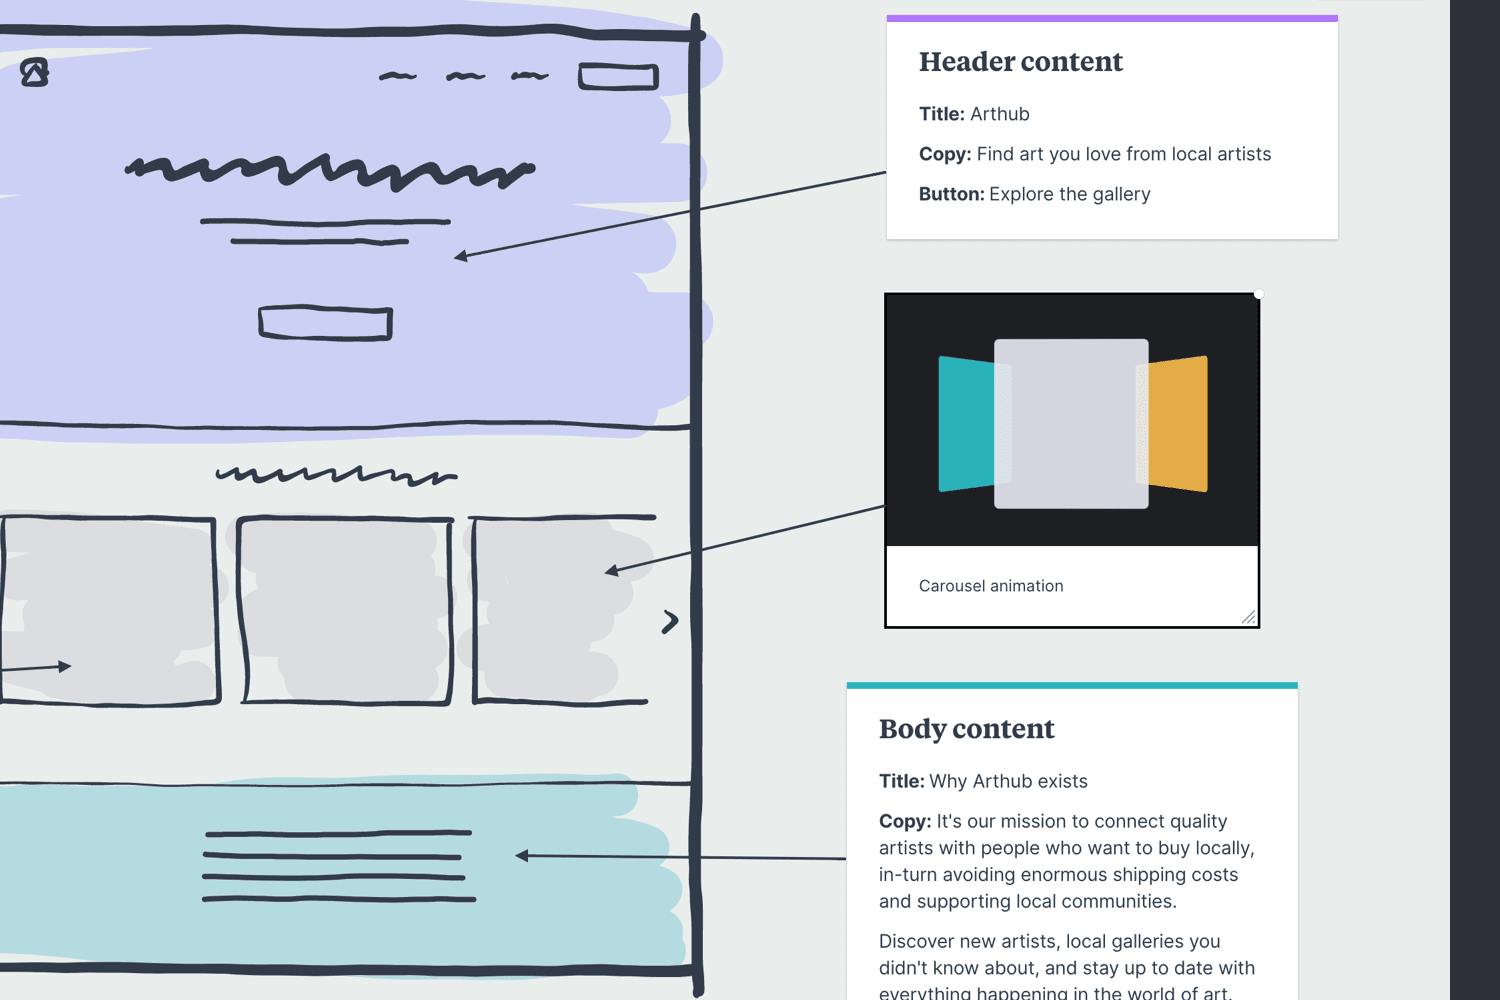
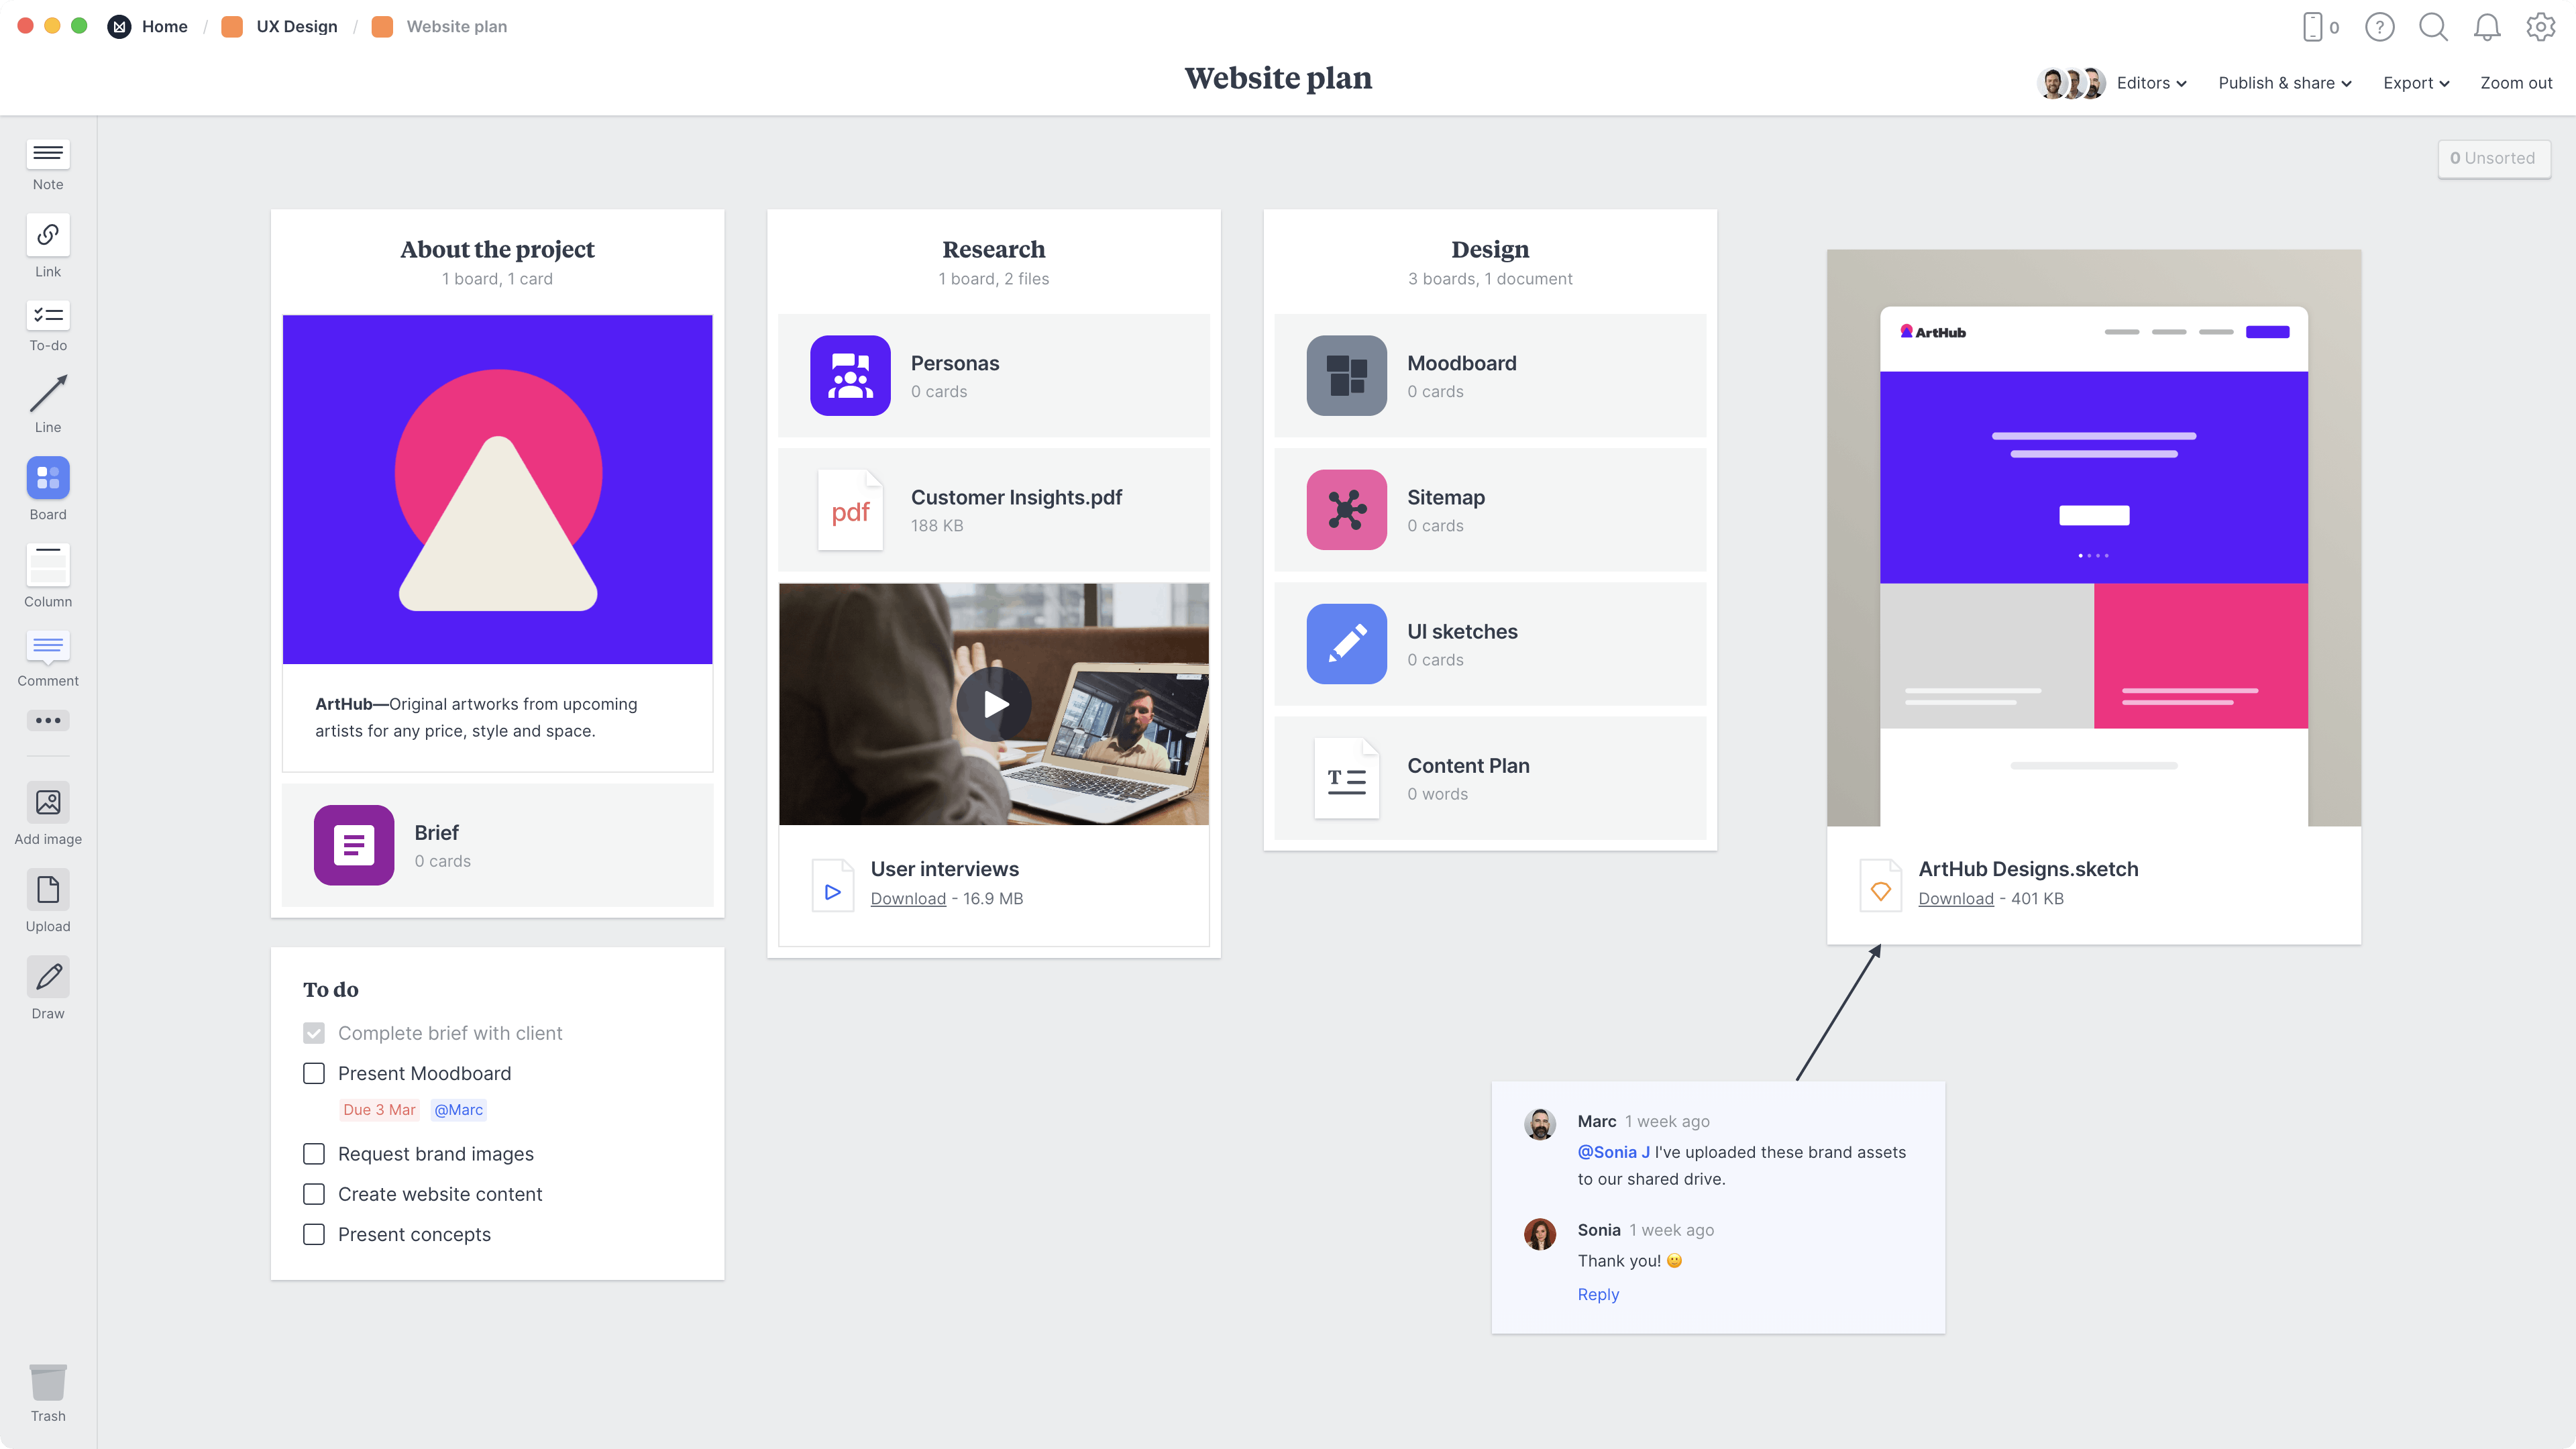
Whether you're a designer, developer or marketing manager, the Website Plan template helps you map out your project in one place so nothing falls through the cracks. By default, it gives you the space to define the goals, audience, visual style, sitemap and content. But you can adapt it to suit the way your team works.

This is part of the Website Design template collection.

  • Set goals & deliverables
  • Organize visually
  • Explore ideas
  • Collaborate with your team
  • Comment & gather feedback

How to use this template

Whether you’re a designer, marketer, or client, follow this step-by-step guide to learn the modern way to plan a website design project in Milanote, a free tool used by top creatives.

1. Open the empty project plan template

The Website Design Project Plan template is the central hub for your project. It includes boards and placeholders to help you organize the goals, deliverables, visual references and content before you start a line of code. There are also checklists for your workflow so you have everything in one easy-to-access place.

Website design plan template
How to do this in Milanote
  1. Create a new board for your project.

    Create a new board

    Drag a board out from the toolbar. Give it a name, then double click to open it.

  2. Choose the Website Design Plan template.

    Choose a template

    Each new board gives you the option to start with a beautiful template.

2. Open the Brief board

It’s crucial to set a strong foundation from the start. A clear, inspiring, and informative brief provides the structure and direction for designers to do their best work. Website Design briefs typically include information about the brand/client, goals, specific deliverables, visual references, target audience, and important dates.

website design brief guide step 06
How to do this in Milanote
  1. Open the Brief board in your Project Plan.

  2. Choose the Website Brief template.

    Choose a template

    Each new board gives you the option to start with a beautiful template.

3. Set the goals & deliverables

How will you know if the project is a success? Having a clear, realistic and measurable goal will help keep your team on the same page. For example, are you trying to increase inbound leads, or double the number of sales enquiries in 1 year? Alongside this, list any specific deliverables that will help you achieve your goal.

Website brief template 03
How to do this in Milanote
  1. Add a to-do list to describe the deliverables.

    Drag a to-do list onto your board

    Start typing then press "Enter" to create a new item. Add a title to your to-do list using the left hand toolbar.

  2. Add a note to describe the goals & target audience.

    Drag a note card onto your board

    Start typing then use the formatting tools in the left hand toolbar.

4. Open the Persona board to define the audience

If you want to design a successful website, it's crucial to know who will be using it. That's where customer personas come in. Customer personas (or buyer personas) are fictional, composite characters that represent a segment of your audience—based on customer research. They'll help you choose a design style and write content that will connect with your customers.

Persona guide step06
How to do this in Milanote
  1. Open the Persona board in your project plan.

  2. Choose the Persona template.

    Choose a template

    Each new board gives you the option to start with a beautiful template.

5. Describe pain points & the ideal experience

Defining your customer's pain points is extremely important, as removing these challenges will likely be the key to winning your customer's loyalty. Next, switch modes and describe the ideal experience. This is the creative part of the process. It's where you can set aside any current limitations and imagine the best experience for your persona.

customer persona template 03
How to do this in Milanote
  1. Add notes to describe the pain points & ideal experience.

    Drag a note card onto your board

    Start typing then use the formatting tools in the left hand toolbar.

  2. Drag research documents and stats from your computer.

    Upload a file or document

    Click the "Upload" button or just drag a file onto your board. You can add images, logos, documents, videos, audio and much more.

6. Set the visual direction with a moodboard

Next, it's time to start exploring some visual directions with a moodboard. Moodboards can help you visualize any aspect of your project. They can be literal and practical (featuring fonts, color schemes and images that you actually plan to use in the final design) or they can be more about exploring tone and mood. You can create a moodboard for each of these separately or mix them all into one board. There are no strict rules.

website design moodboard guide step09
How to do this in Milanote
  1. Open the Moodboard on your project plan.

  2. Choose the Website Moodboard template.

    Choose a template

    Each new board gives you the option to start with a beautiful template.

7. Add inspiring imagery and references

Start by adding any existing material you have—this could include client references, positioning statements or images you've saved as inspiration. Just drag them onto your board.

If you're the type of person who keeps a collection of images in an inspiration library, now's the time to see if you've already got something that could work. Or you can start by searching for visual elements from around the web. There are lots of fantastic sites where you can find great visual inspiration for free, like Dribbble, Behance and Designspiration.

website design moodboard guide step03
How to do this in Milanote
  1. Use the built-in image library.

    Use the built-in image library

    Search over 3 million beautiful, free photos then drag images straight onto your board. Powered by Pexels.

  2. Drag files from your computer.

    Upload a file or document

    Click the "Upload" button or just drag a file onto your board. You can add images, logos, documents, videos, audio and much more.

8. Map out the structure with a Sitemap

Now that you have an idea for your website could look, let's make a Sitemap to plan the content and structure of your website. Designers, copywriters and marketers use them to map out website categories before jumping into the interface design phase. They become an invaluable reference for the whole team when estimating how much work is involved to build the website.

sitemap guide step03
How to do this in Milanote
  1. Open the Sitemap on your project plan

  2. Choose the Sitemap template

    Choose a template

    Each new board gives you the option to start with a beautiful template.

9. Create a board for each page on your website

Start renaming each board to represent a category or page on your website. You can color-code each section to visually group related content. Choosing a relevant icon for each page will help you easily identify it.

sitemap template step02
How to do this in Milanote
  1. Create a new board for each page of your website.

    Create a new board

    Drag a board out from the toolbar. Give it a name, then double click to open it.

  2. Connect the boards with arrows.

    Use lines to connect objects

    Select an object, then drag the arrow from the top right. Connect the line to another object to create a quick diagram.

10. Plan the content for each page

A great content plan is the most important step in creating an engaging website. It's where you map out the copy, imagery and structure you need so your team knows what to design and build.

website content plan guide 08
How to do this in Milanote
  1. Double-click a board to open any page on your Sitemap.

12. Add ideas for content, images & layout

Start adding ideas for the written content and images that might appear on this page. It doesn't have to be the final copy but it will give everyone a feel for what you're aiming to communicate. Think about the key messages you want to communicate, sub-titles and even SEO keywords you need to include.

If you have a picture in your head of head of how the page could be structured, now is a great time to grab a pen and sketch it out. Repeat this process for each page in your Sitemap until you have a clear vision for the content on your website.

website content plan guide 06
How to do this in Milanote
  1. Add notes to explore ideas for content.

    Drag a note card onto your board

    Start typing then use the formatting tools in the left hand toolbar.

  2. Choose example images from the image library.

    Use the built-in image library

    Search over 3 million beautiful, free photos then drag images straight onto your board. Powered by Pexels.

  3. Sketch a rough page layout with the Pen tool.

    Sketch ideas on the board

    Click Draw in the lefthand toolbar to sketch anywhere on a board. Press Save to commit a sketch.

13. Collaborate and build on your ideas

Whether you're working on a client project or collaborating with a team it can be helpful to bounce ideas off other people. As writer Louisa May Alcott said, "It takes two flints to make a fire."

A collaborative content plan is especially helpful for this step as you can easily connect and work together online. Bringing everyone onto the same page (figuratively and literally!) in real-time allows you to collaborate on copy, images and layout allowing you to create a coherent and engaging website.

Website content template 07

You're all done!

Hopefully, this guide has helped you and your team better plan the design and content for your website. If you're just starting a new website, use the Website Design Plan template below to get set up in minutes.

Start planning your website

Plan your website in one place.