
Start your shot list
Get started for free with Milanote's easy to use shot list template.
Start your shot listSign up for free with no time limit
Coordinating a photoshoot can be stressful and costly, especially if that critical shot is missed on the day. But a clearly defined shot list will make sure nothing slips through the cracks.
A shot list is a simple checklist of every photo you (and you client) want to capture on the day of a shoot. It usually contains a list of specific shots, some visual references and extra details like camera angles or lighting set-up so you don't forget a thing.
In this guide, you'll learn the modern approach to creating a visual shot list using Milanote and set yourself up for a stress-free photoshoot.
Start by listing the subjects or topics you want to shoot. Depending on the type of project, these could be commercial products, parts of an event, a buildings or people. Adding references images or sketches will make your shot list easier to scan—even if they're just rough photos you've taken on your phone.
Your clients probably aren't photographers, so these references will also help them imagine the type of shots you're planning to capture.

Create a new board for your shot list.
Drag a board out from the toolbar. Give it a name, then double click to open it.
Upload images to your board.
Click the "Upload file" button or just drag a file onto your board. You can add images, logos, documents, videos, audio and much more.
This is the heart of the shot list. It's where you list each individual shot you require. Think about the different product angles, formats, arrangements, even where you'll position the camera. As iconic photographer Ansel Adams said "a good photograph is knowing where to stand".
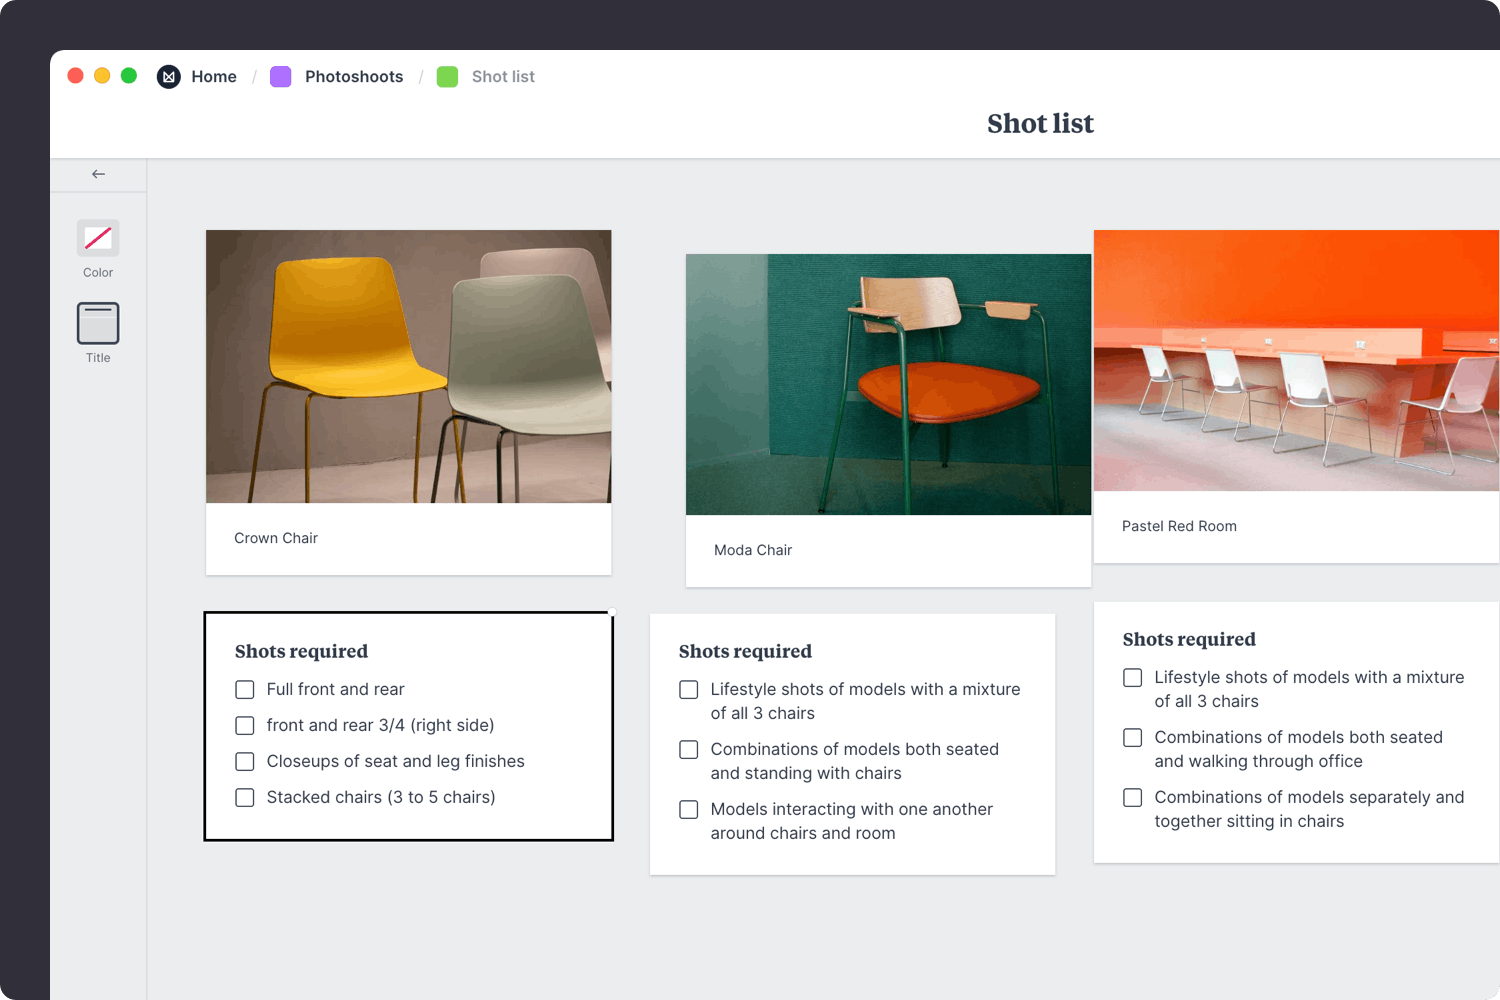
Create a new to-do list for each of the specific shots.
Start typing then press "Enter" to create a new item. Add a title to your to-do list using the left hand toolbar.
Get creative with your shot list. Brainstorming it with others is a great way to uncover new creative image ideas—try it with your client at the start of your next project.
Add any specific details about the shots you plan to capture on the day. These might be reminders about the tone, mood or composition you're aiming for. E.g. "Capture the craftsmanship and design details in the legs of the seat."
Refer back to the photoshoot brief to ensure you've covered everything. There's nothing worse than finishing a shoot and realizing you've missed a critical shot.
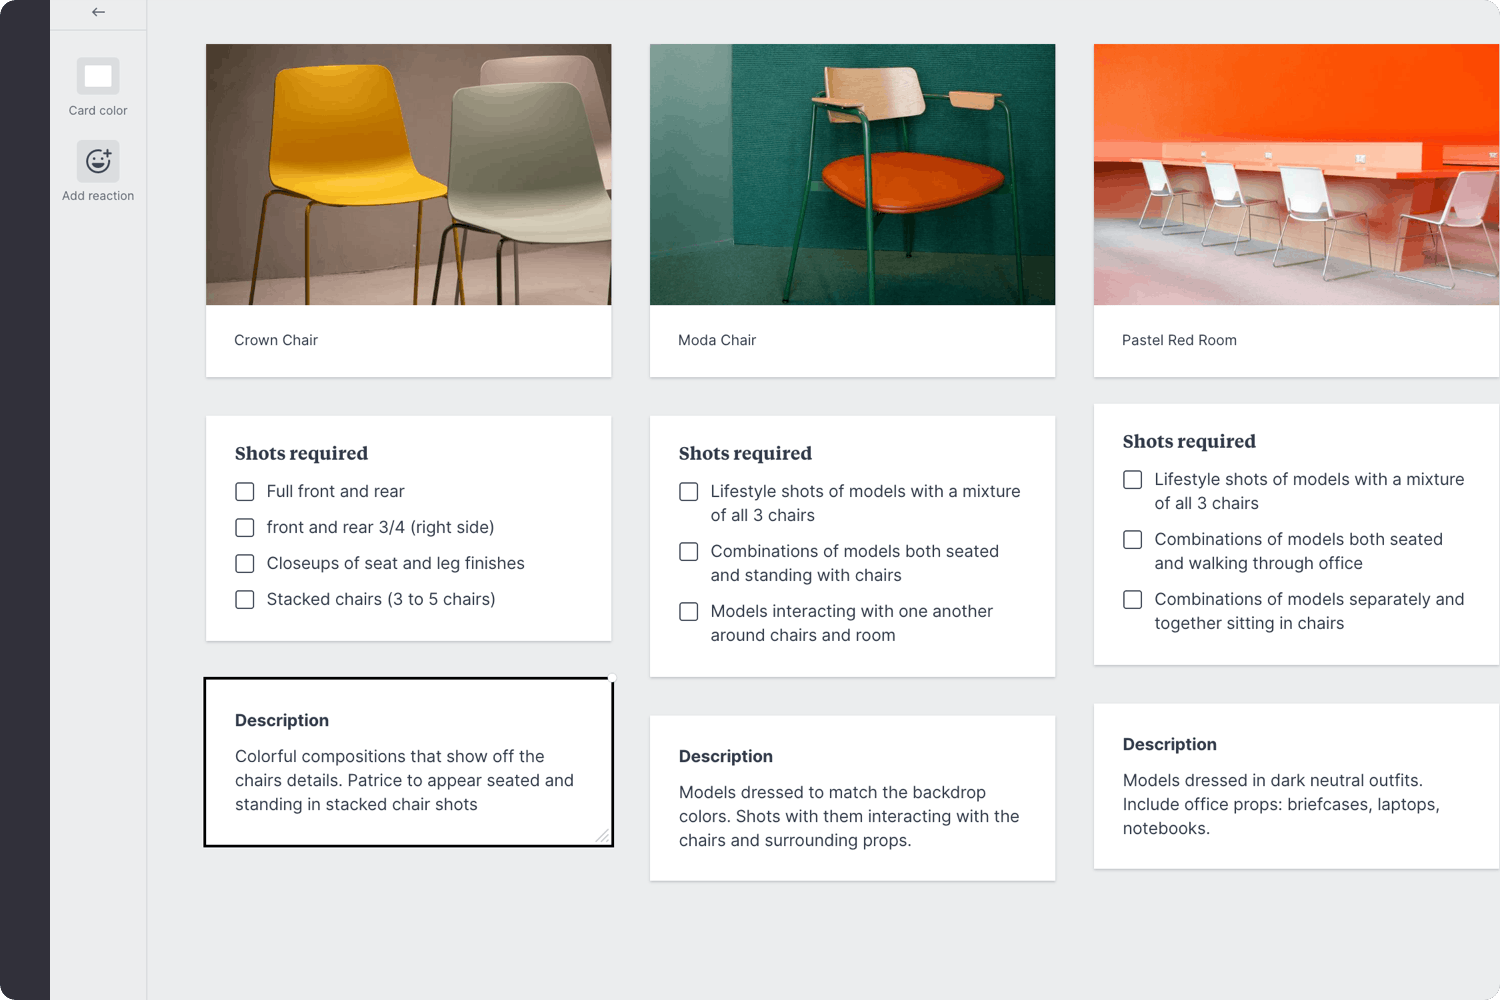
Use note cards to add extra details.
Start typing then use the formatting tools in the left hand toolbar.
Having technical details around lighting and backgrounds on hand will help you prepare quickly on the day of the shoot.
Should the products be shot on plain white or colored backgrounds? If they're lifestyle shots, what does the room or environment behind the product look like? How should the product be lit?

Add a note to describe the lighting and backgrounds.
Start typing then use the formatting tools in the left hand toolbar.
Once you've listed all the shots you need to take, it's time to add some structure. Group related shots and present them in the order you plan to shoot them. That way you can work from left to right on the day of the shoot.
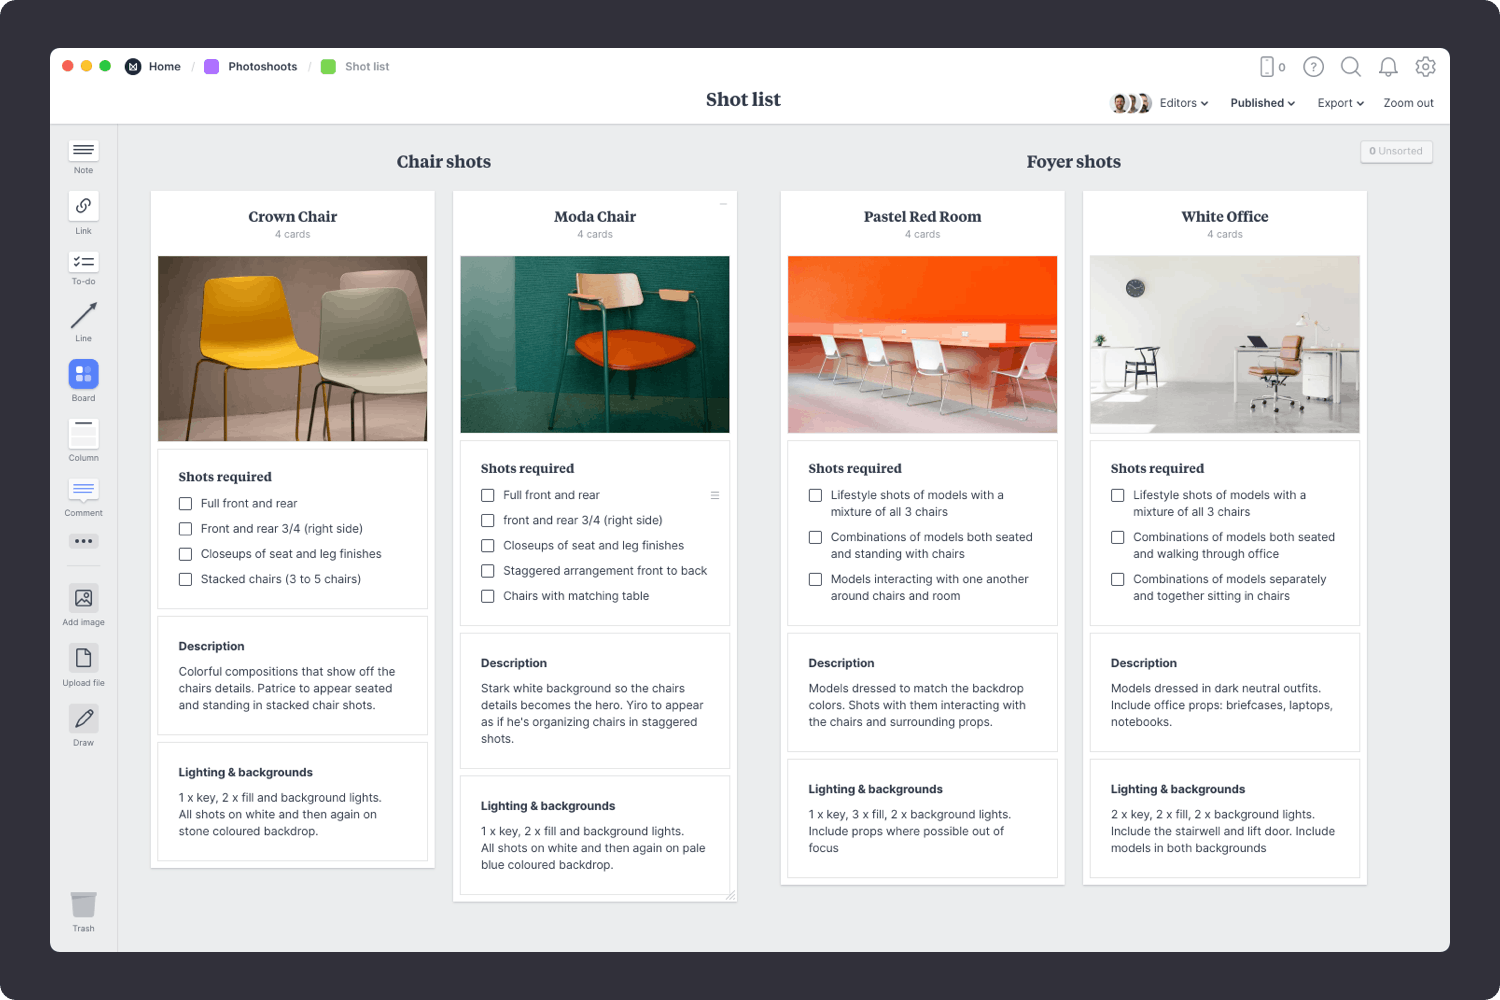
Create a column for each part of your shoot.
Name it, then drag any relevant notes or images into your column
Save time on your next photoshoot by using the free Shot List template.
While a shot list is usually written by one person, it's important to make sure everyone is on the same page. The goal here is to gather feedback and create the final shot list. Scratch any shots that aren't required and add any new ones that you've missed.
Invite a team member or client to provide feedback.
Open the "Editors" menu from the title bar of your board. Add email addresses of the people you'd like to collaborate with—they'll receive an invitation via email.
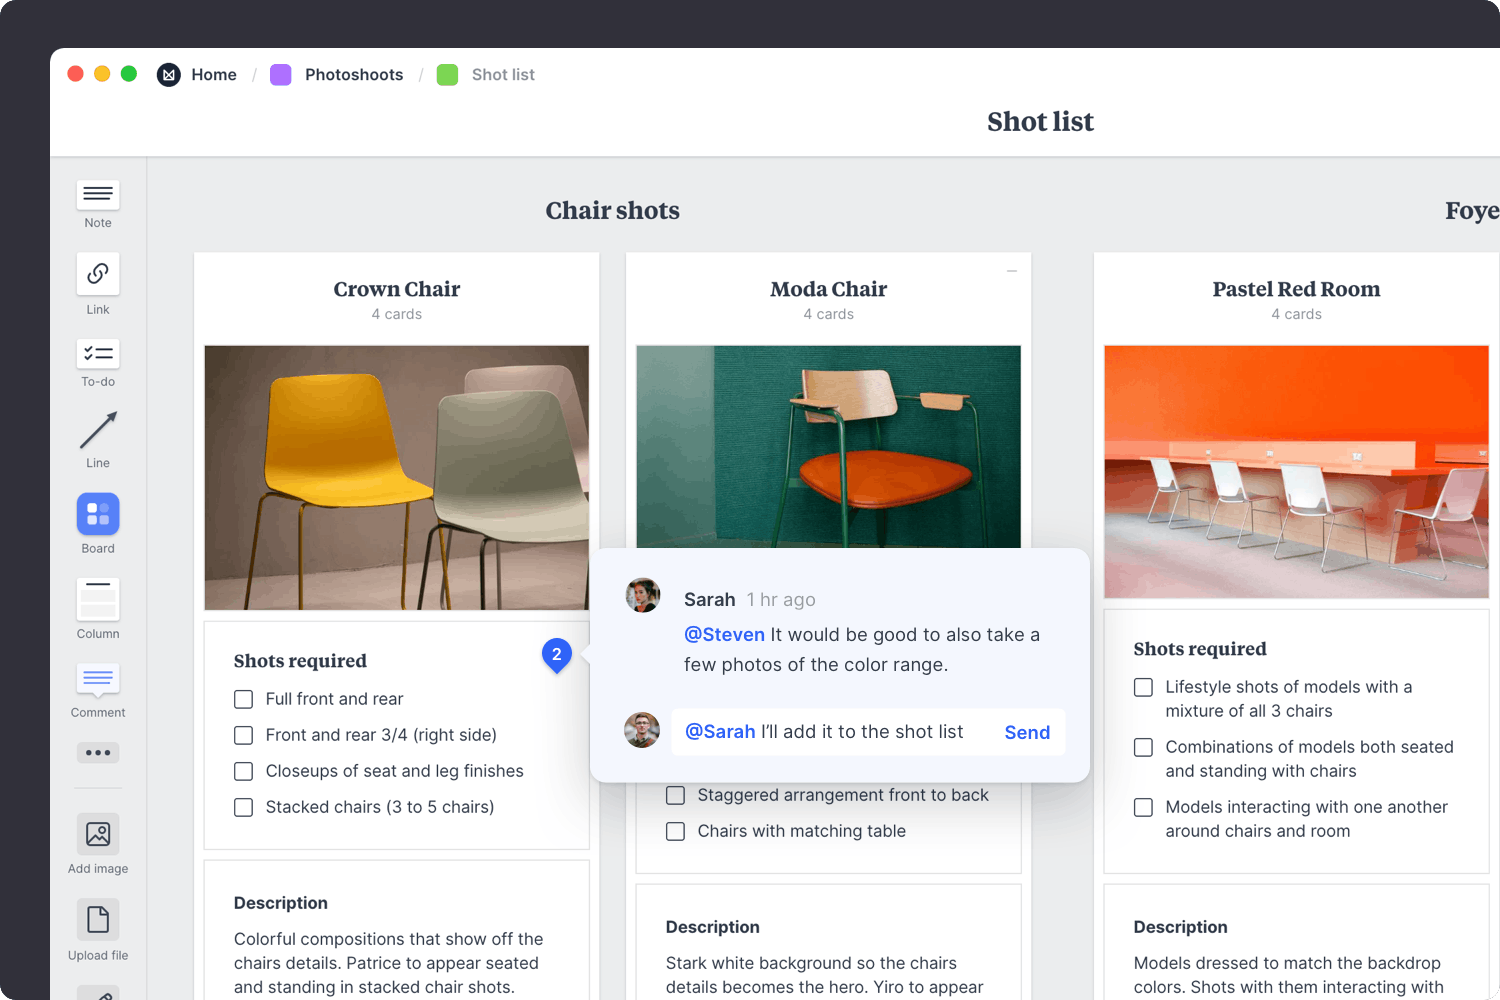
Start a comment thread.
Drag out a comment from the toolbar on the left and place it on your board. Other editors can reply to your comment.
Mention teammates to get their attention.
Type '@' in any text field to mention someone who has access to your board. They'll receive a notification and be able to respond to your comment.
Traditionally, you'd print out your shot list to refer to on the day, but digital shot lists can be accessed on phones or laptops. This way, you can check off each shot or adjust it as you need.

Download the Milanote mobile app
Now that your shot list is complete, you have everything you need for a successful photoshoot—a clear plan and the headspace to do your best creative work. Use the template below to create a new shot list in minutes or check out our guide on how to plan a photoshoot.
