
Start your photoshoot brief
Get started for free with Milanote's beautiful photoshoot brief template.
Start your briefSign up for free with no time limit
When working on a photoshoot, it’s crucial to set a strong foundation from the start. A clear, inspiring and informative brief provides the structure and direction for photographers and crew to their best work.
Photography briefs typically include background information, goals, deliverables, references imagery, creative direction and a style guide.
Whether you’re a photographer, stylist or client, this guide will take you through every step of creating a photoshoot brief so that everyone is aligned and has a clear understanding.
The first thing to define is the subject of the photoshoot. Are you shooting a new product, an interior, food or portraits? Each of these requires unique preparation, equipment and talent - so try and give the photographer as much background information as possible.

Create a new board for your brief.
Drag a board out from the toolbar. Give it a name, then double click to open it.
Add a note to describe the subject of the shoot.
Start typing then use the formatting tools in the left hand toolbar.
Upload an image of the subject
Click the "Upload file" button or just drag a file onto your board. You can add images, logos, documents, videos, audio and much more.
What do you want your photography to communicate? Is there a specific concept or vision you have in mind? What do you want the viewer to feel? Do you have a specific location in mind? List out as much information as possible. This will help the photographer organize their shot-list, equipment, props and talent before the day of the shoot.

Add a note to communicate the goals.
Start typing then use the formatting tools in the left hand toolbar.
Creativity often responds well to some constraints or limitations. Picking a keyword, theme, color or style can be a great way to provide some direction for your photoshoot.
Alongside your goals, list the shots you require. How many photos do you need? Where will they be used—in print, online or social media? This will help the photographer produce the required formats and prepare copyright details.
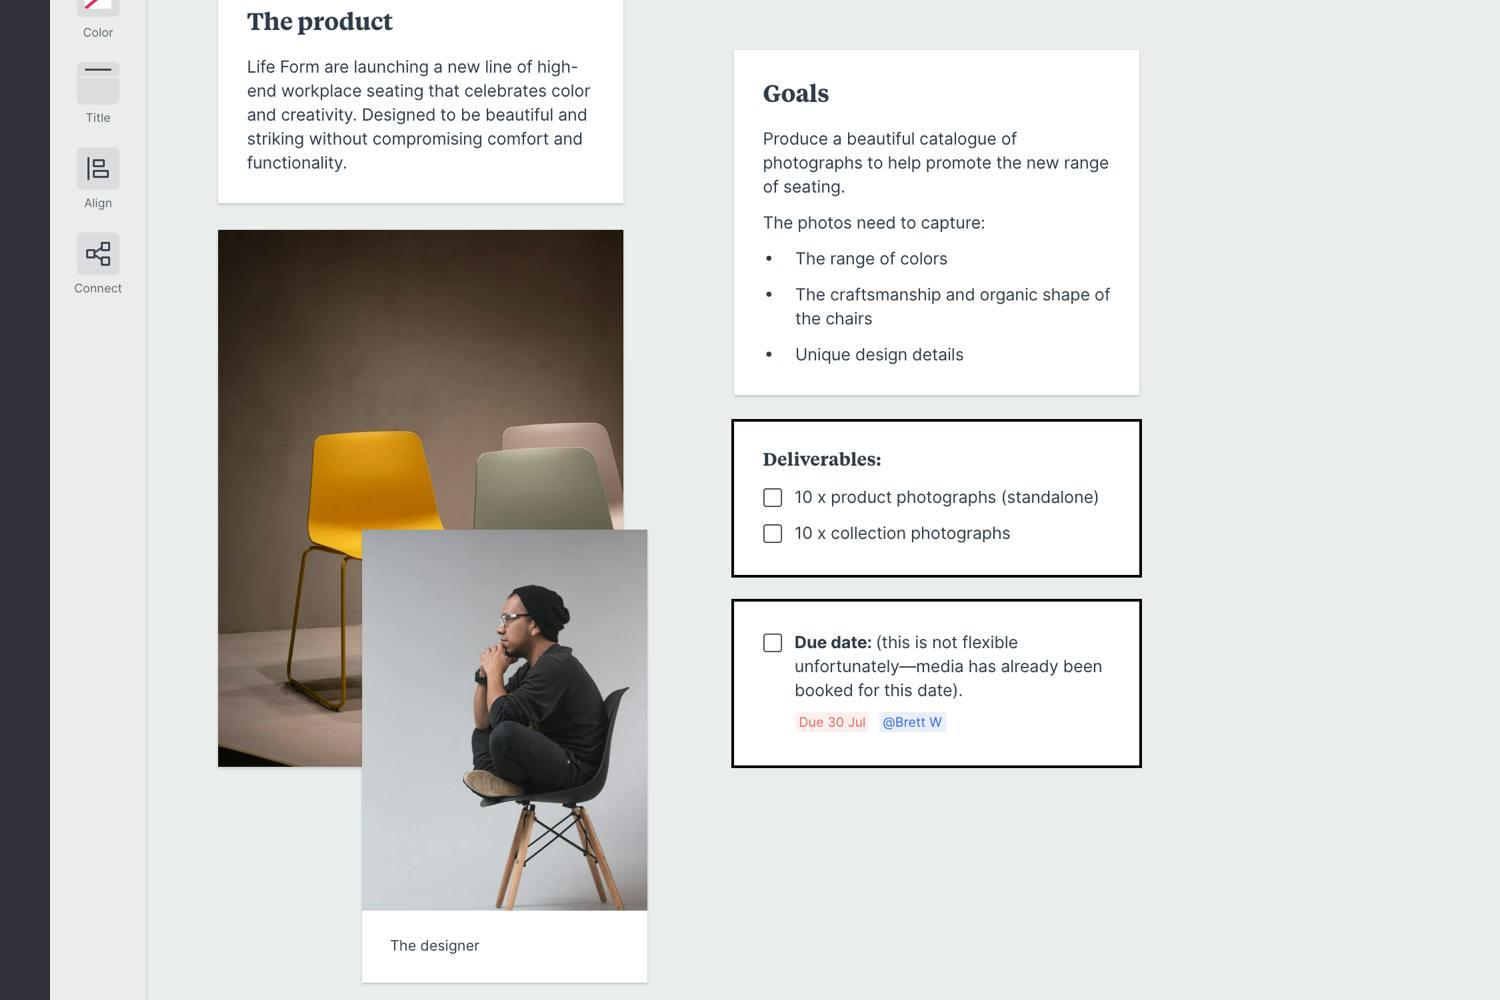
Create a new to-do list for the specific deliverables.
Start typing then press "Enter" to create a new item. Add a title to your to-do list using the left hand toolbar.
This is where you describe a specific type of audience and detail what’s important to them. Include any relevant research or stats you have. The more thorough you are, the better the result will be. Try listing out things like:
All this helps the photographer choose a mood or direction that speaks to your audience. Ansel Adams described how important the audience is when he said "There are always two people in every picture: the photographer and the viewer".
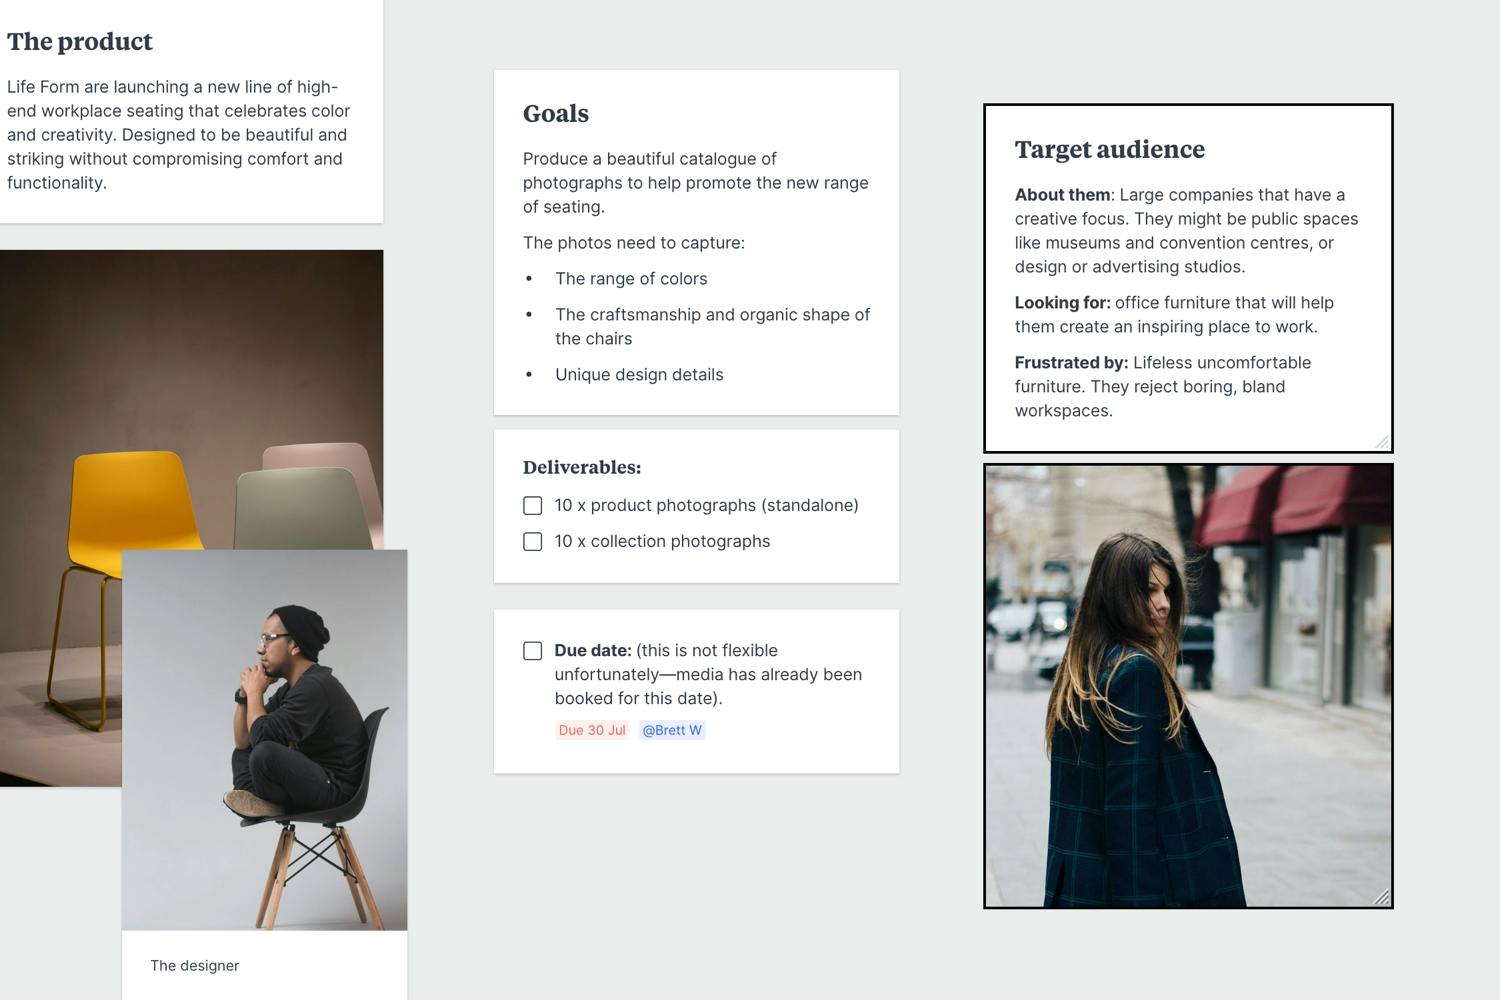
Add a note to describe your audience.
Start typing then use the formatting tools in the left hand toolbar.
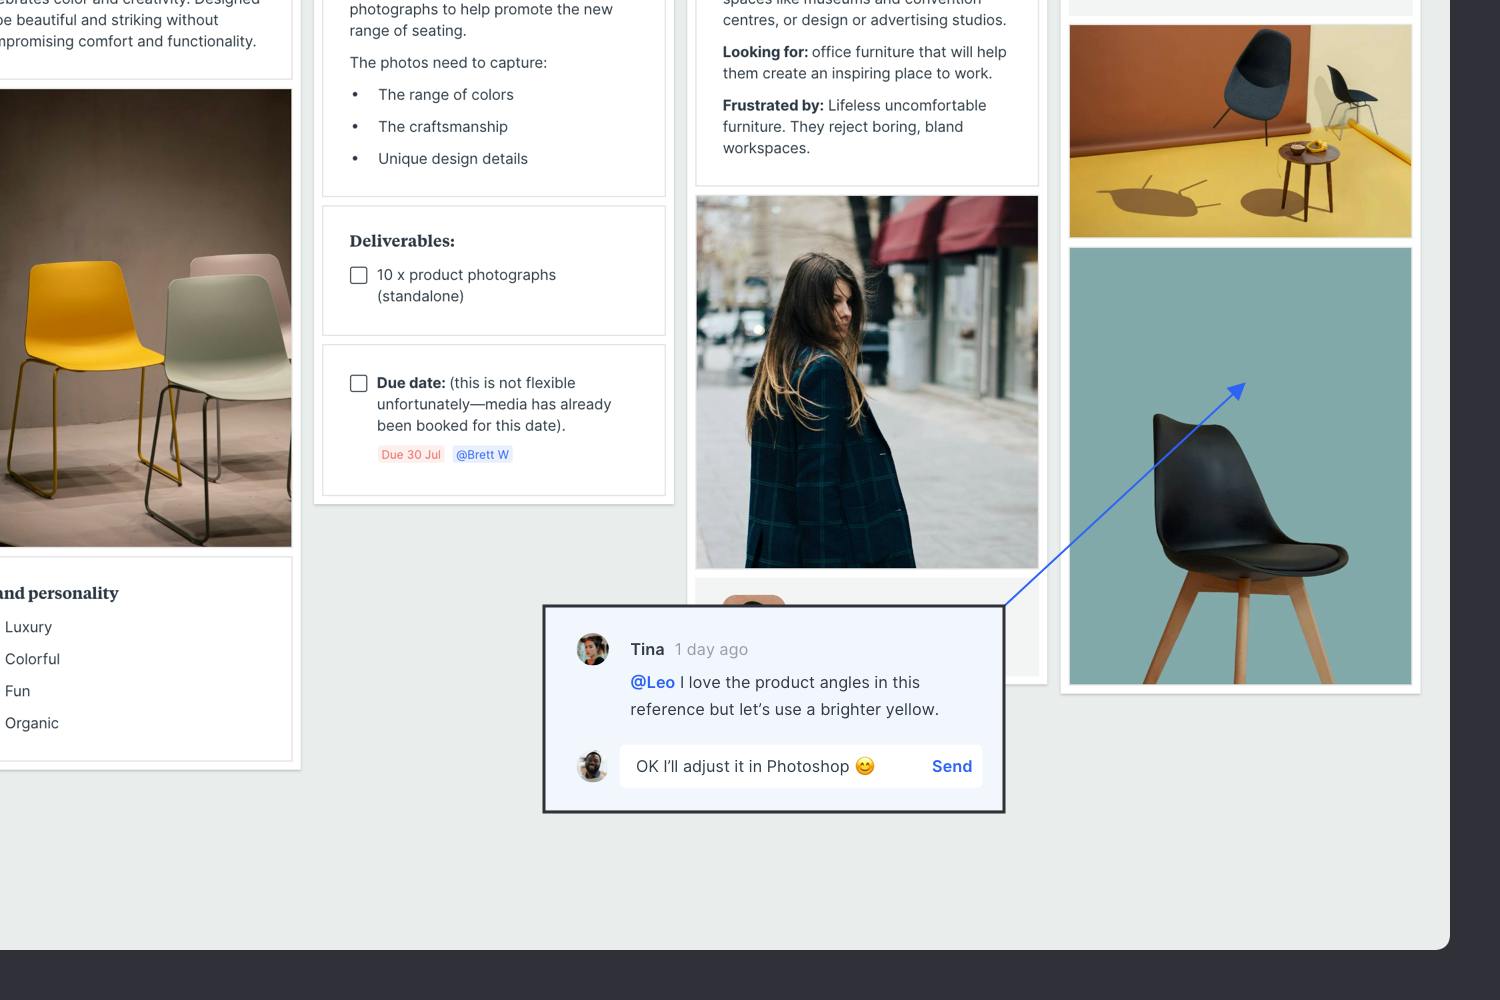
Add inspiring images to communicate the mood or style you want from the shoot. These could be photos from a previous campaign or inspiration you've found on the web. Are the shots you want simple or are they:
A mix of shots ensures you have plenty to choose from when they're done. You could also try organizing your references as a photography moodboard. Read our guide to find out how.

Browse the built-in image library.
Search over 3 million beautiful photos powered by Pexels then drag images straight onto your board.
Install the Milanote Web Clipper
Save images from other websites straight to your board.
Roll over an image (or highlight text), click Save, then choose the destination in Milanote. Return to your board and find the content in the "Unsorted" column on the right.
Once you have everything you need, it's time to organize your content into logical topics. The goal here is to present the most important points in an inspiring and concise format.
Remember, it's called a brief. In its simplest form, writer and illustrator Maira Kalman says a brief consists of "a deadline and a dream".

Use columns to organize your content
Drag a Column from the left toolbar and give it a name. Drag images and notes into the column.
Never skip the logistical details such as location, date, time, and any technical requirements. A well-informed creative team can better prepare and plan for the shoot. Save time on your next photoshoot by using the Photography Brief template.
While a brief is typically written by one person, the best briefs will be run past clients or team members for feedback before final approval. This is a great chance to ensure that the concept, budgets and objectives are understood and that everyone is on the same page well before the day of the shoot.
Invite someone else to edit to your board.
Open the "Editors" menu from the title bar of your board. Add email addresses of the people you'd like to collaborate with—they'll receive an invitation via email.
Start a comment thread.
Drag out a comment from the toolbar on the left and place it on your board. Other editors can reply to your comment.
Once you’ve made any final tweaks, it’s time to share the completed brief with the your team, organize a kickoff meeting and start preparing for the shoot.
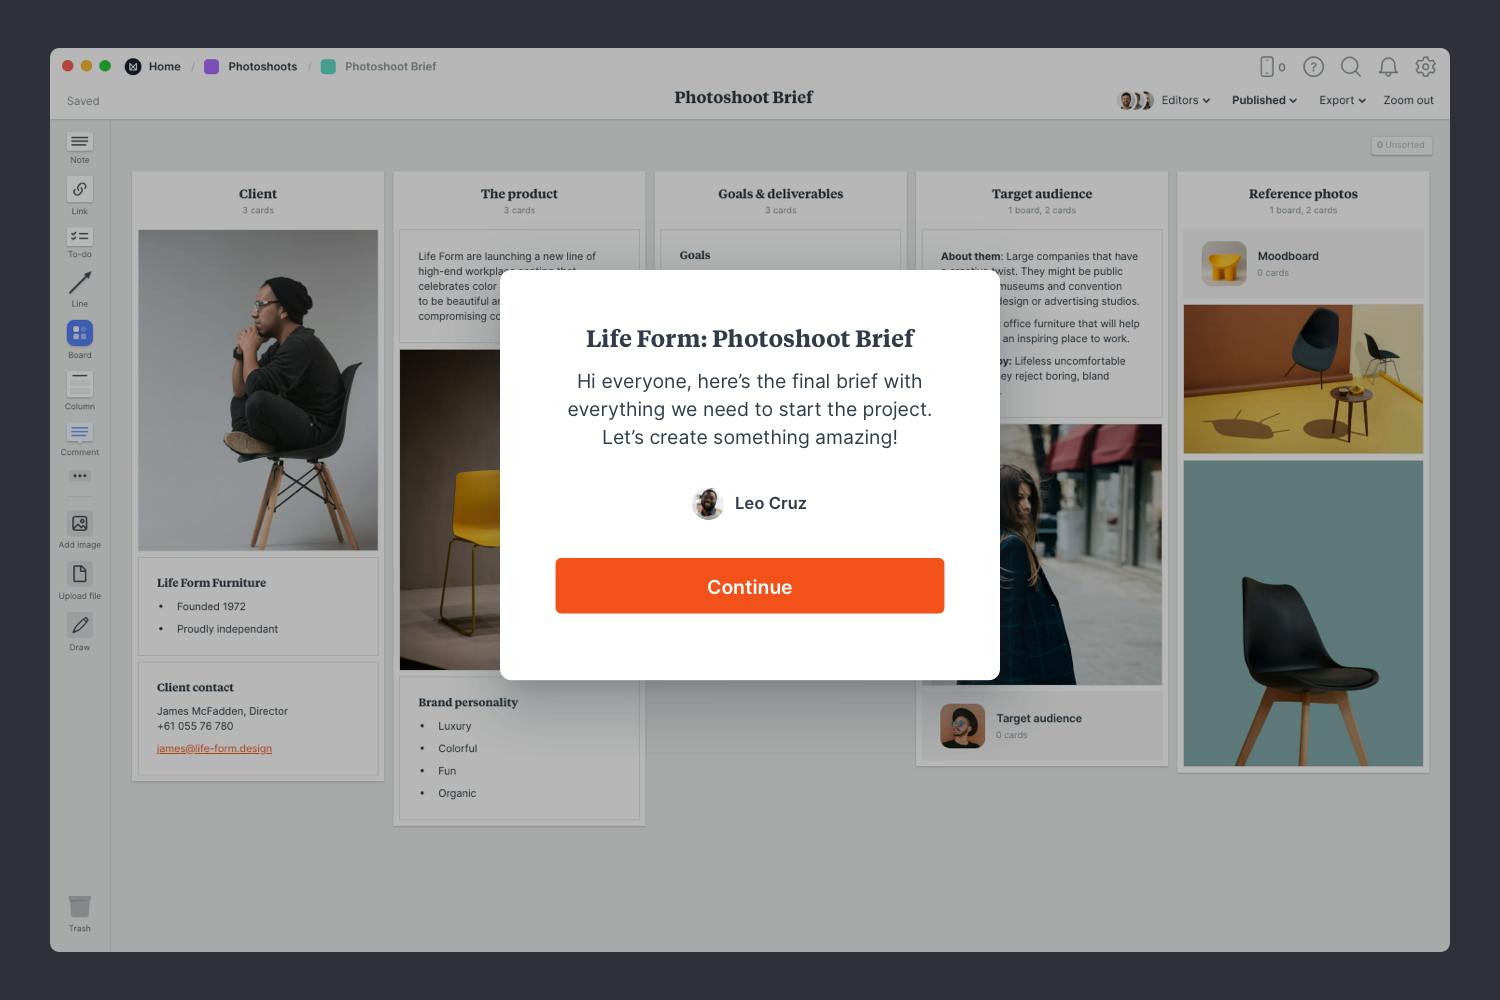
Publish and share the brief with your team.
Write a welcome message under the "Publish & share" menu. This will display the first time someone views your board.
Now that your brief is complete, you have a clear and inspiring starting point for your next photoshoot. Remember to have the brief with you on the day of the shoot and refer to it as you go to ensure you're still on track. Use the template below to create a new photoshoot brief or check out our full guide on how to plan a photoshoot.
