Start your photoshoot call sheet
Get started for free with Milanote's easy to use photoshoot call sheet template.
Start your call sheetSign up for free with no time limit

Follow this step-by-step guide to learn the modern process of creating a call sheet in Milanote, a free tool used by top creatives.
You may have witnessed a disorganized photoshoot before—the models were late, the crew forgot the lighting or the studio wasn't setup properly. One vital document was missing—the call sheet.
But first, what is a call sheet? The call sheet is a simple, but incredibly useful tool for organizing your shoot. It outlines everything your talent and crew need to know before the day of the shoot. Crucial elements like the location, contact details, the schedule and most importantly the arrival time.
In this guide, you'll learn the modern approach to creating a call sheet using Milanote and set yourself up for a stress-free photoshoot.
Here's a comprehensive list of what could be included in a photoshoot call sheet and why:
Now, let's look at how to create a simple Call Sheet using Milanote...
The first thing to add is a simple overview of the photoshoot outlining the purpose of the day. This usually includes the name of the shoot, the concept and a logo or photo representing the client or product.
Most importantly, add the contact details for the person in charge so everyone knows who to go to with questions or ideas.
Consider adding a link to the photoshoot brief so everyone on your team is clear on the goals of the shoot. Use the Photoshoot Brief Template to create a simple, visual brief.

Create a new board for your call sheet.
Drag a board out from the toolbar. Give it a name, then double click to open it.
Add a note to describe the purpose of the photoshoot.
Start typing then use the formatting tools in the left hand toolbar.
Upload an image of the subject
Click the "Upload file" button or just drag a file onto your board. You can add images, logos, documents, videos, audio and much more.
Next add the location of the shoot and any details that will help people arrive safely and on time. Explain where the parking options are, nearby public transport and any details about to get into the building. Providing a link to Google Maps lets everyone get turn-by-turn directions and travel time estimates.
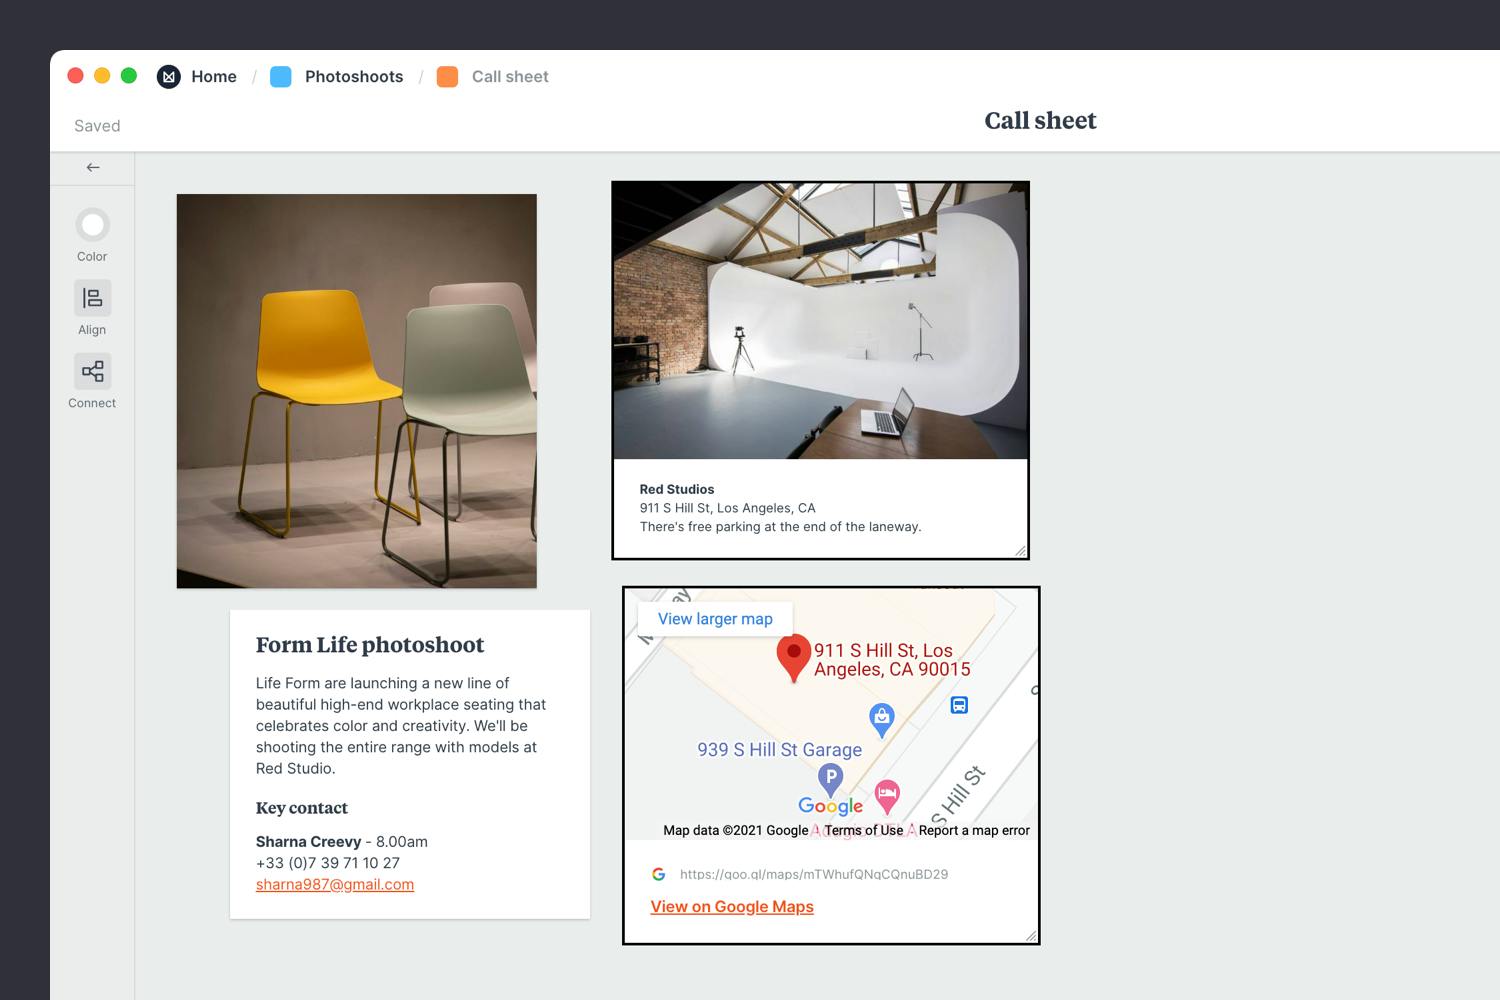
Embed a Google map
Copy the share link from Google Maps, paste it into the link card in Milanote and press Enter.
Who's involved in your shoot? List your talent and crew along with their contact details. This will save you hunting around for phone numbers when plans inevitably change on the day. Next, add any specific arrival times so each person knows exactly when they're expected.
To ensure nothing's forgotten, create a checklist for the equipment you'll need on the day.
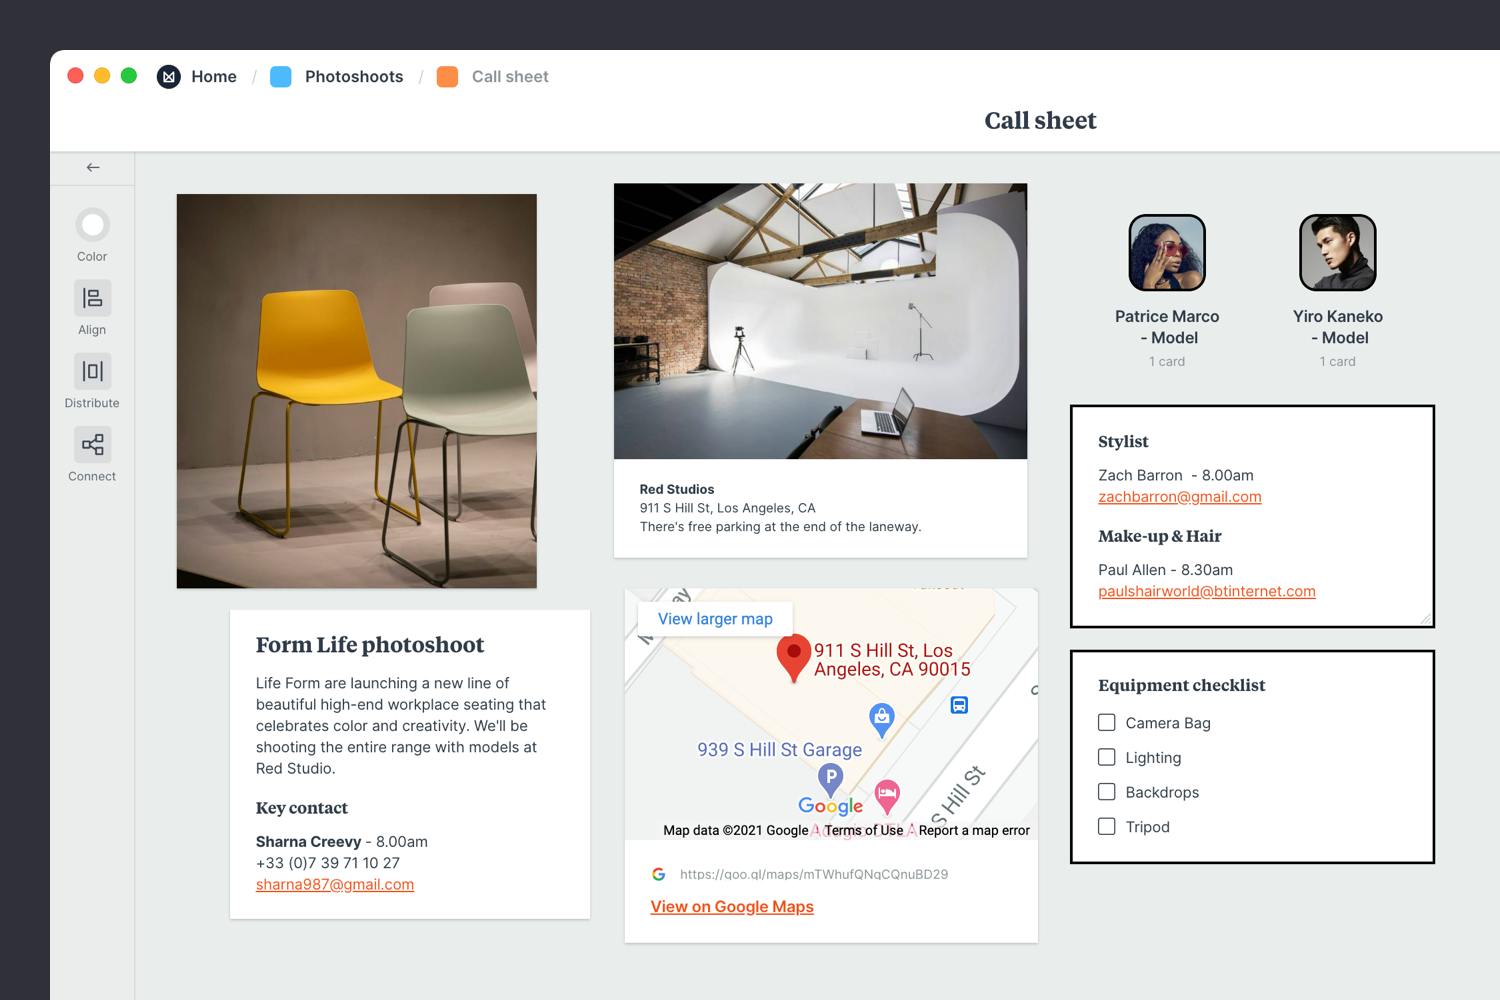
Add a note for the details of your crew
Start typing then use the formatting tools in the left hand toolbar.
Create a checklist for your equipment
Start typing then press "Enter" to create a new item. Add a title to your to-do list using the left hand toolbar.
While it can feel laborious, creating a solid plan for a photoshoot gives you the time and space to be creative on the day. As photographer Martin Parr said "Photography is the simplest thing in the world, but it is incredibly complicated to make it really work."
Probably the most important part is the schedule—specifically the general crew call time. The general crew call time is when everyone needs to arrive on location. Under this, add the key events for the day so everyone can clearly see what's on and when.
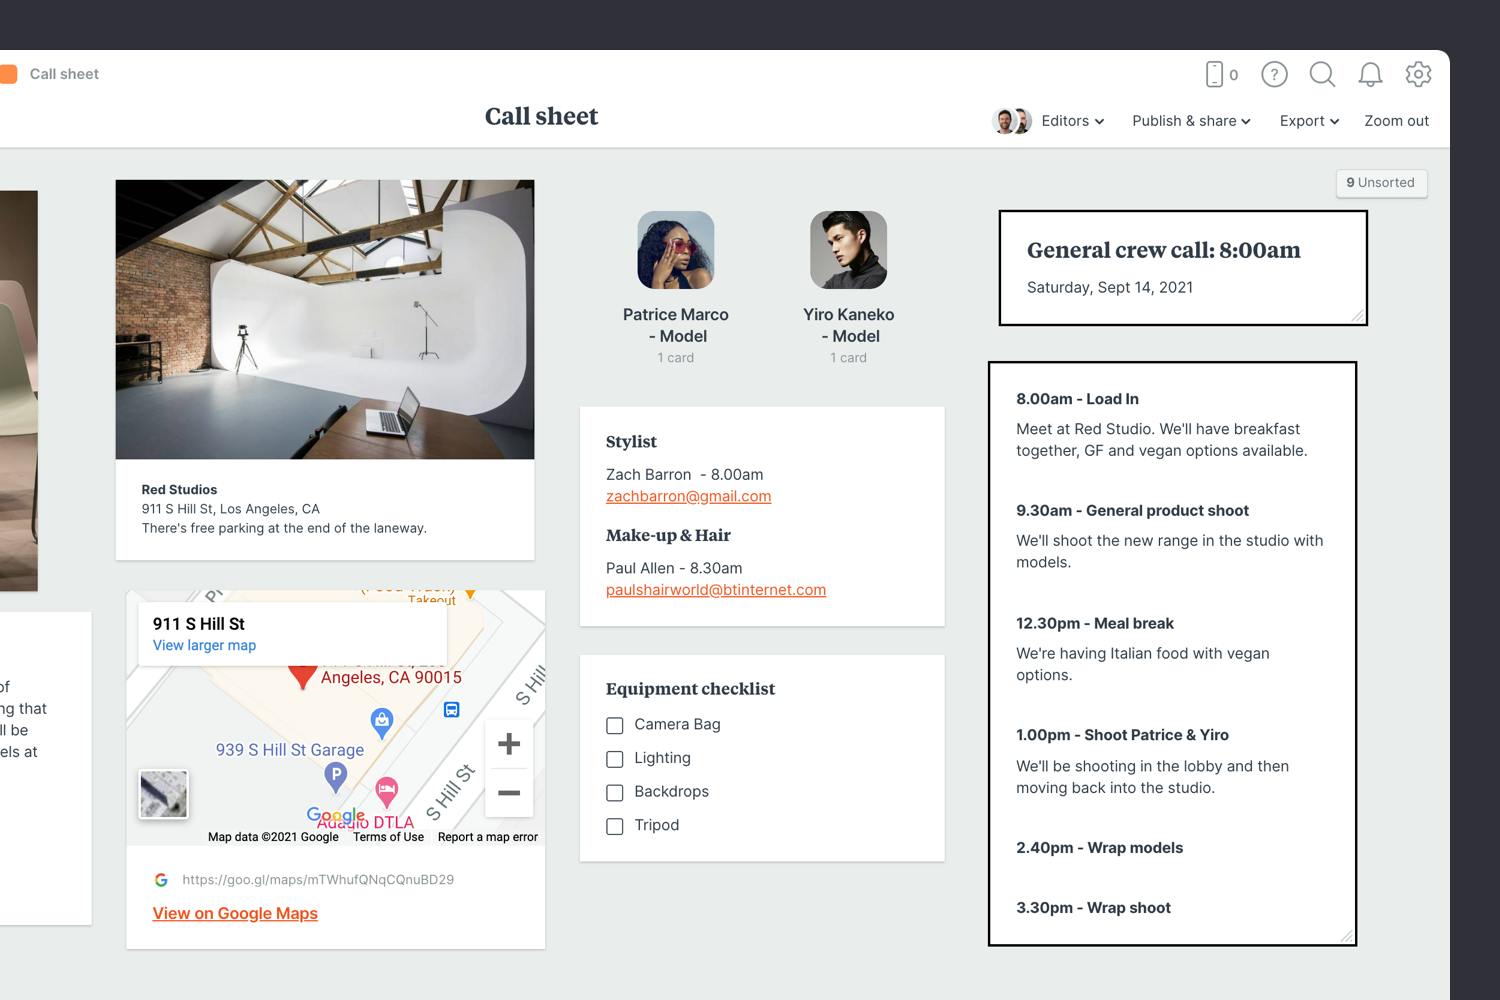
Add a note to describe each activity on the schedule
Start typing then use the formatting tools in the left hand toolbar.
Once you have everything you need, it's time to organize your call sheet so it's easy to scan. The goal here is to present the most important information first. This ensures the talent and crew arrive at the right place at the right time and they know what's expected of them on the day.
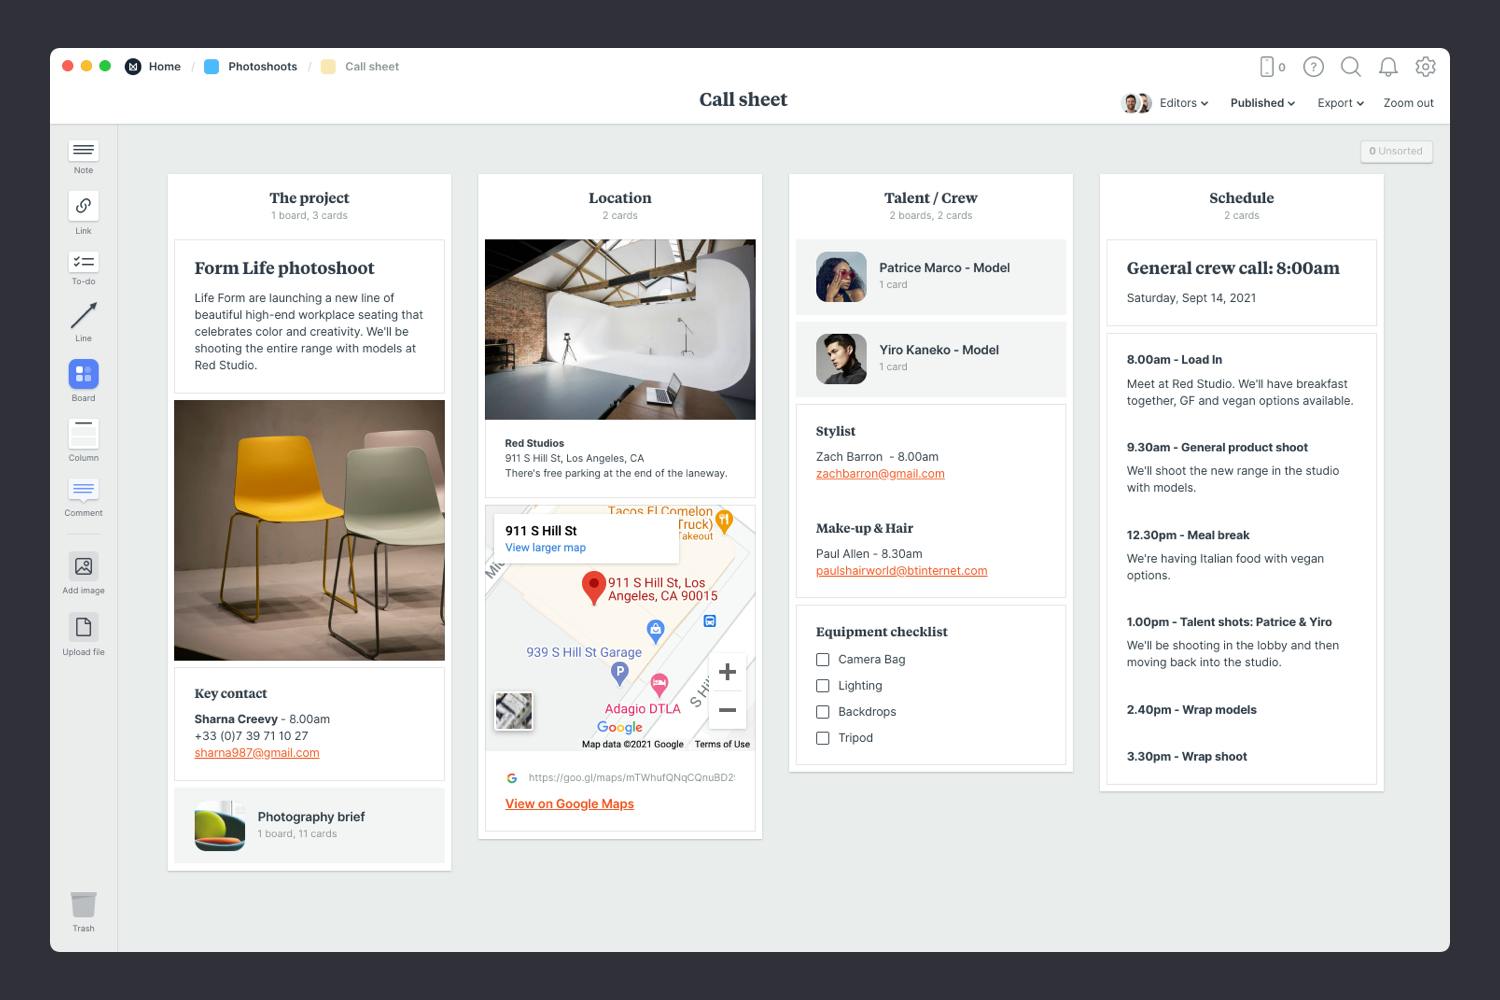
Create a column for each part of your call sheet
Name it, then drag any relevant notes or images into your column
Save time on your next photoshoot with a Photoshoot Call Sheet template.
When you’ve made any final tweaks, it’s time to share the call sheet with the your team so everyone can start preparing for the shoot.
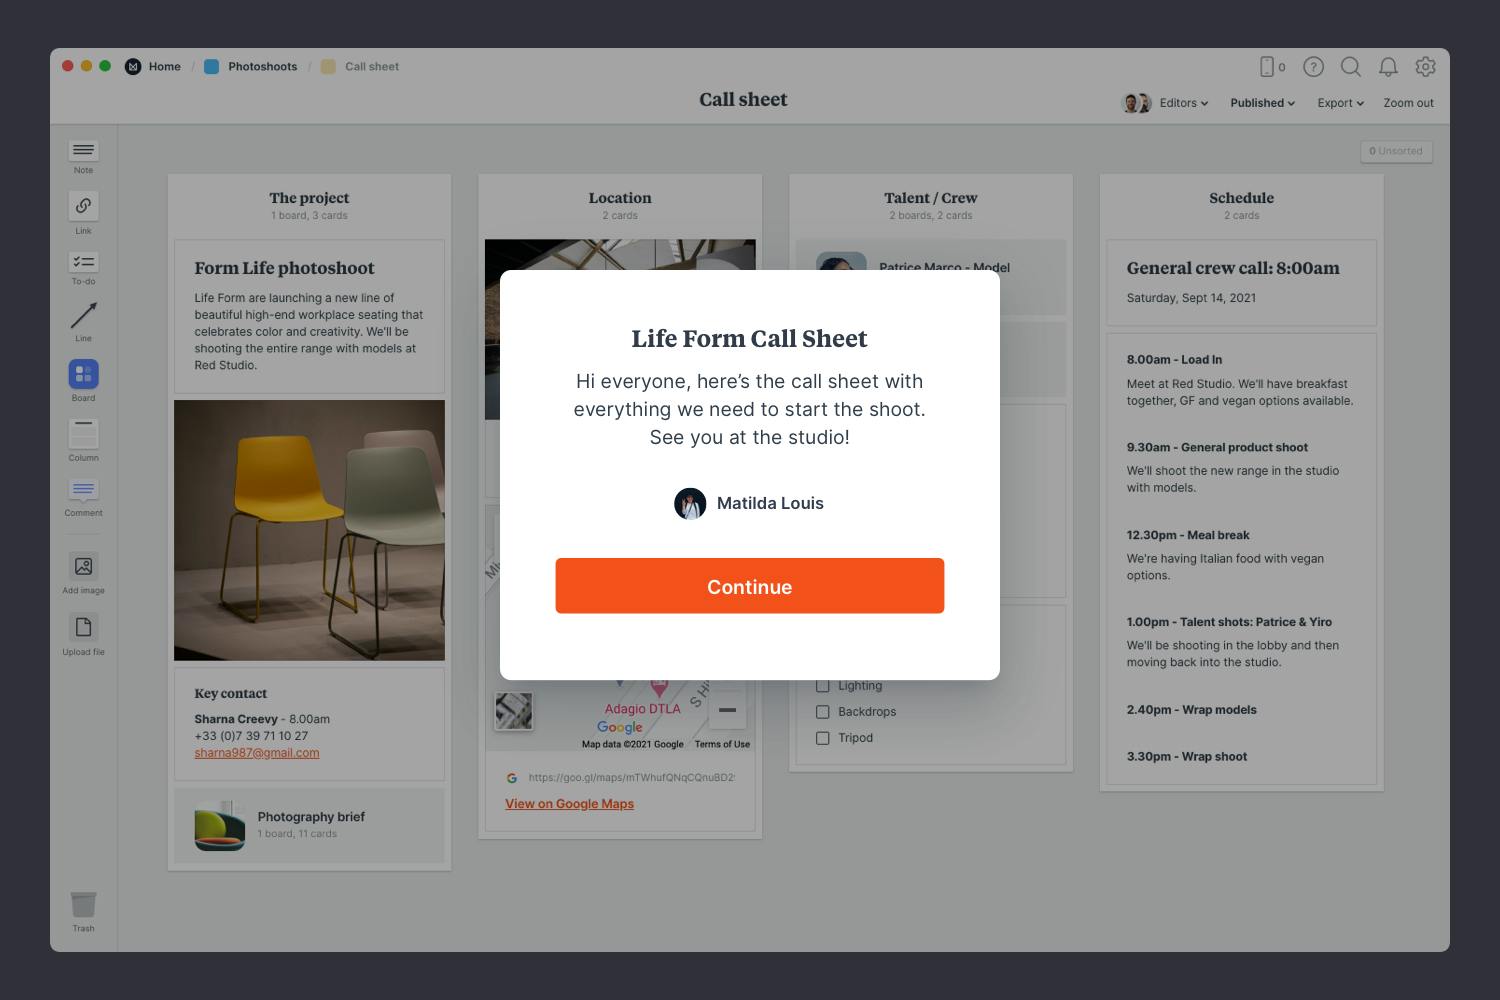
Publish and share the call sheet with your team.
Write a welcome message under the "Publish & share" menu. This will display the first time someone views your board.
Traditionally, you'd print out a copy for each person to refer to on the day, but digital call sheets can be accessed on phones or laptops. This way, when you update your call sheet, you know everyone is seeing the latest version. No need to resend Call-sheet-v4.PDF!

Download the Milanote mobile app
Now that your call sheet is complete, you (and your team) have a solid plan for your upcoming photoshoot. Use the template below to create a new call sheet in minutes or check out our guide on how to plan a photoshoot.
