Start planning your novel
Get all 6 writers templates FREE and start planning in minutes.
Get startedSign up for free with no time limit
Follow this step-by-step guide to learn the modern process of planning a novel in Milanote, a free tool used by top creatives.
Starting a novel can be an exciting but daunting experience. It's the beginning of the creative process—where your mind is overflowing with ideas, inspiration, and plans. This guide will help you organize everything in one place so you can begin writing with confidence. It includes some priceless novel writing tips from brainstorming ideas, to collecting inspiration, researching your topic, dreaming up unique characters and creating an outline for your story. At the end you'll have a solid foundation that will speed up the entire writing process.
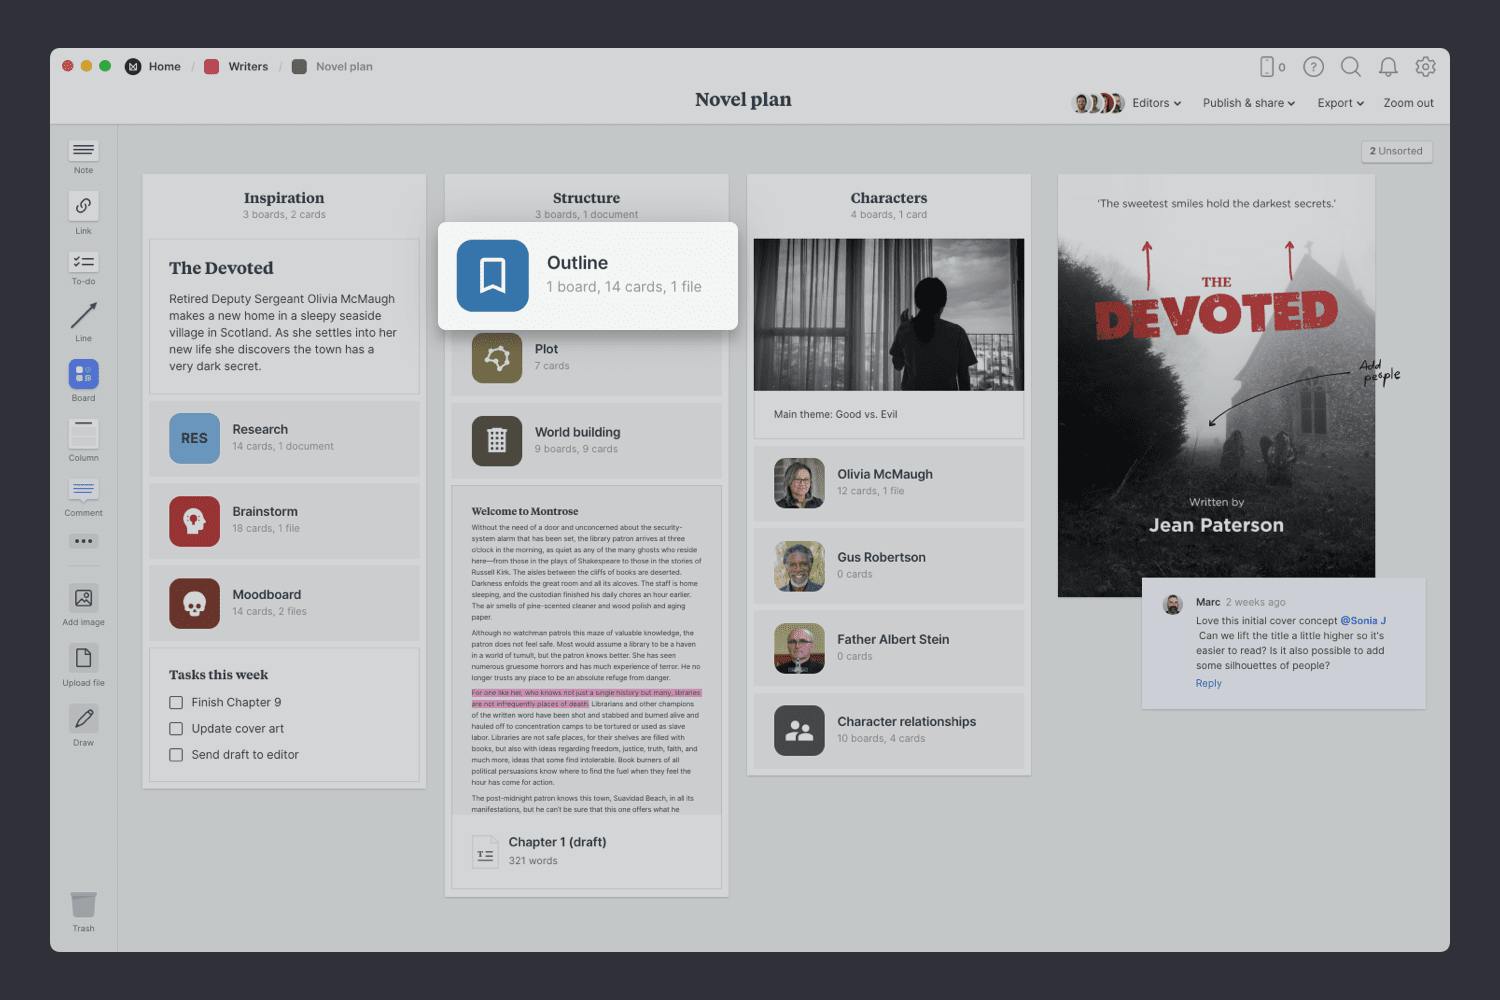
Traditionally, your ideas and plans might be scattered across various sticky notes, to-do lists, spreadsheets, and documents, making it hard to keep track of everything and get a bird's-eye view of your project. A central project plan combines these artifacts into one easy-to-access place. It will evolve over the lifespan of your novel but usually includes:
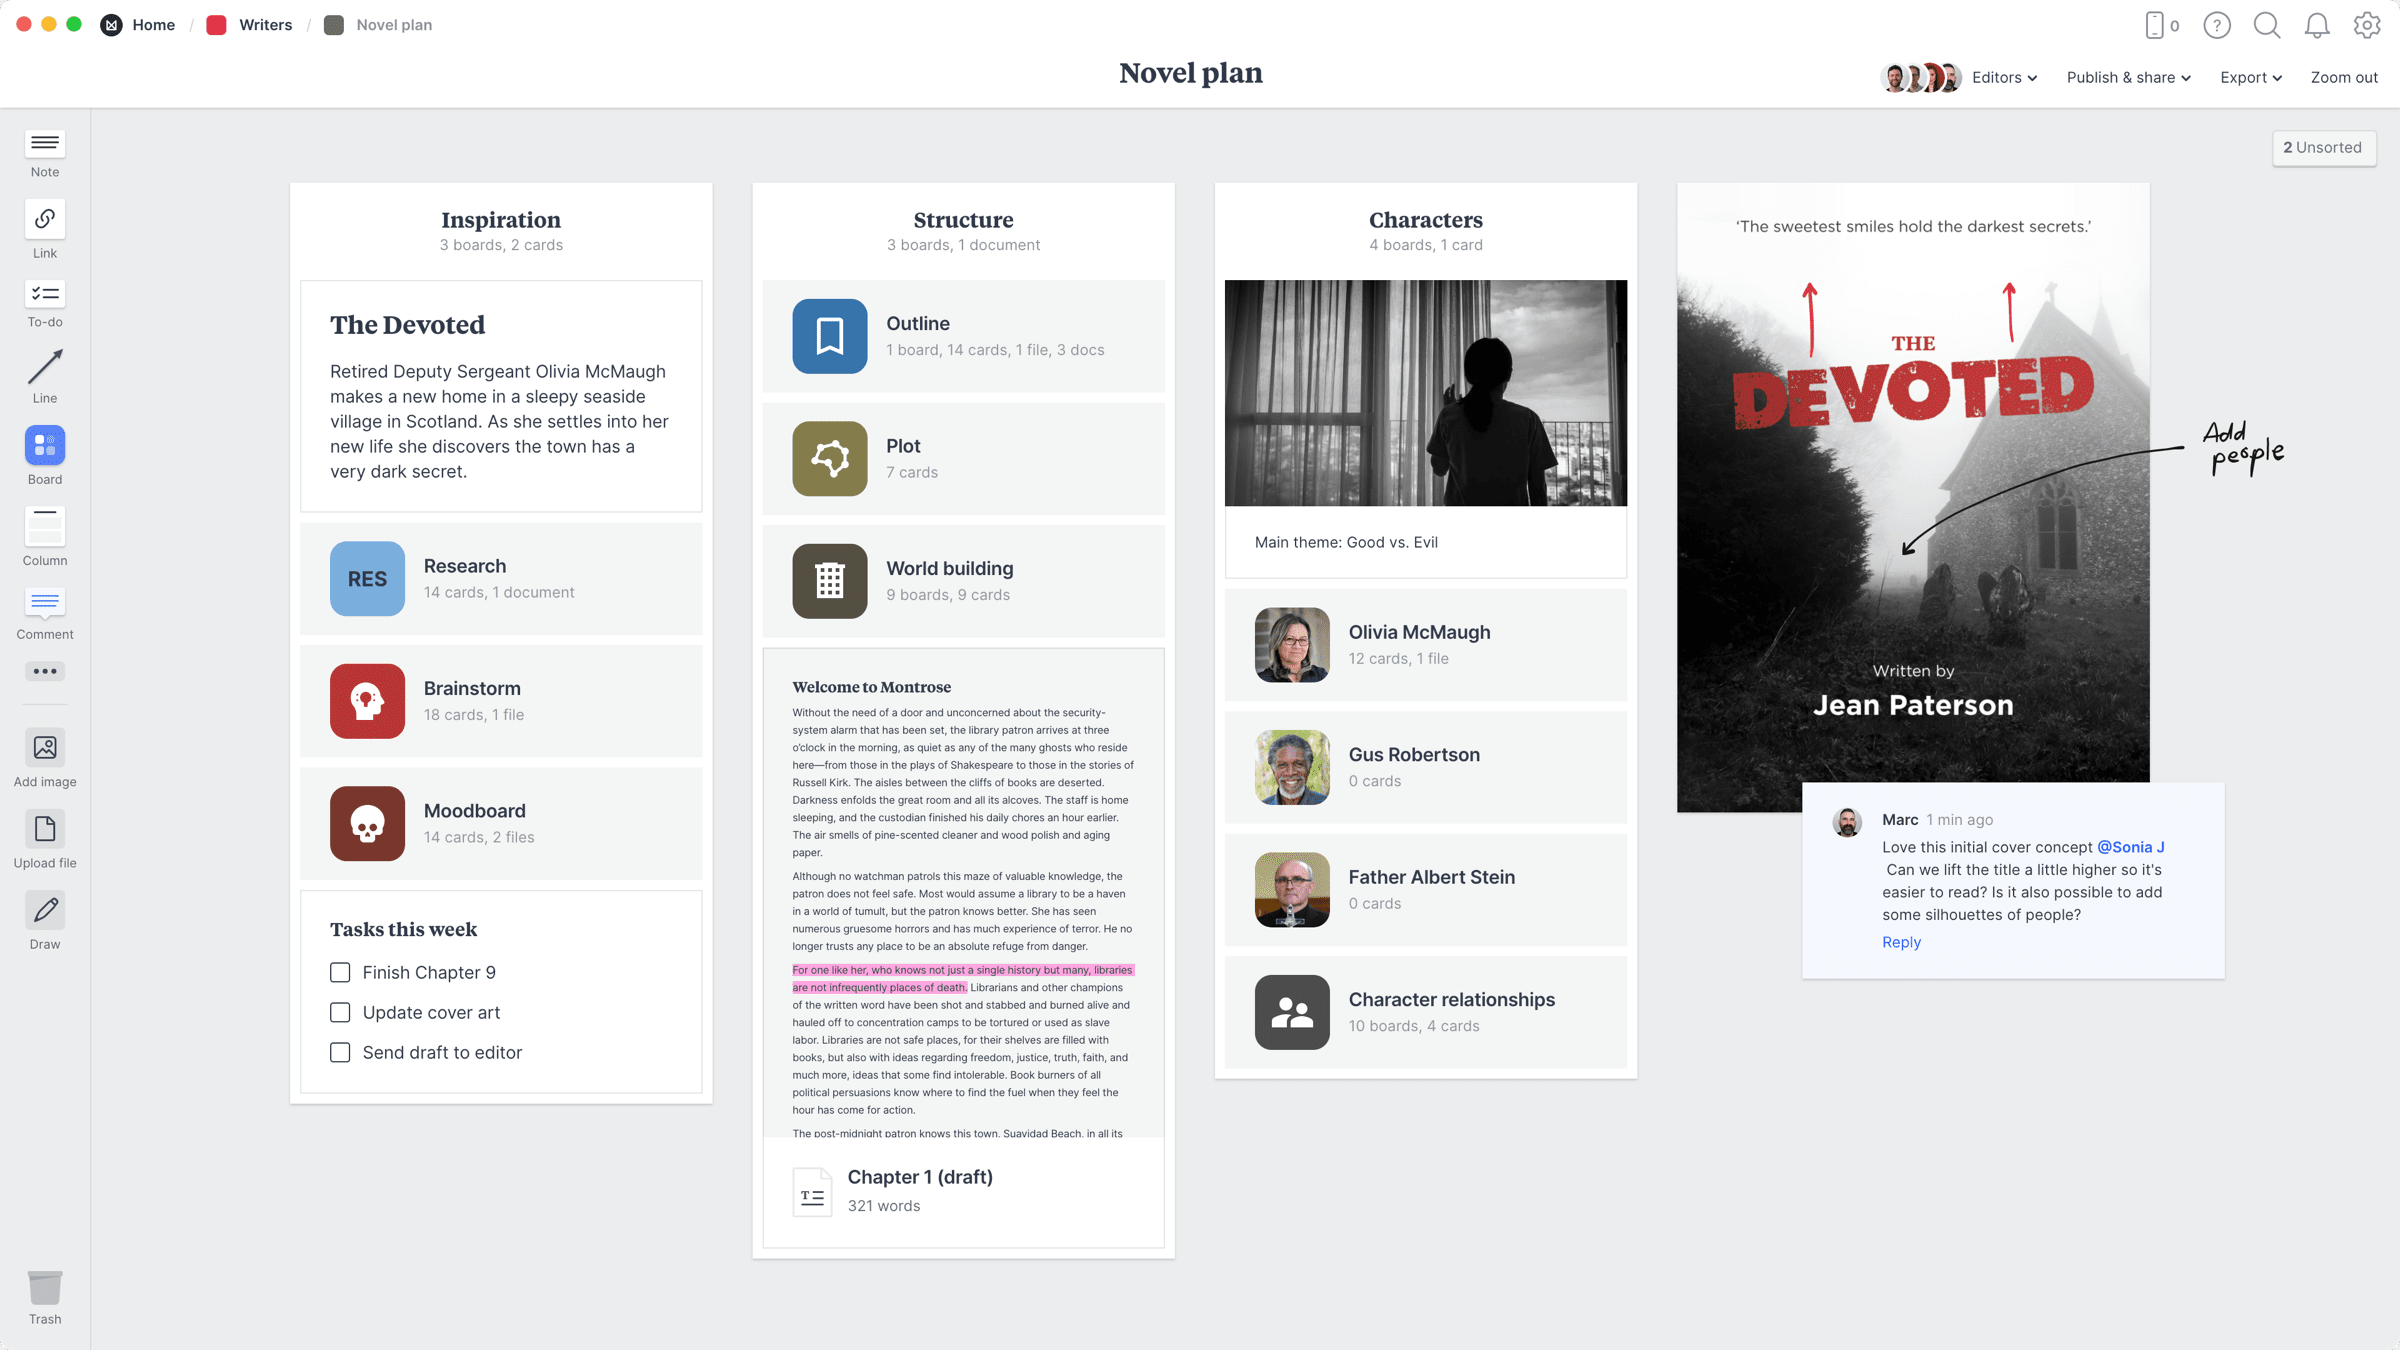
Create a new board to plan your novel.
Drag a board out from the toolbar. Give it a name, then double click to open it.
Choose the Novel Plan template.
Each new board gives you the options to start with a beautiful template.
Whether you're writing a sci-fi thriller or historical fiction, research is a crucial step in the early writing process. It's a springboard for new ideas and can add substance and authenticity to your story. As author Robert McKee says "when you do enough research, the story almost writes itself. Lines of development spring loose and you'll have choices galore." When you bring your research into one place and see things side-by-side, new ideas and perspectives start to emerge.

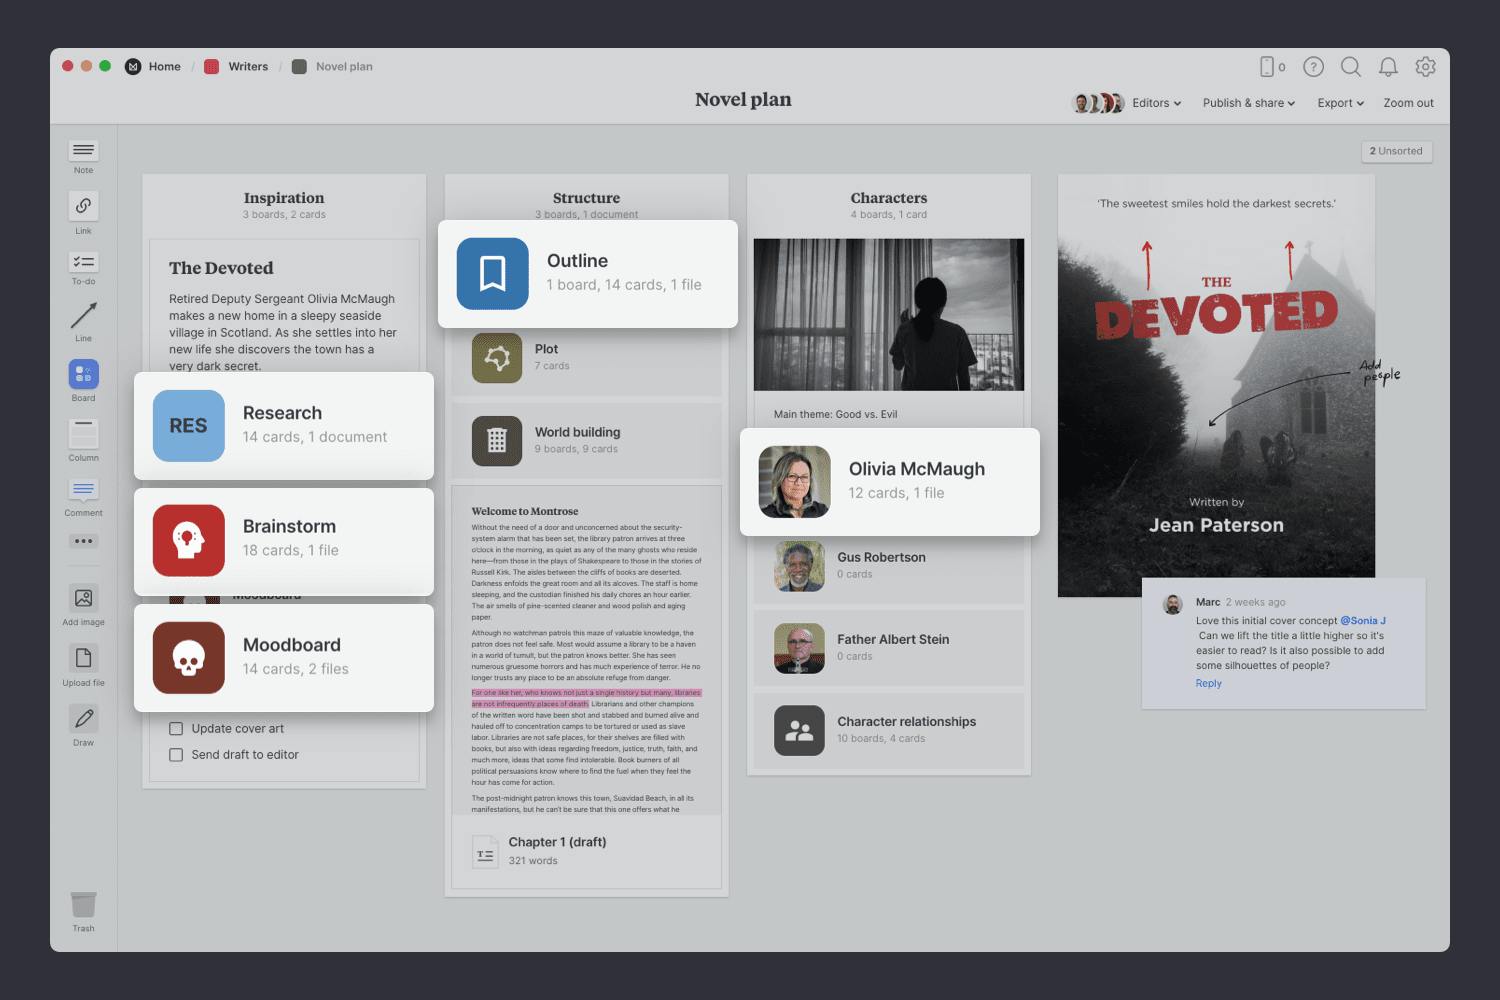
You’ll find the board for collecting research on your Novel Plan board. Double click the Research board to open it and get started.

Double click the Research board to open it.
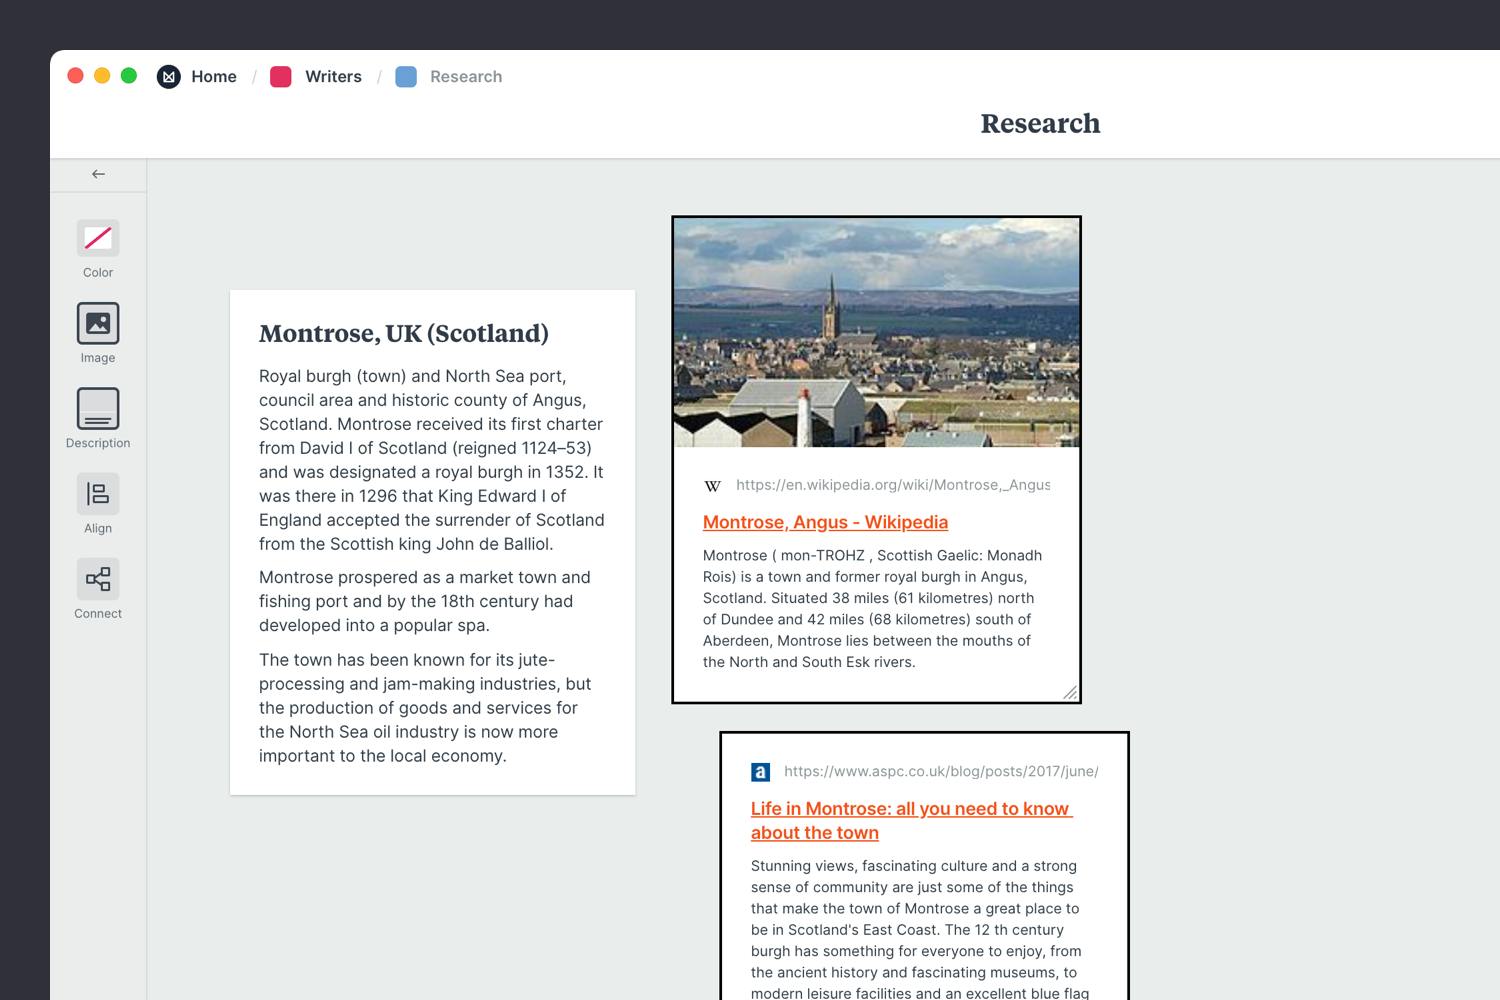
Wikipedia, blogs, and news websites are a goldmine for researchers. It's here you'll find historical events and records, data, and opinions about your topic. We're in the 'collecting' phase so just save links to any relevant information you stumble across.
Drag a link card onto your board to save a website.
Install the Milanote Web Clipper
Save websites and articles straight to your board.
With the Web Clipper installed, save a website, image or text. Choose the destination in Milanote. Return to your board and find the content in the "Unsorted" column on the right.
Video and movie clips can help you understand a mood or feeling in a way that words sometimes can't. Try searching for your topic or era on Vimeo, or Youtube. Podcasts are another great reference. Find conversations about your topic on Spotify or any podcast platform and add them into the mix.

Embed Youtube videos or audio in a board.
Copy the share link from Youtube, Vimeo, Soundcloud or many other services. Drag a link card onto your board, paste your link and press enter.
Sometimes the quickest way to understand a topic is with an image. They can transport you to another time or place and can help you describe things in much more detail. They're also easier to scan when you return to your research. Try saving images from Google Images, Pinterest, or Milanote's built-in image library.

Use the built-in image library.
Search over 3 million beautiful photos powered by Pexels then drag images straight onto your board.
Allow yourself the time to explore every corner of your topic. As author A.S. Byatt says "the more research you do, the more at ease you are in the world you're writing about. It doesn't encumber you, it makes you free".
You never know where or when you'll find inspiration—it could strike you in the shower, or as you're strolling the aisles of the grocery store. So make sure you have an easy way to capture things on the go. As creative director Grace Coddington said, "Always keep your eyes open. Keep watching. Because whatever you see can inspire you."

Download the Milanote mobile app
Save photos straight to your Research board.
Shoot or upload photos directly to your board. When you return to a bigger screen you'll find them in the "Unsorted" column of the board.
Research is an ongoing process and you'll probably continue learning about your topic throughout your writing journey. Reference your research as you go to add a unique perspective to your story. Read the full guide on Organizing research for your novel to learn more.
You have an idea for a story. It's just a spark at the moment, but you can't stop thinking about it. Now is the time to harness your creative energy and turn your idea into something real. And brainstorming is the perfect technique for the job.
Brainstorming is a classic creative technique for generating new ideas quickly. You can use it to dream up new characters, settings, or even explore themes you want to include in your book.

You’ll find the board for brainstorming on your Novel Plan board. Double click the Brainstorming board to open it and get started.

Double click the Brainstorming board to open it.
What's the central idea or concept for your story? This is your starting point. It might be just a rough idea at the moment or a topic that you want to explore, but this process will help you see how far you can take it. Add a note that describes your concept in 1 to 2 sentences to get started.

Add a note to describe your central idea.
Start typing then use the formatting tools in the left hand toolbar.
Your initial idea doesn't need to be something groundbreaking, you'll transform it over time. As Steven Spielberg says "All good ideas start out as bad ideas, that's why it takes so long."
Now it's time to get creative. Start adding any ideas that relate to your main concept. Think about different parts of your story, locations, characters, or even the history of your topic. Explore every thread until you fill the board. Don't worry about evaluating your ideas yet, that will come later.

Add a note for each idea.
Start typing then use the formatting tools in the left hand toolbar.
Sometimes it's easier to communicate an idea with an image or video, especially if it's a mood or style you're trying to express. Gather reference imagery, videos, and sound and add them into the mix. Images can help define things like fashion, character attributes and emotions, scenes, and more.

Use the built-in image library.
Search over 3 million beautiful photos powered by Pexels then drag images straight onto your board.
Drag images from your computer onto the board.
Click the "Upload file" button or just drag a file onto your board. You can add images, logos, documents, videos, audio and much more.
Once you've explored tangents and shared feedback, the next step is to make connections. This is where you see the magic of brainstorming.
Start by grouping similar ideas to uncover patterns in your thinking. Add a title to each group so it's easy to scan. You might find your ideas fall into groups like story, location, characters, or scenes, but there are no rules about how you do it.
Now that your brainstorming session is complete, you have some strong ideas and you should start to see your initial concept coming to life! Remember, just as creativity and inspiration is constantly evolving, so are ideas. Come back and add to the brainstorm when inspiration strikes. Read the full guide on brainstorming ideas for a novel to learn more.
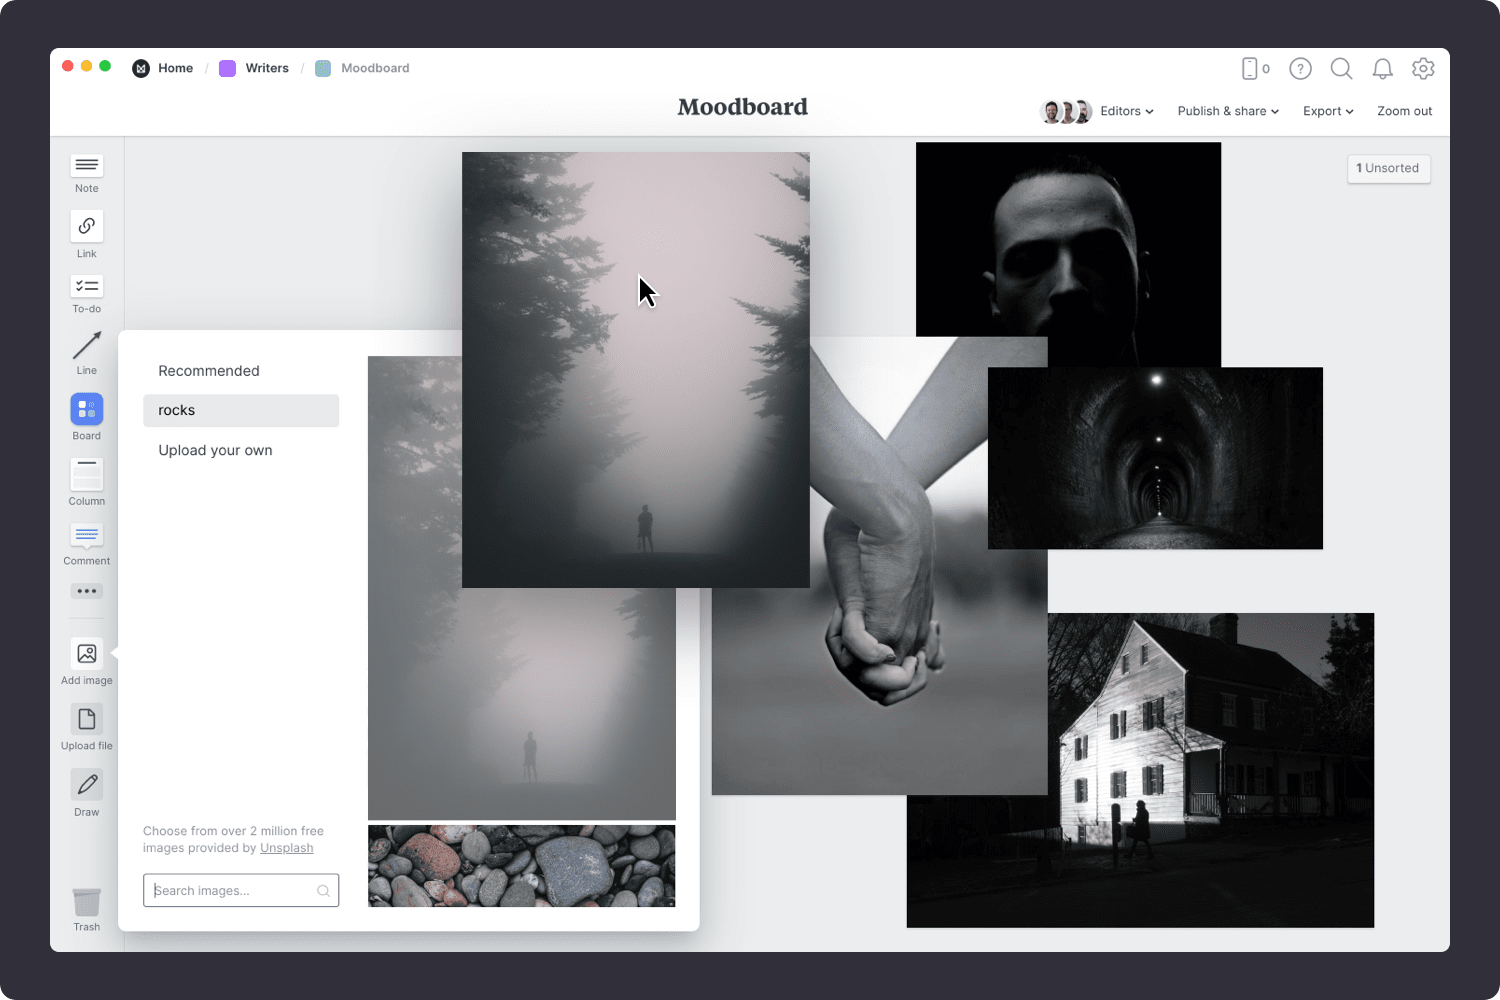
During brainstorming, you imagined the different parts of your story. It's time to start collecting inspiration with a moodboard (or "inspiration" board). It's a technique used by designers, filmmakers, and photographers but works just as well for creative writing.
Moodboards can help you visualize any aspect of your project. You can use them to figure out how a character or location could look. Or they could be centered around the era or the emotion you want to capture. You can create a moodboard for each of these separately or mix them all into one board. There are no strict rules.

You’ll find the board to make your moodboard on the Novel Plan board. Double click on the Moodboard to open it and start adding your inspiration.

Double click the Moodboard to open it.
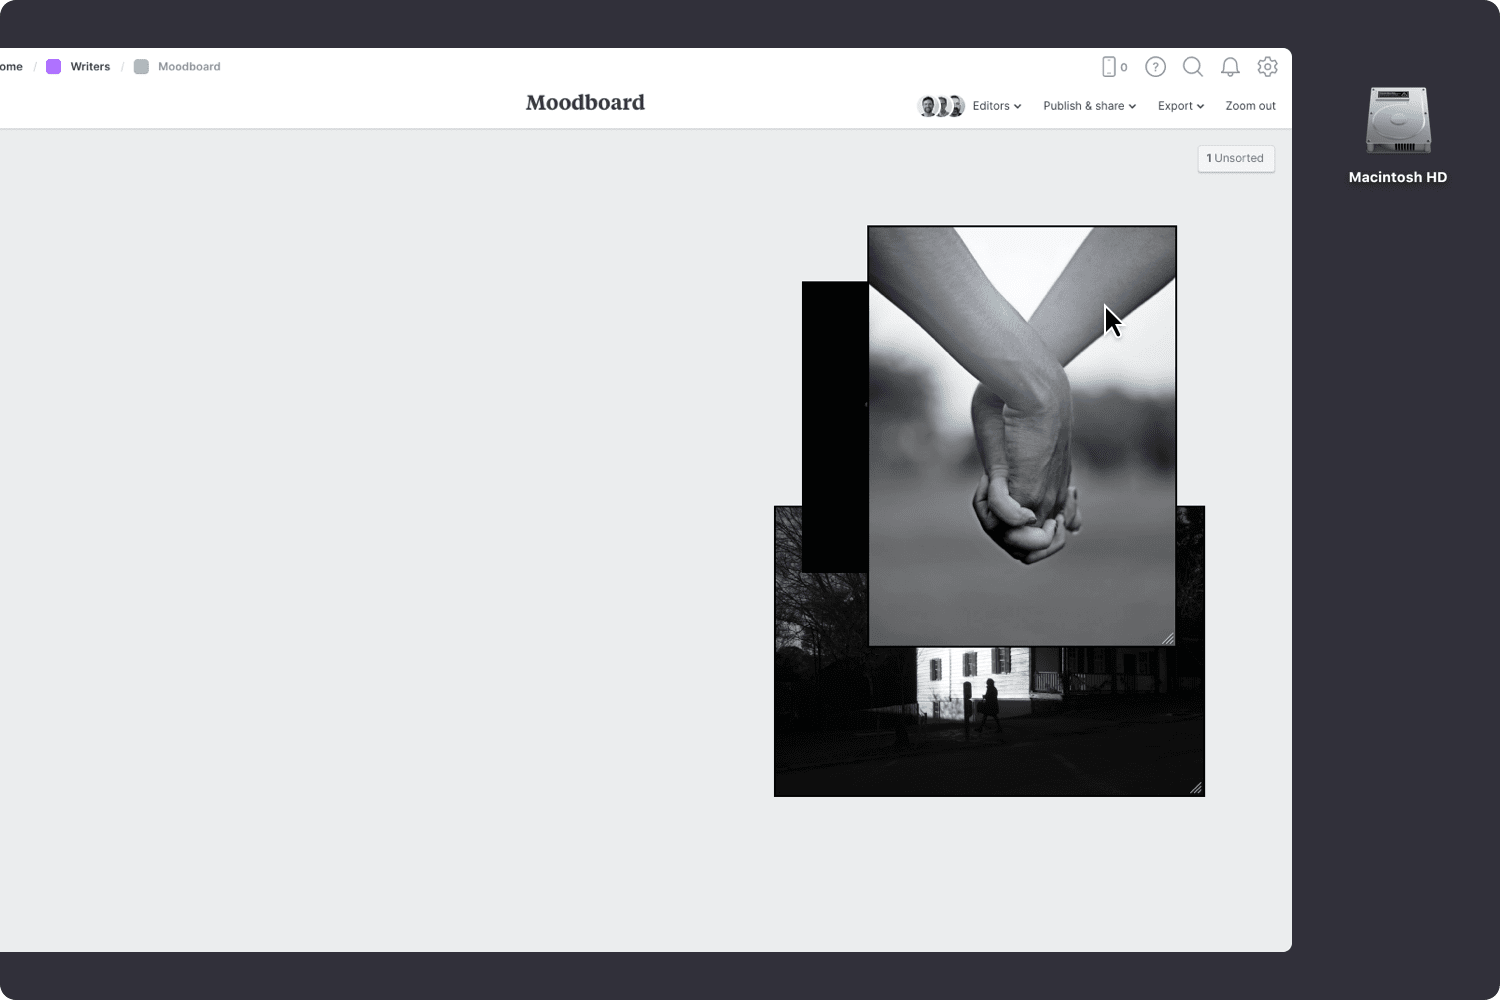
Start by adding any existing material you have—this could include images you've saved to your computer as inspiration. Just drag and drop them onto your board.
Drag files from your computer.
Click the "Upload file" button or just drag a file onto your board. You can add images, logos, documents, videos, audio and much more.
The imagery you bring into your moodboard is what helps you express the feel of your story. Images can help you define things like tone, emotion, or a feeling you might be struggling to capture as you're writing. Use Milanote's built-in image library or search for visual elements from around the web. Don't worry about organizing the images just yet, that step will come later.
Use the built-in image library.
Search over 3 million beautiful photos powered by Pexels then drag images straight onto your board.
Install the Milanote Web Clipper
Save images from other websites straight to your board.
Roll over an image (or highlight text), click Save, then choose the destination in Milanote. Return to your board and find the content in the "Unsorted" column on the right.
Once you have all your inspiration in one place, the next step is to arrange your ideas to create the perfect composition. Try combining different elements together. This is where you'll start to see new ideas appear. Perhaps the combination of two unrelated images will trigger an exciting new storyline.
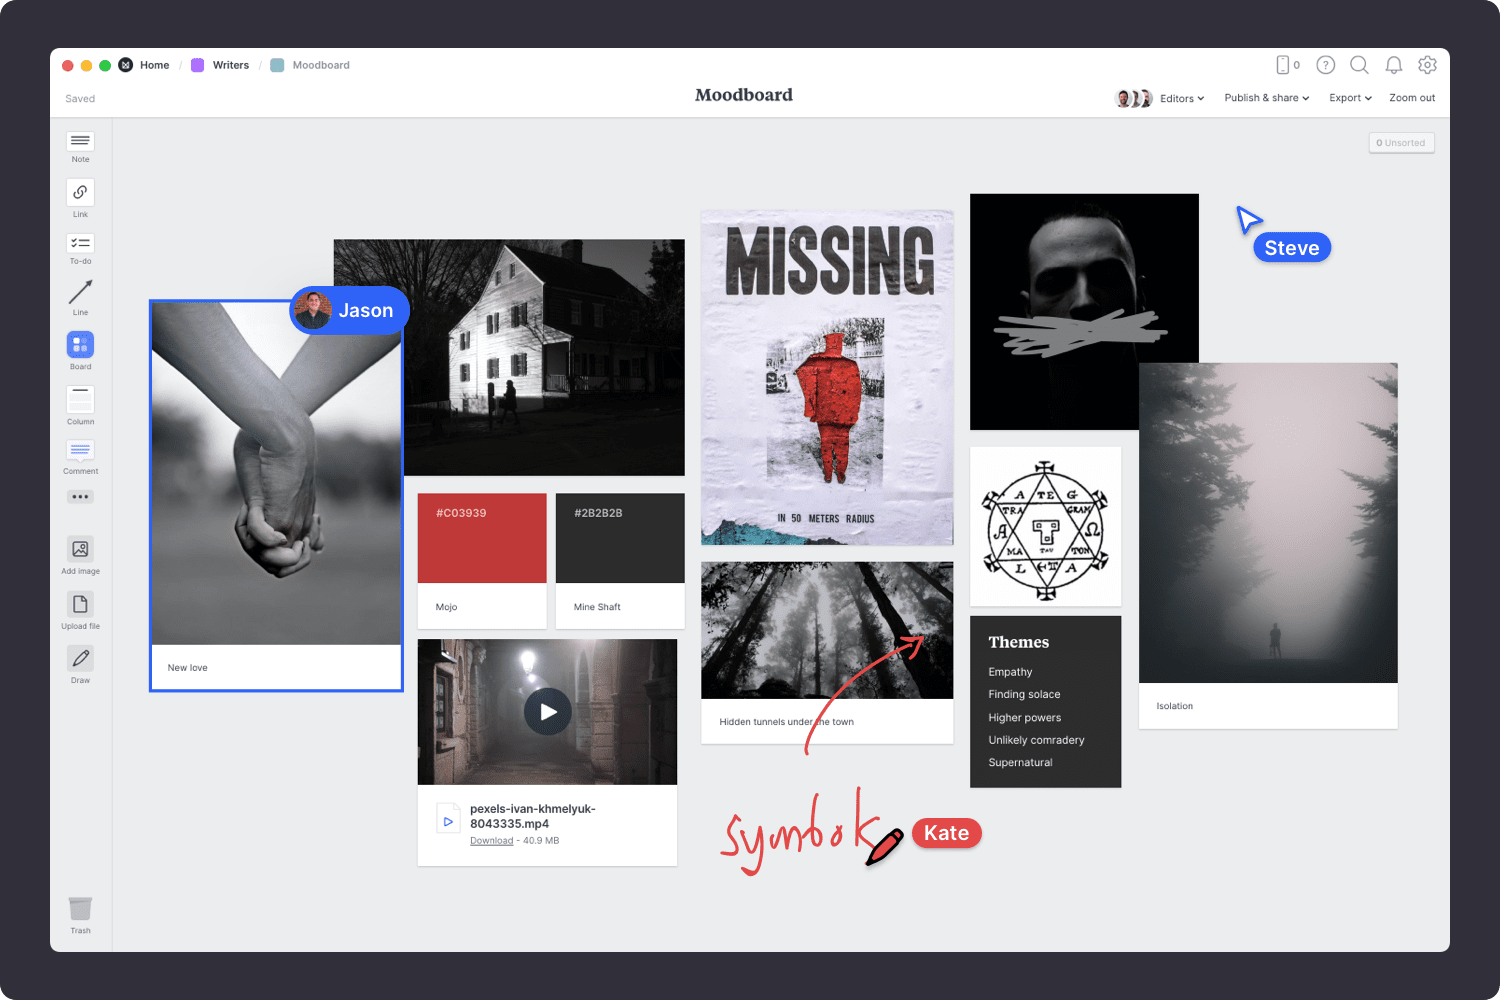
Resize your images to add hierarchy.
Drag the corner of an image to resize it. Double-click the corner to return it to its original size.
Crop images.
Double-click an image and press edit to crop or rotate it.
Now that your moodboard is complete, you have a powerful visual reference for your story and hopefully a bunch of new ideas. Remember, you can create multiple moodboards to explore different aspects of your story at any time. Read the full guide on making a moodboard to learn more.
Next, we'll start outlining your story.
A novel outline is often described as a roadmap or blueprint for your story. It helps you see the big picture and plan the sequence of scenes, characters, and ideas that will become your novel. It's a simple, flexible technique to help all types of writers stay organized.
This method is perfect for 'visual' writers—those who prefer to see the big picture as a sequence of events. Think of it as the modern, digital equivalent to the corkboard or wall of sticky notes, but much easier to manage.

You’ll find the empty Outline board on the Novel Plan board. Double-click it to start adding the mapping out your story.
Double-click the Outline board to open it.
Start by laying out the major scenes or events you know so far. These might be the key turning points, locations, or plot twists. Don't worry too much about the order or details yet, just get the main parts out of your head. This is a quick flexible way to brainstorm the centerpieces of your story.
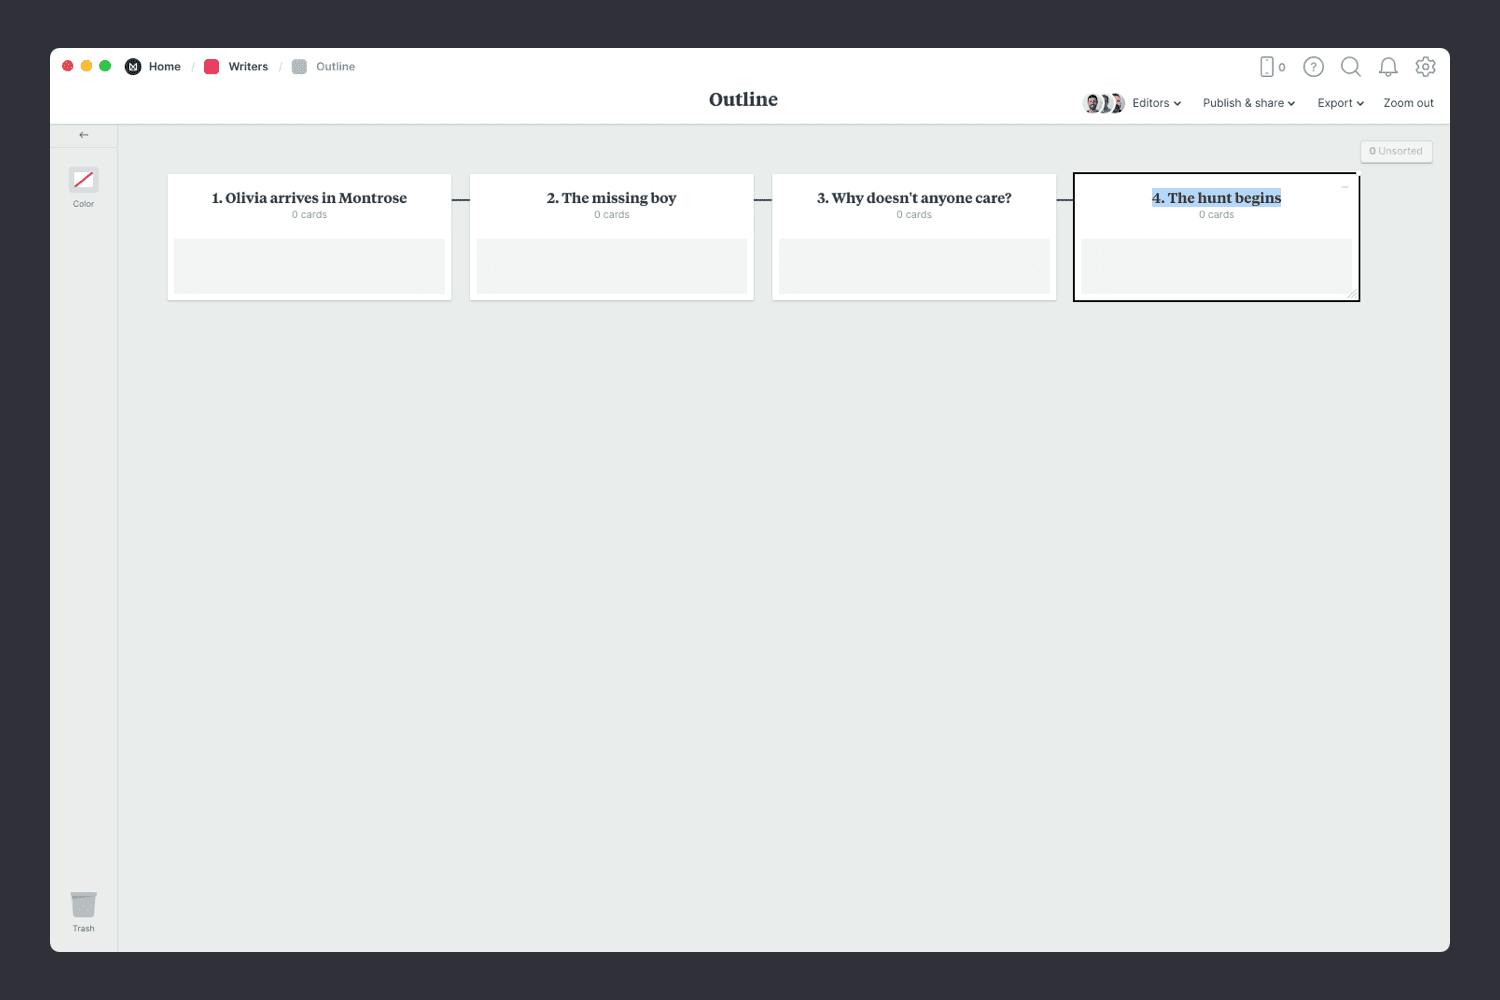
Add a Column for each key scene.
Name it, then drag any relevant notes or images into your column
Next, add a sentence or a short paragraph for each scene. There are no rules for how much detail to add, do what works best for you. Think about what's being communicated in this scene, the location, and the characters involved. This will help you consider where characters are introduced and how this scene connects with the next one.

Add a note to describe the plot points.
Start typing then use the formatting tools in the left hand toolbar.
Seeing your story at this level lets you make connections between themes and concepts you might otherwise miss if you went straight into writing. Re-read your outline so far. Look for scenes that feel out of place. Perhaps your transitions need some tweaking or a character appears without a proper introduction. Highlight areas that need more work and move scenes or plot points around to get the sequence just right.

Drag plot points around to get the sequence right.
While imagery probably won't make an appearance in your novel, this is a great technique for kickstarting new ideas. Experiment by adding images or movie clips that relate to your scenes. If you're the type of writer who creates moodboards, now's the time to see if you've already got imagery that could help evoke the feeling you're trying to capture. Try saving images from Google Images, Pinterest, or Milanote's built-in image library.

Use the built-in image library.
Search over 3 million beautiful photos powered by Pexels then drag images straight onto your board.
Drag files from your computer.
Click the "Upload file" button or just drag a file onto your board. You can add images, logos, documents, videos, audio and much more.
Now that you've finished a draft outline, you can start writing, confident that your story has a strong foundation. If you want to learn more about this stage, read the full guide on how to outline a story or start with one of 5 outline templates.
One of the most integral parts of any story is crafting relatable and vivid characters. As writer Ernest Hemingway said, “When writing a novel a writer should create living people; people not characters. A character is a caricature.”
The character profile is a popular technique for developing genuine personas for your story. It will help to shape a narrative as well as provide a handy reference point for their personality traits, backstory, goals, flaws, and challenges.

You’ll find the first character profile board on the Novel Plan board. Double click on the Character board to open it and get started.

Double click the Character profile board to open it.
A character might start as a bundle of random ideas, traits and plot points from your game concept, so it’s important to bring everything together in one place. You can begin to shape the character and make them original. Consider the emotional connection between your audience and your character, and work towards the desired outcome. You may find that switching the age and gender of a character can lead to very different responses from your reader.

Add notes to describe your character.
Start typing then use the formatting tools in the left hand toolbar.
Add an image to represent your character.
Click the "Upload file" button or just drag a file onto your board. You can add images, logos, documents, videos, audio, and much more.
Your character's backstory describes the journey they have taken up to this point. It allows you to explore their fears, weaknesses, and motivations and to define their purpose. You can explain the character's methods and evaluations—why they act the way that they do, the choices they make, and how it drives the individual forward. Are they making progress towards their goal, or making things worse?

Add a note to describe their backstory.
Start typing then use the formatting tools in the left-hand toolbar.
Your character should come from an authentic place. That means that the character probably has some contradictions that make them a little out of the ordinary. If a character is too simplistic, it can feel cliched. Character flaws such as overconfidence, impatience, or recklessness can add new dimensions to a hero and make them feel more relatable.

Add a note to describe their quirks and flaws.
Start typing then use the formatting tools in the left hand toolbar.
Even if you're writing a novel, visual references and inspiration can help bring your character to life. There are lots of fantastic sites where you can find great visual inspiration for free, like Pinterest or Google Images. You can also create a character moodboard at this stage to help explore all aspects of their appearance. See our guide on creating moodboards for a novel to learn more.

Use the built-in image library.
Search over 3 million beautiful photos powered by Pexels then drag images straight onto your board.
Drag files from your computer.
Click the "Upload file" button or just drag a file onto your board. You can add images, logos, documents, videos, audio and much more.
Once you have everything you need, it's time to organize your content into logical topics. There's no right or wrong way to do this. The goal is to make your character profile easy to scan and reference as you're writing the story.
Use Columns to group related content
Name it, then drag any relevant notes or images into your column
It's important not to fall into the trap of giving just one character too much responsibility for the drama in your story. Work on additional characters that compliment and contrast the traits of your main character. You can repeat the above process to develop a whole cast of characters that help bring your novel to life.

Hopefully, this guide has helped you stay organized while building a solid foundation for your novel. If you're just starting a new story, use the Novel Plan template below to get set up in minutes.