Create a game design document
Get all 6 game design document templates FREE in our game designers pack.
Get startedSign up for free with no time limit

Follow this step-by-step guide to learn the modern process of creating a game design document in Milanote, a free tool used by top creatives.
A Game Design Document is the blueprint for how to create your game. It outlines your plans for characters, environments, gameplay, levels, visual style, and much more. But they're often written as long text documents that end up collecting dust. Modern Game Design Documents are visual, collaborative, and lightweight. They're filled with inspiring imagery, video examples of gameplay, and even audio to help your team visualize the final product. Whether you're an indie game designer or a team of 20, this guide will help you create an inspiring, modern Game Design Document your team will love and actually use.
Traditionally, a project plan might be scattered across various emails, to-do lists, spreadsheets, and documents, making it hard to keep track of everything. A central project plan combines these artifacts into one easy-to-access place. It will evolve over the lifespan of your project but usually includes:
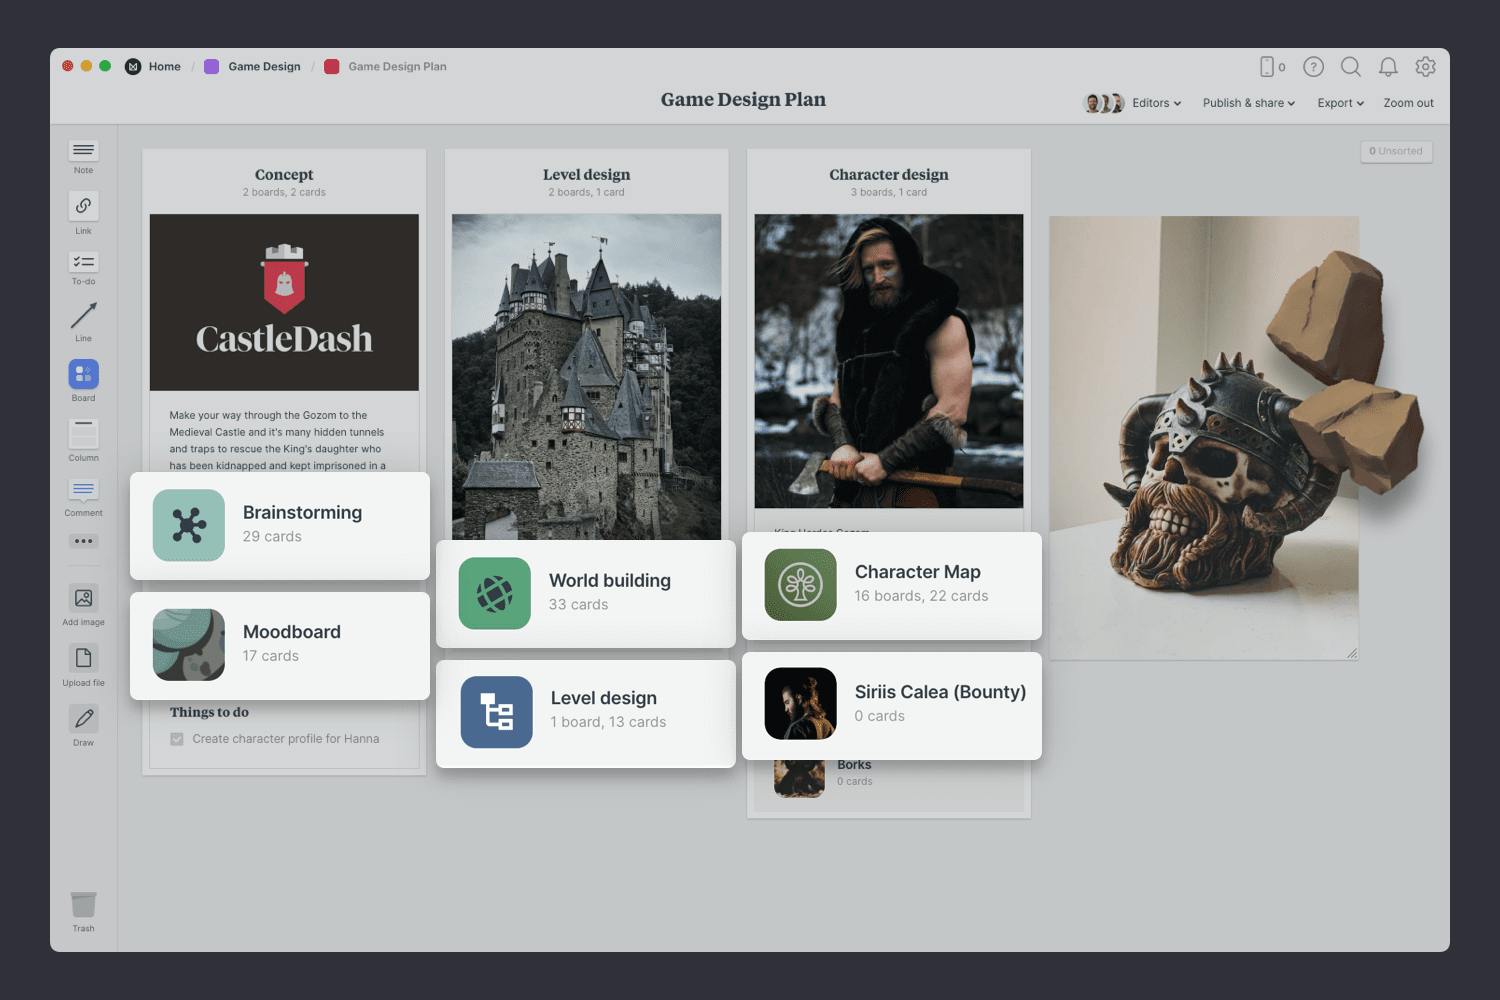
Create a new board for your game design document
Drag a board out from the toolbar. Give it a name, then double click to open it.
Choose the Game Design Document template
Each new board gives you the options to start with a beautiful template.
When a new game design project kicks off, your starting point is often just a rough concept or idea. So how do you transform that idea into something bigger? Brainstorming!
Brainstorming is a classic creative technique for generating new ideas quickly. You can use it to explore visual styles, dream up new characters, worlds, or even the levels you're planning. It’s best thought of as a way to light up our imagination.

You’ll find the board for brainstorming on your Game Design Plan board. Double click the Brainstorming board to open it and get started.
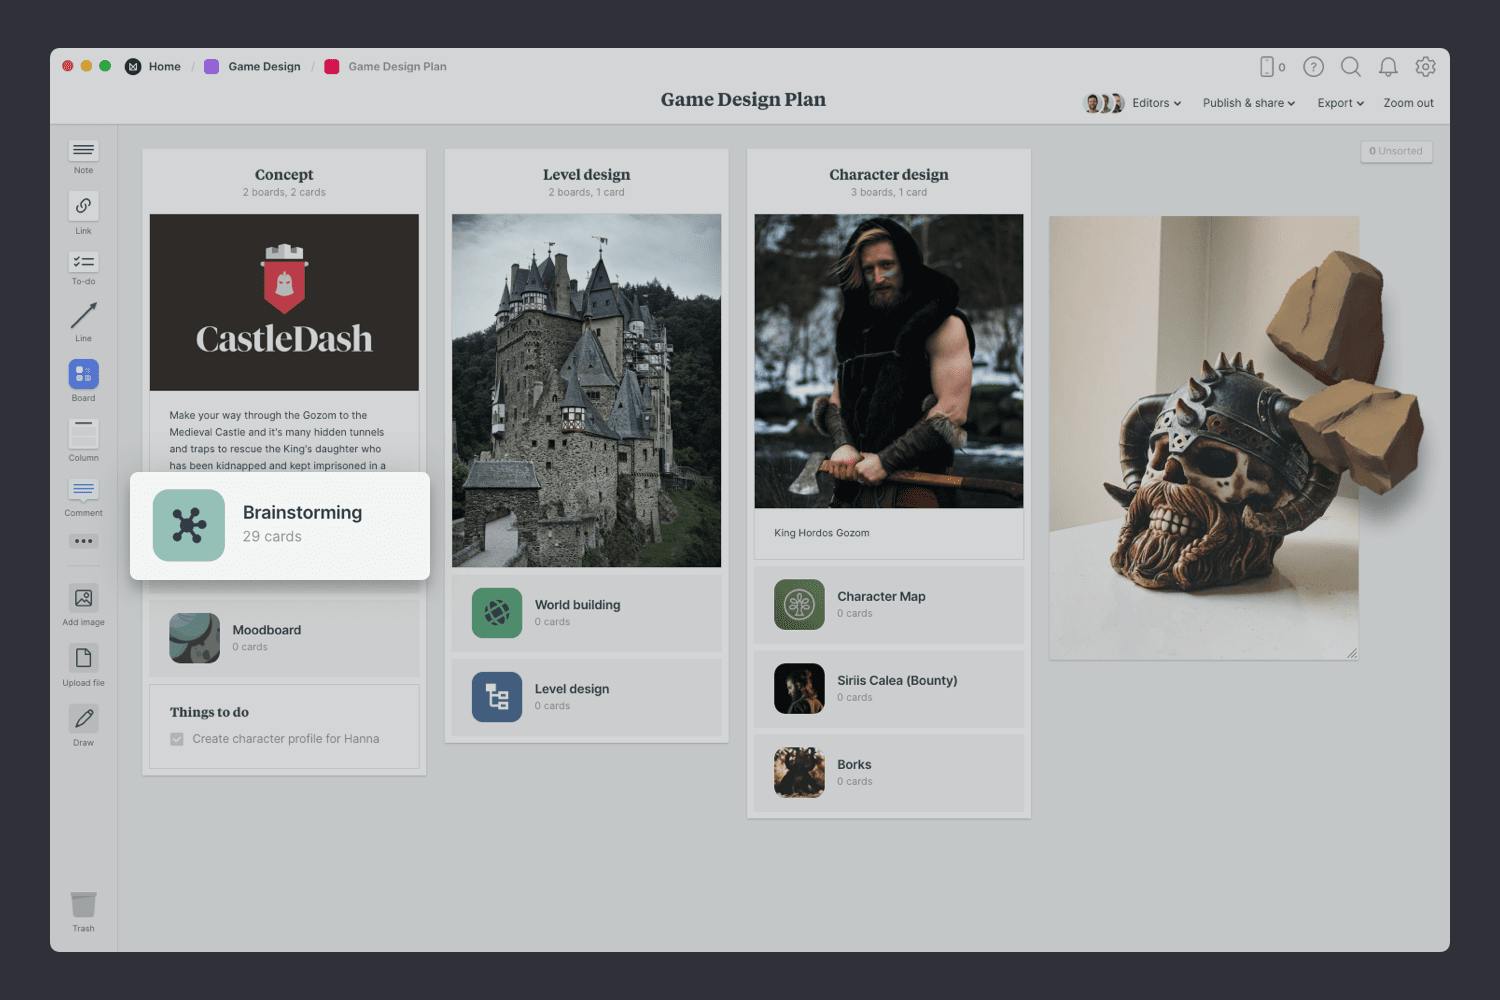
Double click the Brainstorming board to open it.
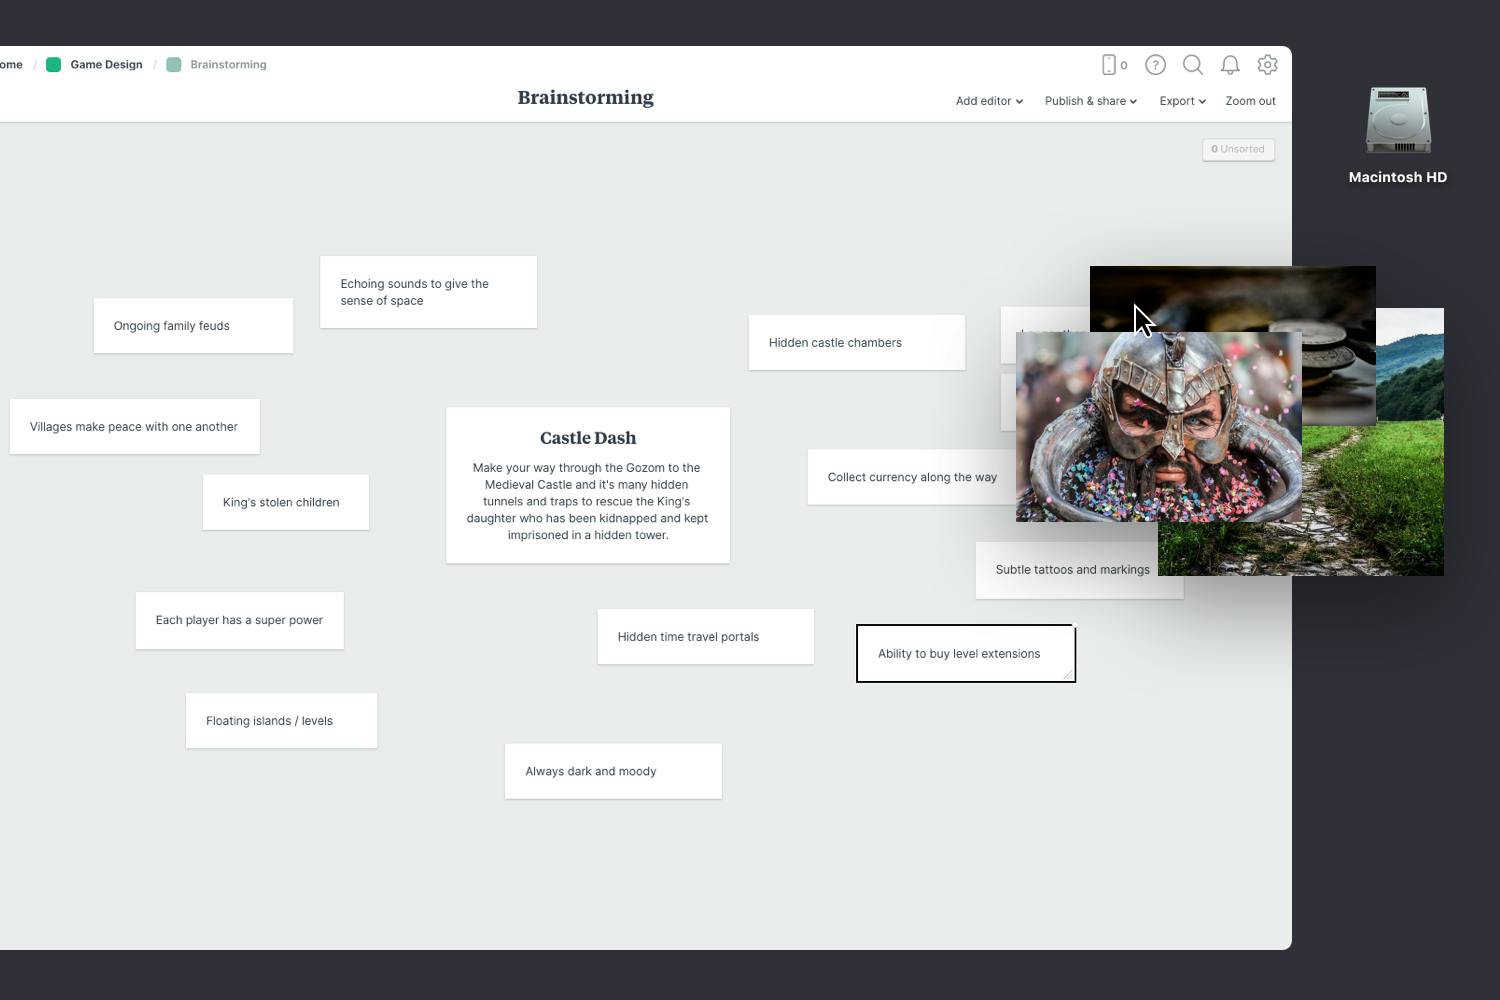
What's the central idea or concept for your game? This is your starting point. It might be just a rough idea at the moment or a topic that you want to explore, but this process will help you see how far you can take it. Add a note that describes your concept in 1 to 2 sentences to get started.

Add a note to describe the concept of your game.
Start typing then use the formatting tools in the left hand toolbar.
Your initial idea doesn't need to be something groundbreaking, you'll transform it over time. As Steven Spielberg says "All good ideas start out as bad ideas, that's why it takes so long."
Now it's time to get creative. Start adding any ideas that relate to your main concept. Think about different parts of your story, game plan and animation styles you could use, characters, or even the history of your topic. Explore every thread until you fill the board.
Don't worry about evaluating your ideas yet, that will come later. Setting a timer for 5 minutes is a great way to create a sense of urgency and prevent people from judging their thoughts.

Invite others to add their ideas.
Open the "Editors" menu from the title bar of your board. Add email addresses of the people you'd like to collaborate with—they'll receive an invitation via email.
Add a note for each idea.
Start typing then use the formatting tools in the left hand toolbar.
Sometimes it's easier to communicate an idea with an image, especially if it's a mood or style you're trying to express. Images can define things like character style, font choices, colors, scenes, and more. These can become the foundation for a moodboard as your game evolves.
Use the built-in image library.
Search over 3 million beautiful photos powered by Pexels then drag images straight onto your board.
Drag images from your computer onto the board.
Click the "Upload file" button or just drag a file onto your board. You can add images, logos, documents, videos, audio and much more.
Once you've explored tangents and shared feedback, the next step is to make connections. This is where you see the magic of brainstorming.
Start by grouping similar ideas to uncover patterns in your thinking. Add a title to each group so it's easy to scan. You might find your ideas fall into groups like story, gameplay, character, or levels but there are no rules about how you do it. Now you should start to see your initial concept coming to life.
Now that your brainstorming session is complete, you have a strong foundation for your game! Remember, just as creativity and inspiration is constantly evolving, so are ideas. Come back and add to the brainstorm when inspiration strikes.
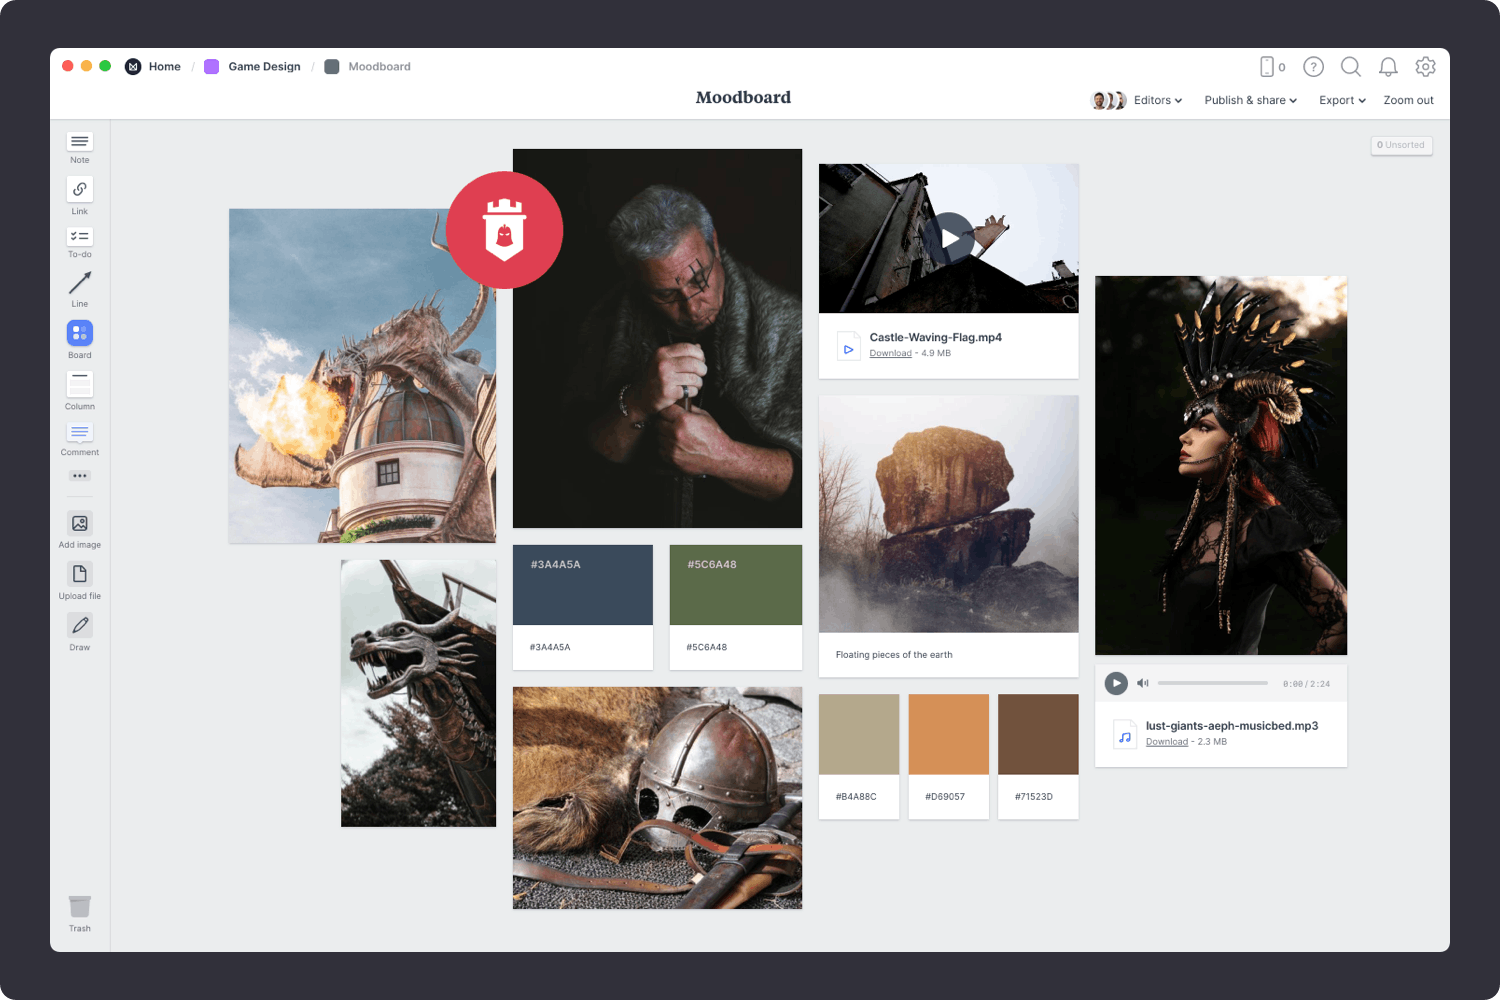
During brainstorming, you imagined the different parts of your game. It's time to start exploring some visual directions with a moodboard. Moodboards can help you visualize any aspect of your project. You could focus on how you want the finished design to look. Or they could be centered around collecting references for characters or environments. You can create a moodboard for each of these separately or mix them all into one board. There are no strict rules.
Your moodboard is also a fantastic reference for your team—from your artists to the designers and programmers—it helps everyone visualize the end result.
You’ll find the board to make your moodboard on the Game Design Plan board. Double click on the Moodboard to open it and start adding your inspiration.

Double click the Moodboard to open it.
Start by adding any existing material you have—this could include examples from previous projects, references from other games, or images you've saved as inspiration. These might not make it into the final moodboard, but they're still a great place to start.

Drag files from your computer.
Click the "Upload file" button or just drag a file onto your board. You can add images, logos, documents, videos, audio and much more.
The imagery you add to your moodboard is what helps you express the look and feel of your game. Images can define your character style, concept art, colors, scenes, and more.
You can start by searching for visual elements from around the web. There are lots of fantastic sites where you can find great visual inspiration for free, like Dribbble, Behance, and Pinterest. Don't worry about organizing the images just yet, that step will come later.

Use the built-in image library.
Search over 3 million beautiful photos powered by Pexels then drag images straight onto your board.
Install the Milanote Web Clipper
Save images from other websites straight to your board.
Roll over an image (or highlight text), click Save, then choose the destination in Milanote. Return to your board and find the content in the "Unsorted" column on the right.
Once you have all your inspiration in one place, the next step is to arrange your ideas to create the perfect layout. Start by exploring composition and introducing hierarchy. Place a key element to anchor your board, and change the size and position of the remaining elements to indicate their importance and relationships to one another.

Resize your images to add hierarchy.
Drag the corner of an image to resize it. Double-click the corner to return it to its original size.
Crop images.
Double-click an image and press edit to crop or rotate it.
Now that your moodboard is complete, you have a powerful visual reference for your game. Remember, you can create multiple moodboards to explore different directions at any time.
Next, we'll map out the environments for your game.
A crucial step in any game pre-production is deciding what the world or environment will be like. A world can be as expansive as a wide-open fantasy landscape, or as minimalistic as a single room. Here's where you let your imagination run wild and set the scene for your character and level design.
Worldbuilding lets you define how players behave and interact in their surroundings. It gives your game structure and most importantly, can transport players to somewhere new.

You’ll find the empty Worldbuilding board on the Game Design Plan board. Double-click it to start adding the mapping out your game environment.

Double-click the Worldbuilding to open it.
Start by thinking about the biggest concept in your game world—the environment. Where does your game take place? What's the geography and climate? These details can help your team design suitable level backgrounds, clothes for your characters, and even the style of buildings in each level.

Add a note to describe your environment.
Start typing then use the formatting tools in the left hand toolbar.
Who inhabits this world? Is your game set in a dystopian war-torn city with only soldiers and robots? If so, what's their purpose? This is where you set some rules to be used later when designing your characters.
Next, take some time to create the culture that exists in this world. Consider the fashion and how inhabitants dress, the technology available to them, and how this affects their weaponry.
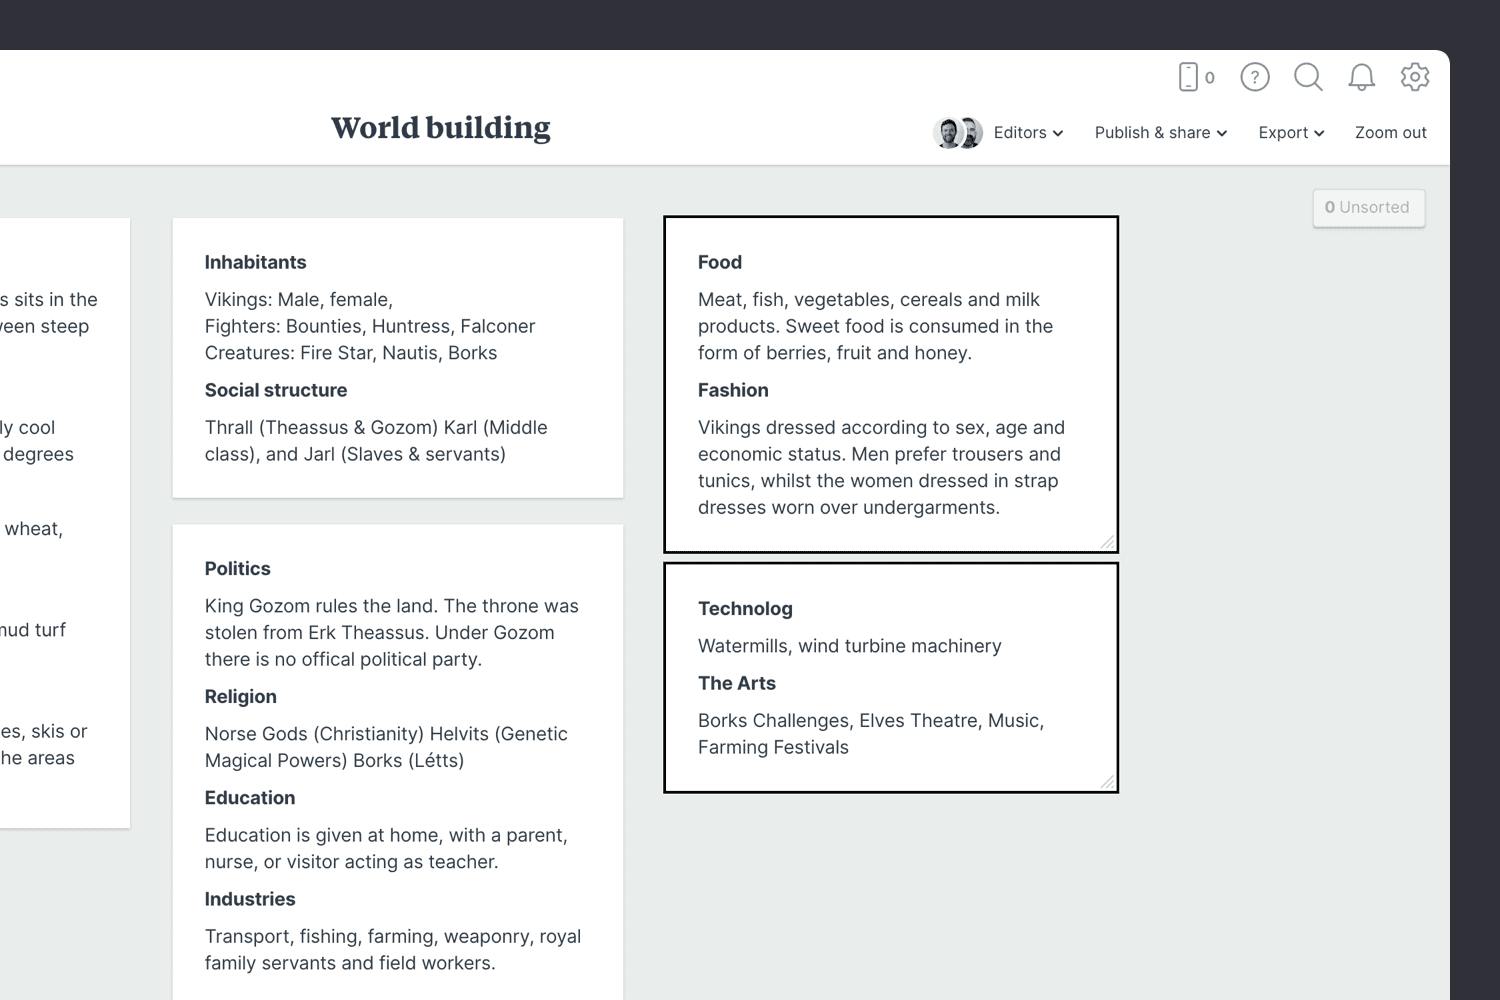
Add a note to describe your environment.
Start typing then use the formatting tools in the left hand toolbar.
Now that you have a rough idea of the rules of your world, collect visual references that will help bring it to life. These can provide a handy starting point when thinking about character or level design.
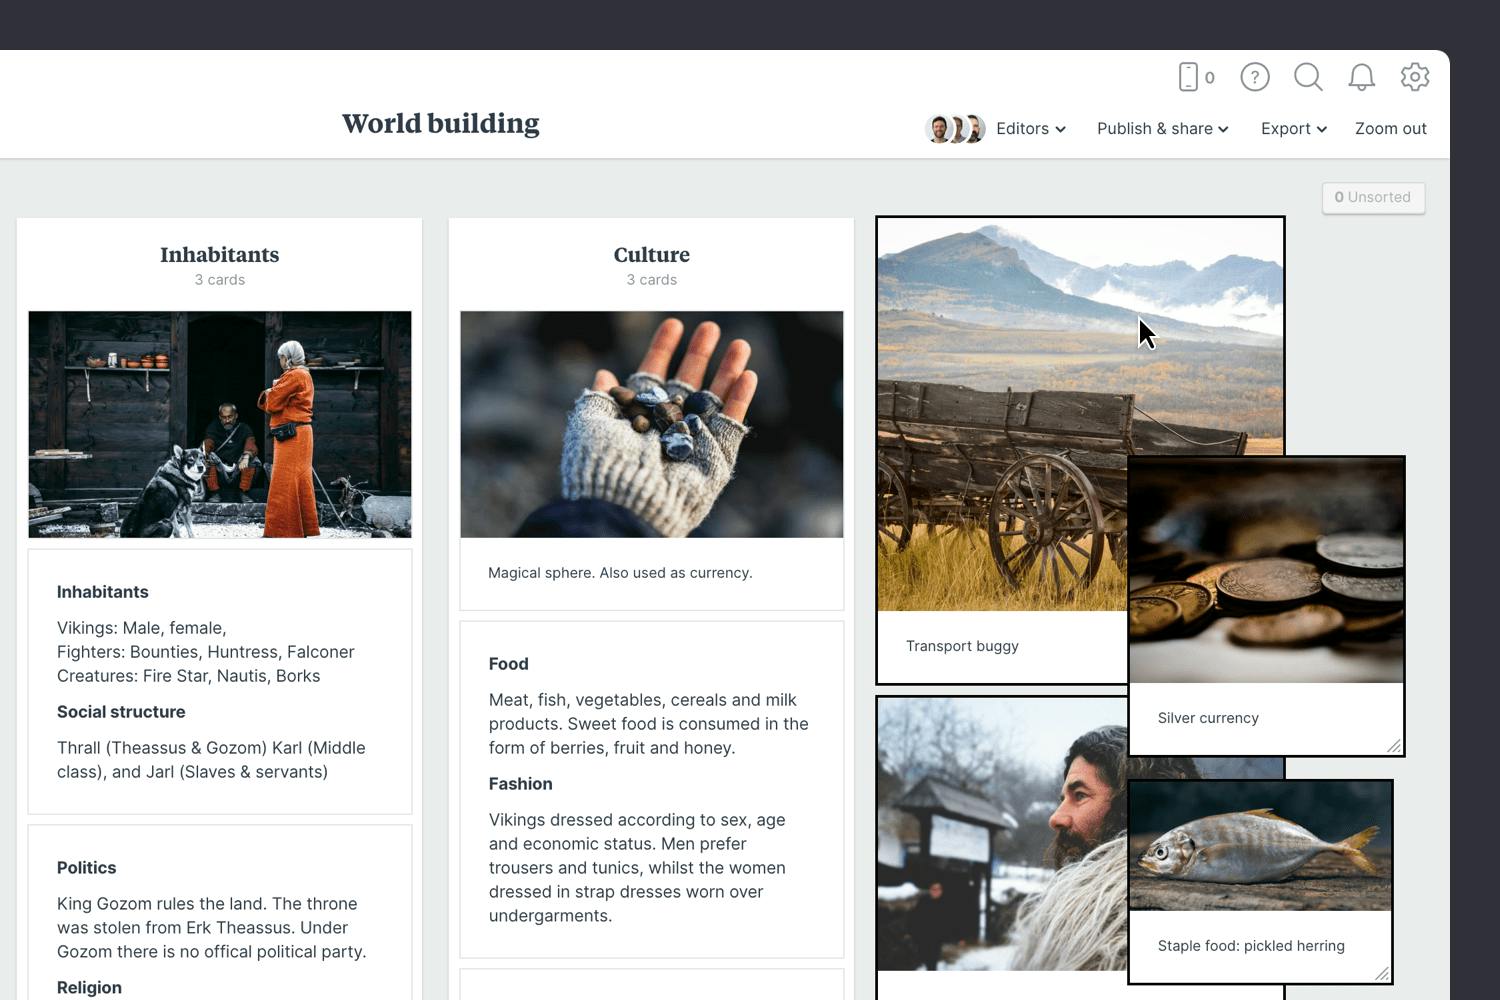
Use the built-in image library.
Search over 3 million beautiful photos powered by Pexels then drag images straight onto your board.
Drag files from your computer.
Click the "Upload file" button or just drag a file onto your board. You can add images, logos, documents, videos, audio and much more.
A variety of team members are involved in worldbuilding: from design to art and programming, everyone contributes. That makes now a great time to share the board and get your team's feedback. Ask them to leave comments and build on your initial ideas.
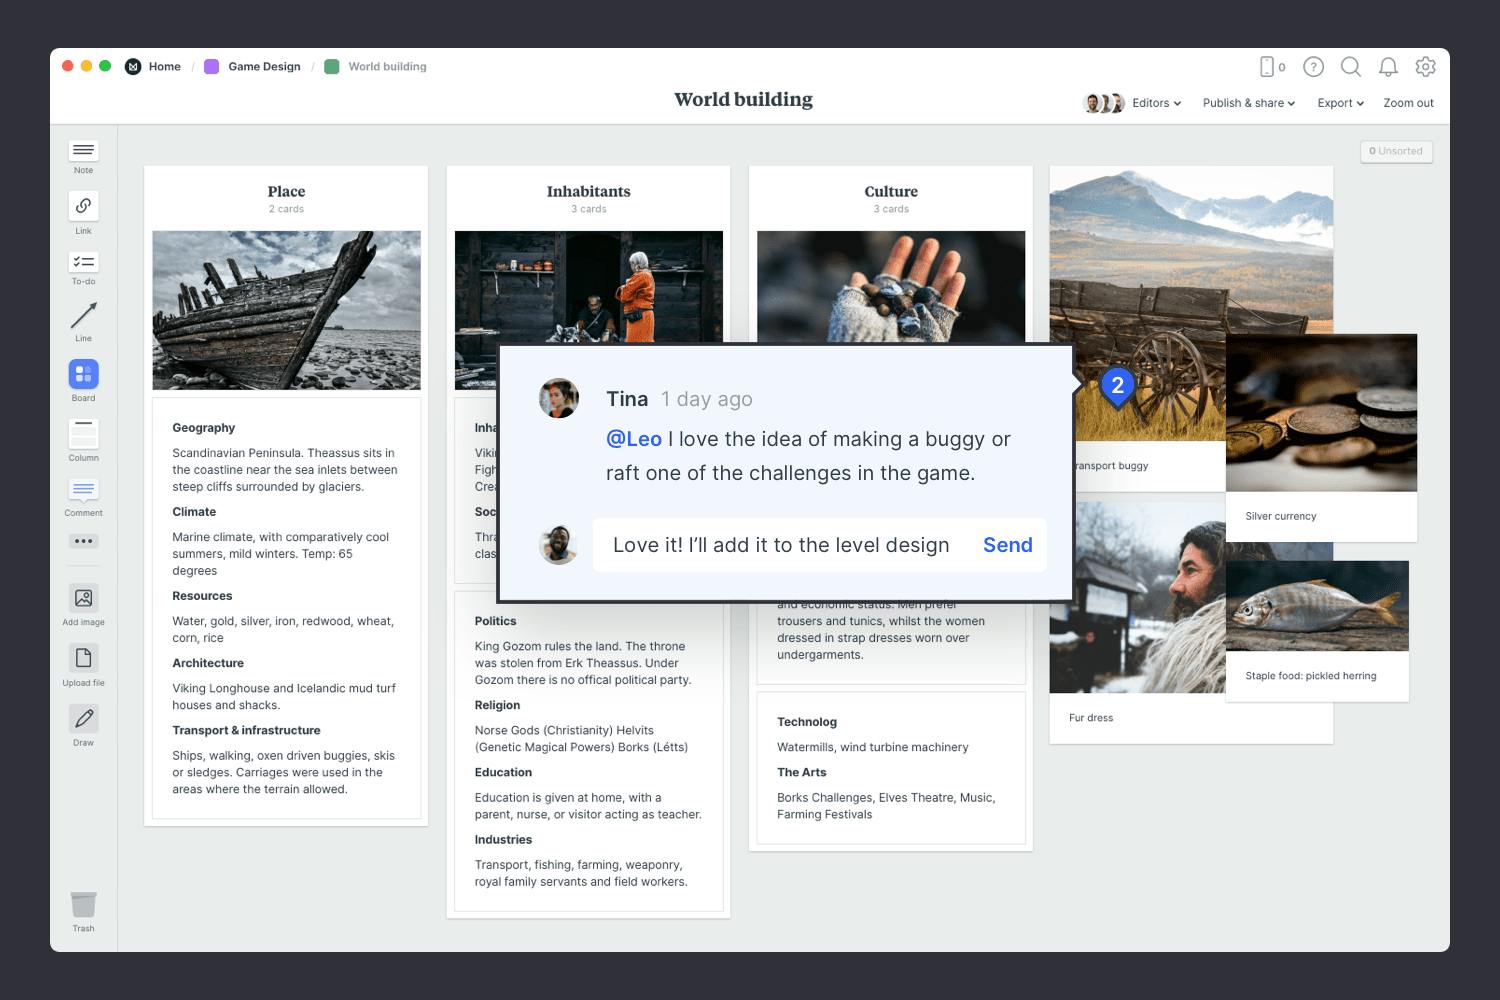
Share the board with your team.
Open the "Editors" menu from the title bar of your board. Add email addresses of the people you'd like to collaborate with—they'll receive an invitation via email.
Start a comment thread.
Drag out a comment from the toolbar on the left and place it on your board. Other editors can reply to your comment.
Mention teammates to get their attention.
Type '@' in any text field to mention someone who has access to your board. They'll receive a notification and be able to respond to your comment.
Now that your worldbuilding exercise is finished, you (and your team) have a clear vision for the environment in which your game will take place.
A great game level can make your players feel immensely excited and fully engaged in your game. From the level map, milestones, powerups, and obstacles they encounter along the way, every detail is planned during level design.
Level design is not only a great framework for you to invent something new. It's also a handy tool to help your team understand the size and scope of your game.
You’ll find the Level Design board on your Game Design Plan board. Double click on the Level Design board to open it and get started.
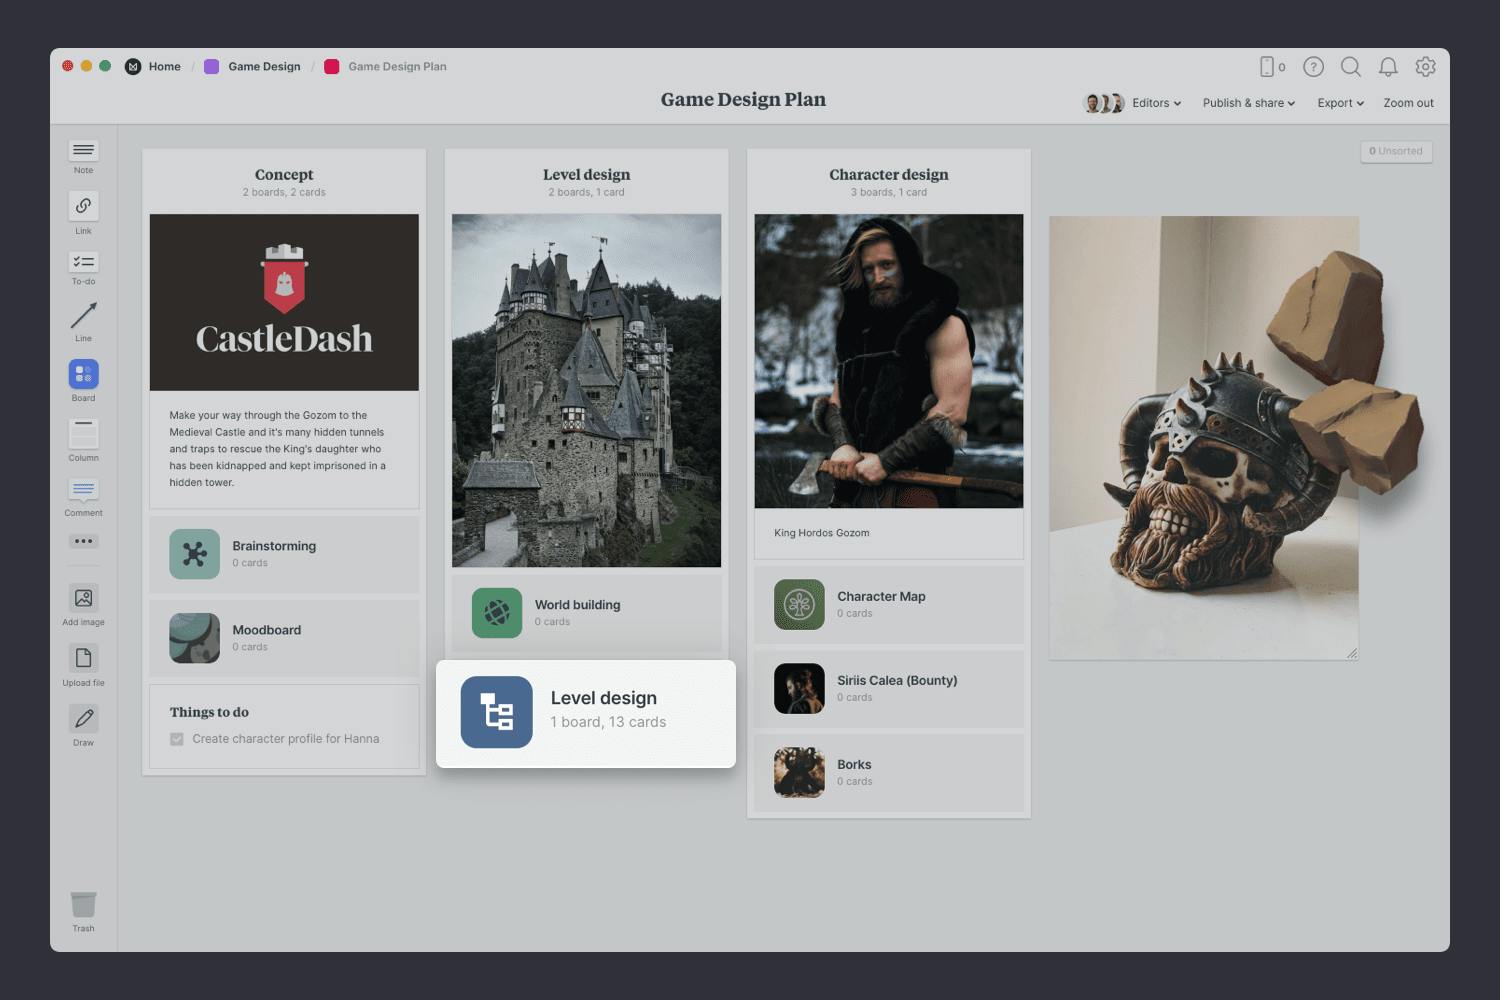
Double click the Level Design board to open it.
What's the basic concept for your level? This is your starting point. For example, is this the 'underwater' level, where your character has to avoid the sharks to stay alive? Is it at night? In the forest? Add a note that describes your topic in 1 to 2 sentences to get started.
Add a note to describe the concept of your level.
Start typing then use the formatting tools in the left-hand toolbar.
Once you have a rough idea for your level, start to create a 'top-down' map of your level. It doesn't have to be perfect, this is just a starting point. Where does your level start and how does someone finish this level? Map out the ideal path you want the player to take and what you want them to encounter along the way.
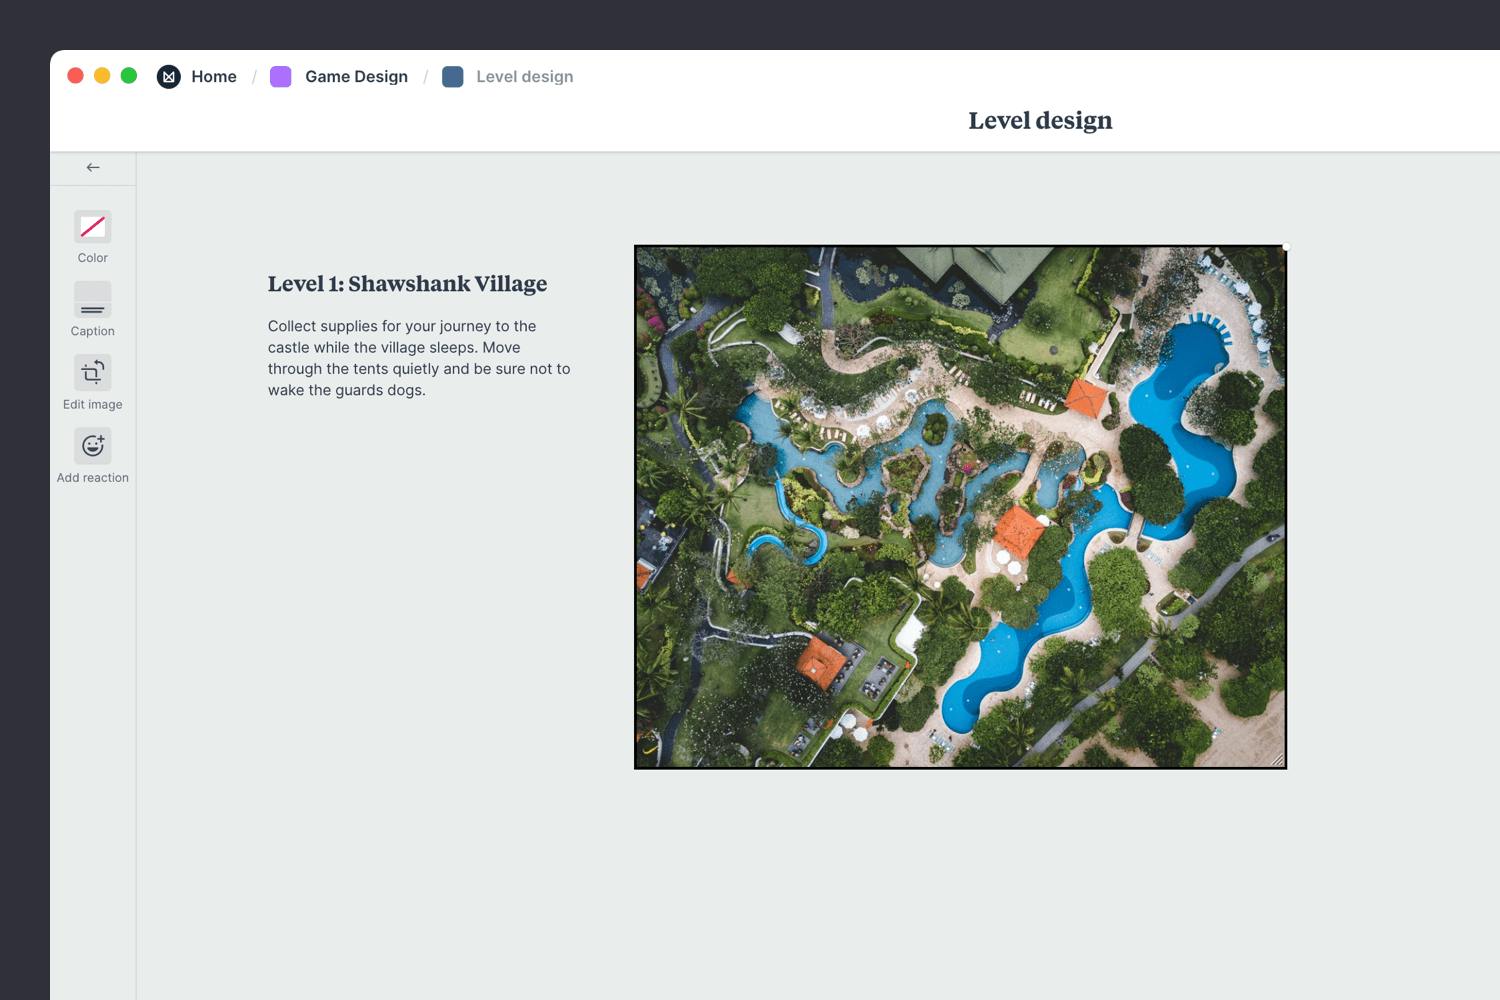
Drag an image from your computer onto the board.
Click the "Upload file" button or just drag a file onto your board. You can add images, logos, documents, videos, audio, and much more.
Great levels have just the right mix of challenge and reward. Start adding in obstacles or puzzles for your players to complete along the journey, like finding a switch, opening a door, or defeating an enemy. Also, design mini victories along the way to help propel them forward.
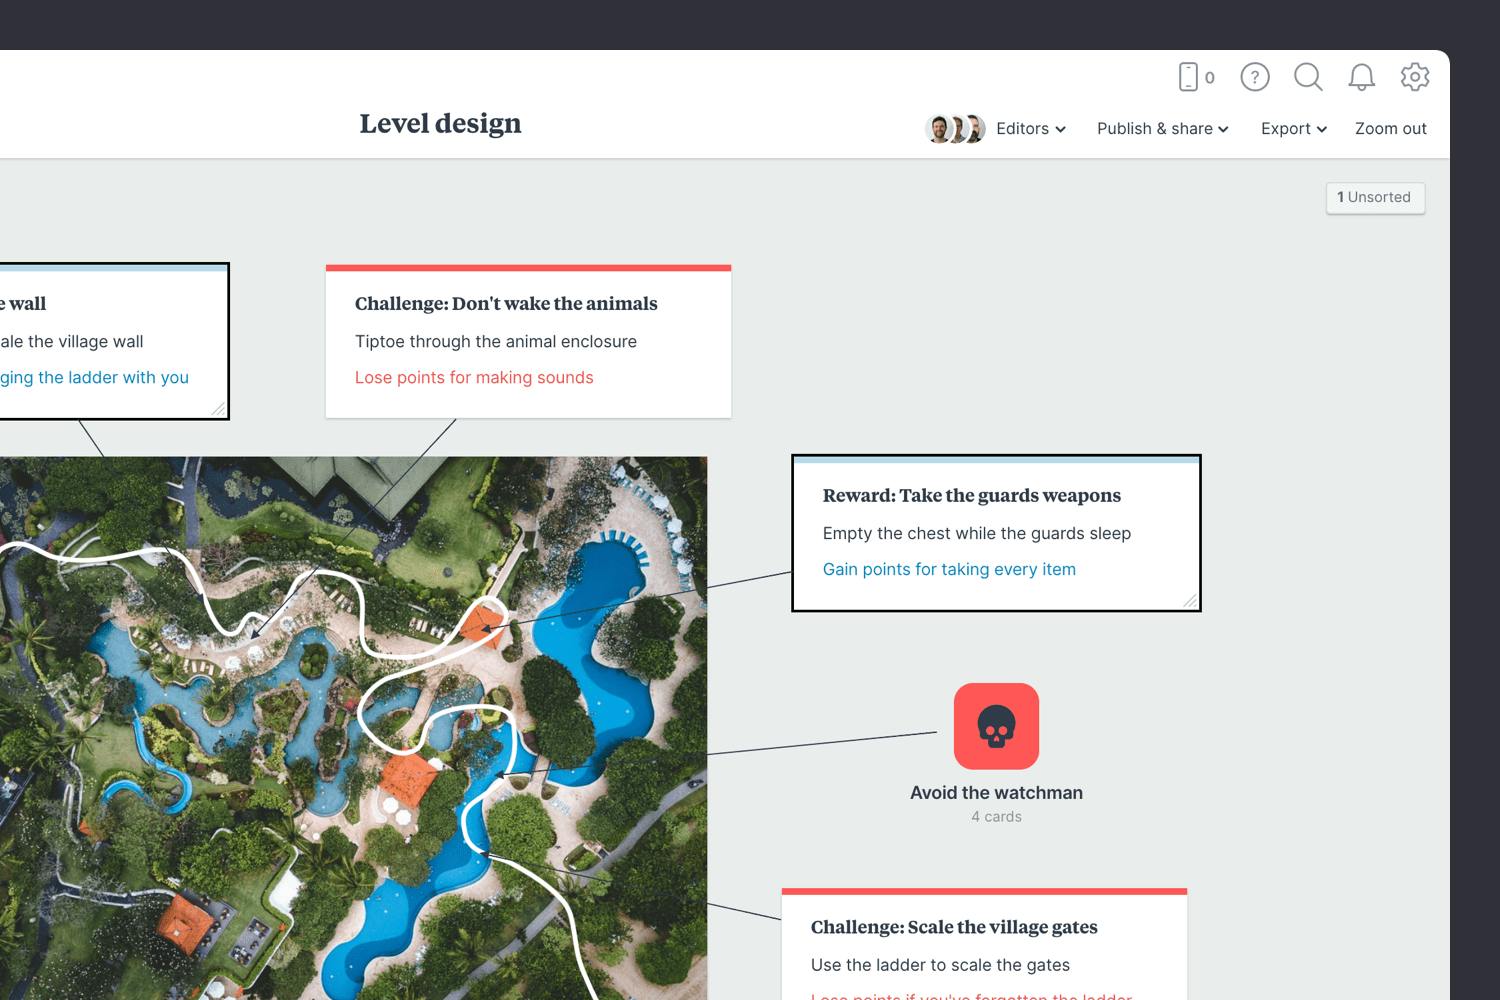
Add notes to describe the challenges & rewards.
Start typing then use the formatting tools in the left-hand toolbar.
Now that you have a rough picture of how the level fits together, it's time to start considering how the scenes might look. Refer to your game design moodboard or gather images that represent specific parts of your level. Google images or Pinterest are a great places to grab free reference images.

Drag images onto your board.
Click the "Upload file" button or just drag a file onto your board. You can add images, logos, documents, videos, audio and much more.
Browse the built-in image library.
Search over 3 million beautiful photos powered by Pexels then drag images straight onto your board.
Now that your level design is complete, you have a strong reference for how you want the level to fit together! Remember, just as creativity and inspiration are constantly evolving, so are ideas. Come back and add to your plan when inspiration strikes.
Repeat this process for each level and you'll start to see how the whole game fits together.
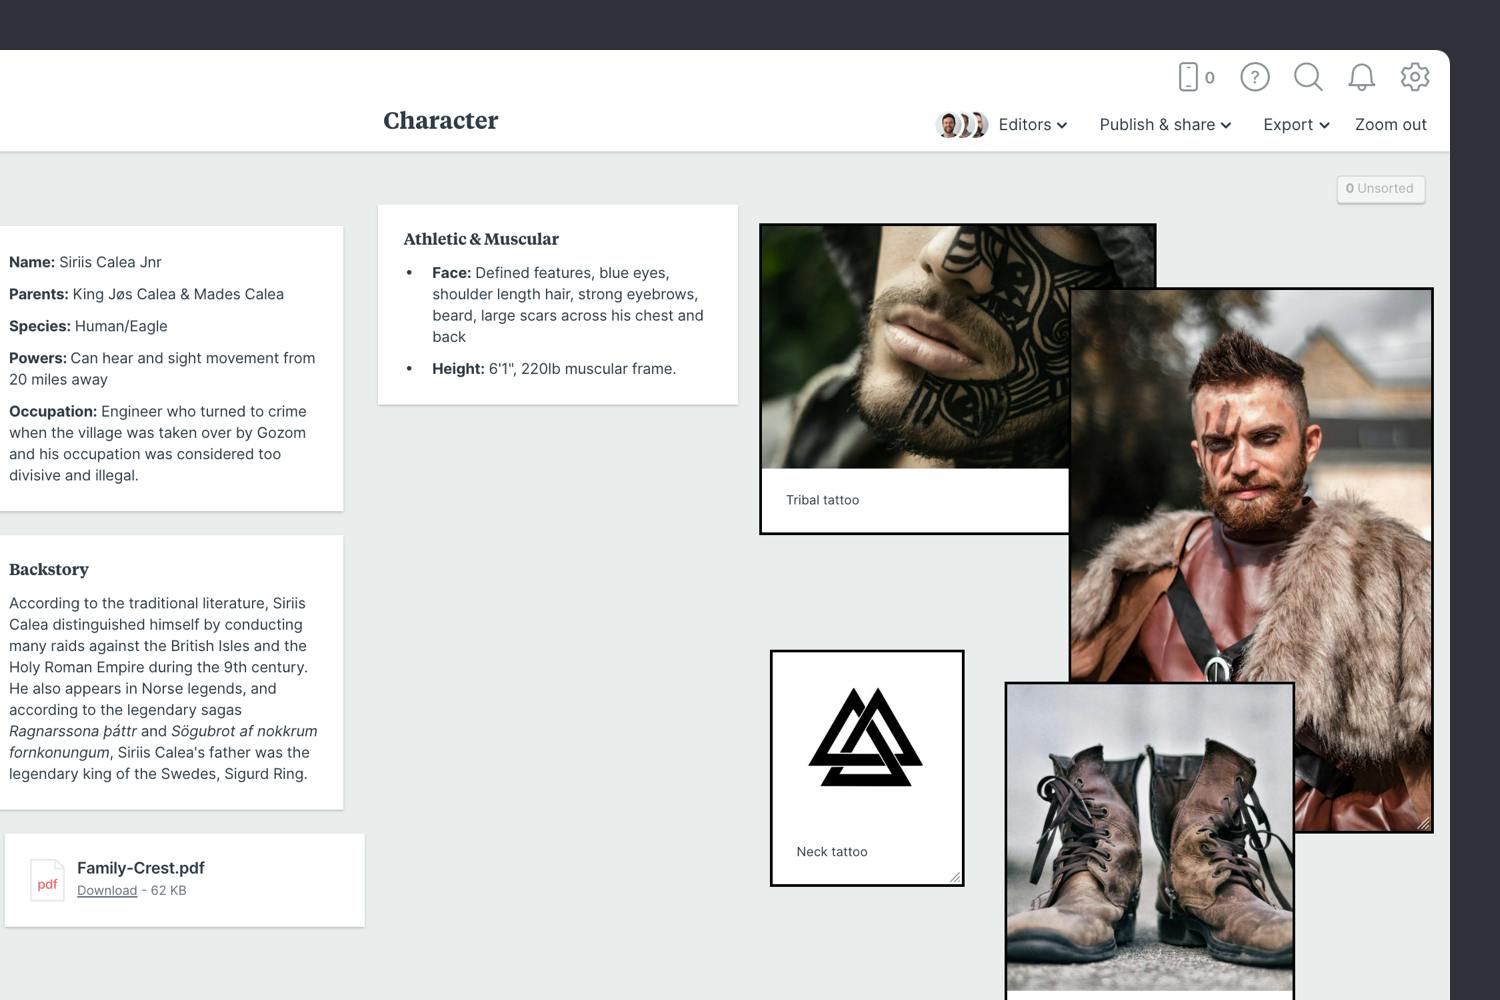
A great character feels like a natural part of your game's world, yet is unique and interesting with their own traits and personality. The character profile is a popular framework for developing unique characters. Game designers and writers use it to define a character's background, appearance, general strategy, and gameplay style.

You’ll find the first character profile board on the Game Design Plan board. Double click on the Character board to open it and get started.

Double click the Character profile board to open it.
A character might start as a bundle of random ideas, traits and plot points from your game concept, so it’s important to bring everything together in one place.

Add a note to describe your character.
Start typing then use the formatting tools in the left hand toolbar.
Add an image to represent your character.
Click the "Upload file" button or just drag a file onto your board. You can add images, logos, documents, videos, audio, and much more.
Just like people, characters are made up of their past experiences, goals, and aspirations. As Henry David Thoreau wrote, “Dreams are the touchstones of our characters.” Some aspects of their backstory might not make it into the game but will they help your artists and animators make the character more believable.
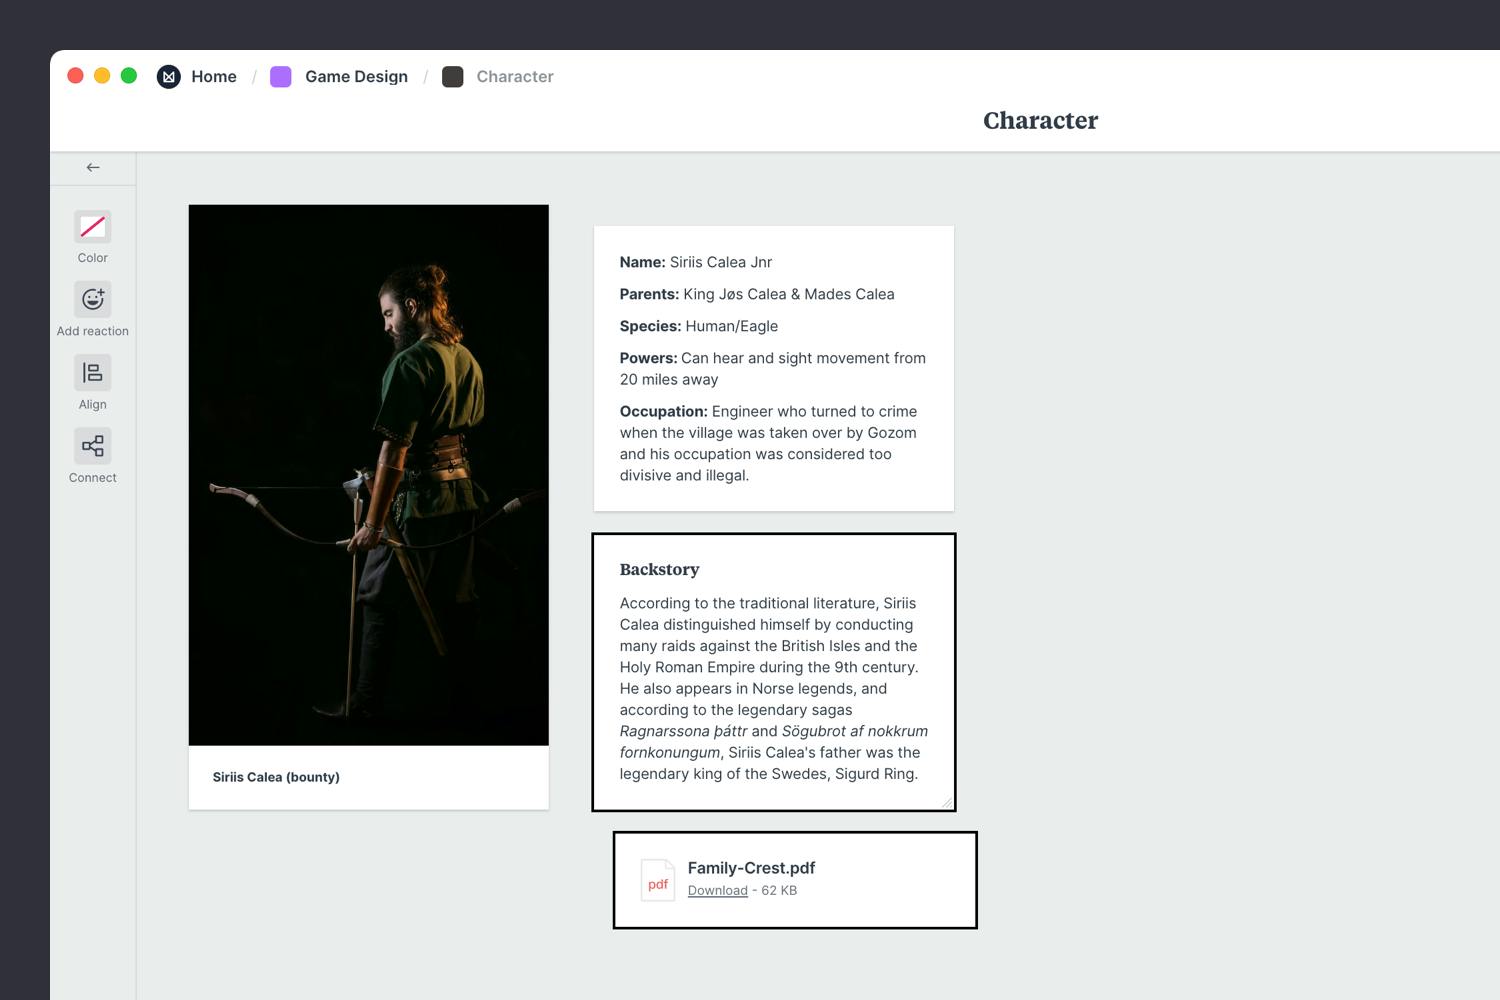
Add a note to describe their backstory.
Start typing then use the formatting tools in the left-hand toolbar.
Next, start to visualize the look of your character with sketches and reference imagery. There are lots of fantastic sites where you can find great visual inspiration for free, like Dribbble, Pinterest, or Google Images. You can also create a character moodboard at this stage to help explore all aspects of their appearance. See the guide on creating moodboards to learn more.
Use the built-in image library.
Search over 3 million beautiful photos powered by Pexels then drag images straight onto your board.
Drag files from your computer.
Click the "Upload file" button or just drag a file onto your board. You can add images, logos, documents, videos, audio and much more.
Now it's time to think about how they move, attack enemies and defend themselves. Consider their weight, speed, and style. Are they heavy or agile, how does their movement match their physical appearance? Do they have a super-power or can they acquire special powerups that transform their abilities?
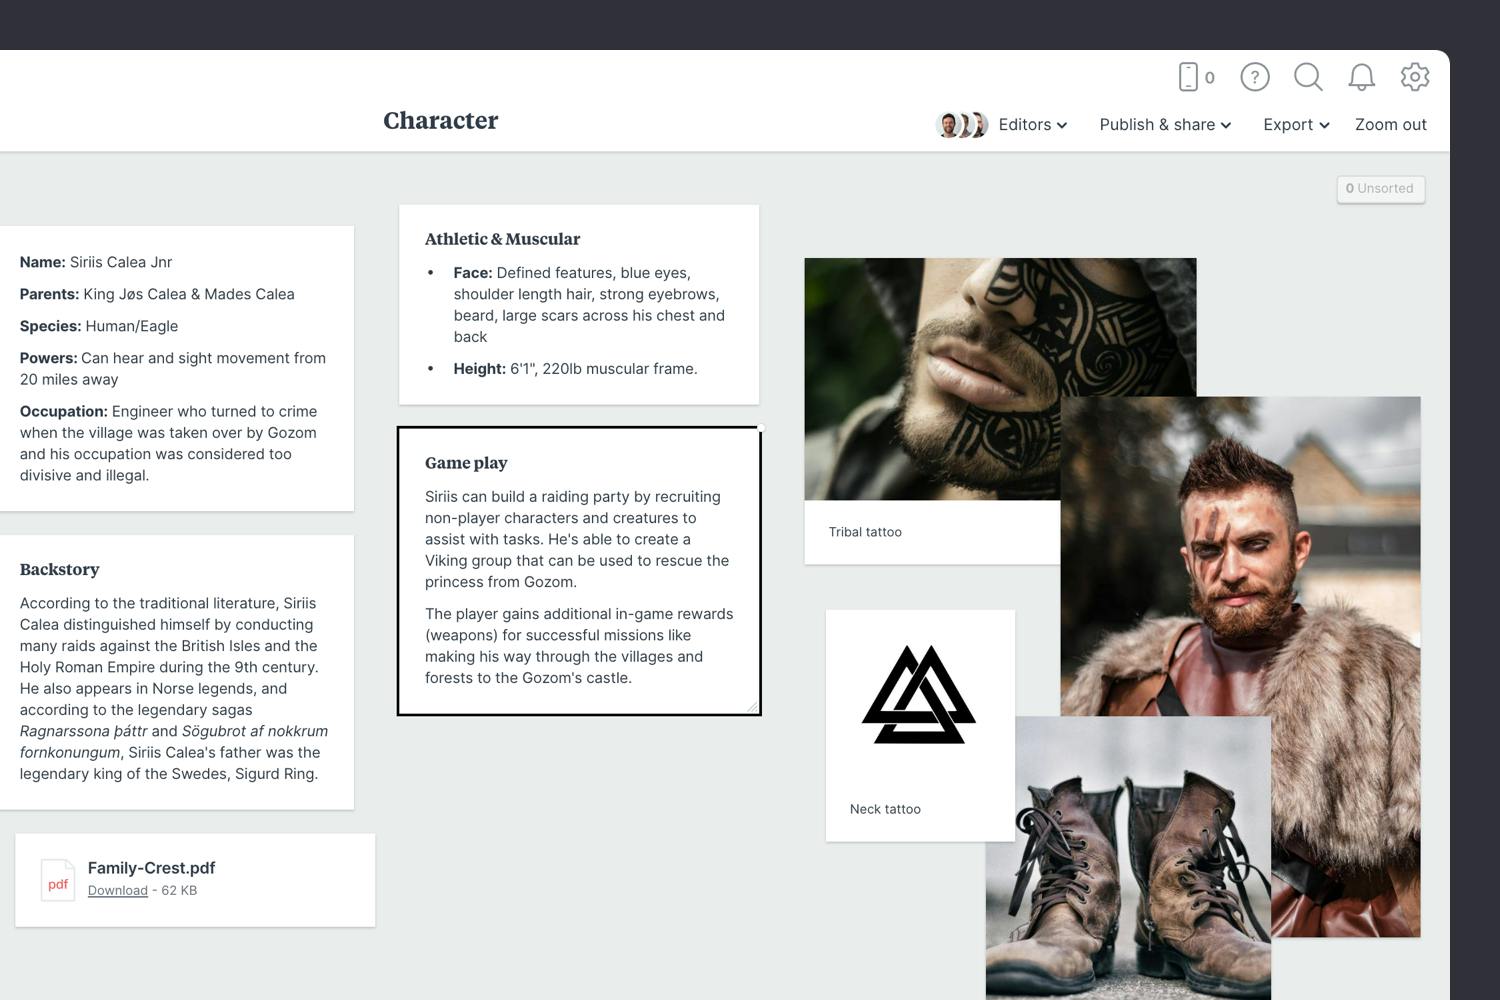
Add a note to describe the gameplay.
Start typing then use the formatting tools in the left hand toolbar.
Once you have everything you need, it's time to organize your content into logical topics. The goal here is to present the character to your team in an inspiring and concise format.

Use Columns to group related content
Name it, then drag any relevant notes or images into your column
It's important not to fall into the trap of giving just one character too much responsibility for the dramatic functions of your game. It's better to create additional characters that compliment and contrast the traits of your main character. You can repeat the above process to develop a whole cast of characters that help bring your game to life. Use the Character map template to lay them all out.

Hopefully, this guide has helped you become more organized and create an engaging game design document. If you're just starting a new game, use the Game Design Document template below to get set up in minutes.