Plan your next interior design project
Get all 4 interior design templates FREE.
Start your interior design projectSign up for free with no time limit

Follow this step-by-step guide to learn the modern process of planning an interior design project in Milanote, a free tool used by top creatives.
Whether you’re redesigning your living room or fitting out a restaurant for a client, planning your project is an exciting first step. But it can also feel overwhelming. There are a million things to organize. From the brief to collecting visual references, writing a product shopping list, and much more. This guide will help you organize the creative and practical parts of your interior design project in one place. By the end, you'll have an inspiring vision and clear steps to bring it to life.
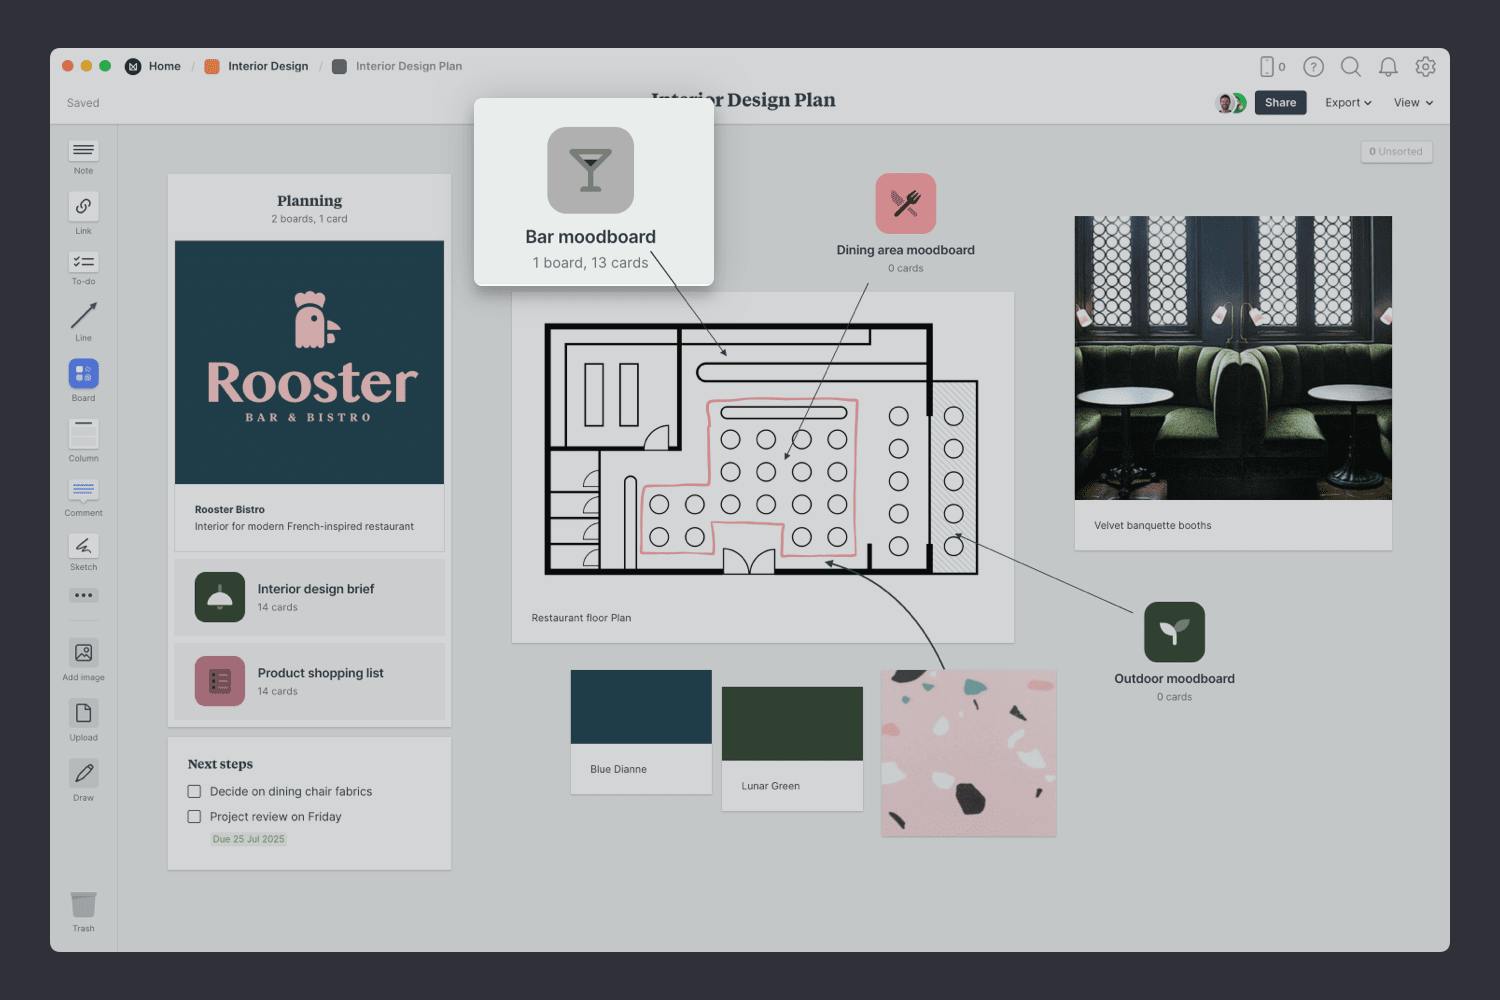
Traditionally, an interior design project plan might be scattered across various sketchbooks, to-do lists, bookmarks, and laptop folders. A central project plan combines these artifacts into one easy-to-access place. It will evolve over the lifespan of your project but usually includes:

Create a new board for your project plan.
Drag a board out from the toolbar. Give it a name, then double click to open it.
Choose the Interior Design Project Plan template.
Each new board gives you the option to start with a beautiful template.
A clear, inspiring, and informative brief provides the structure and direction for designers to do their best work. Interior Design briefs typically include background information, goals, deliverables, visual references, floor plans, and information about the people who'll use the space.
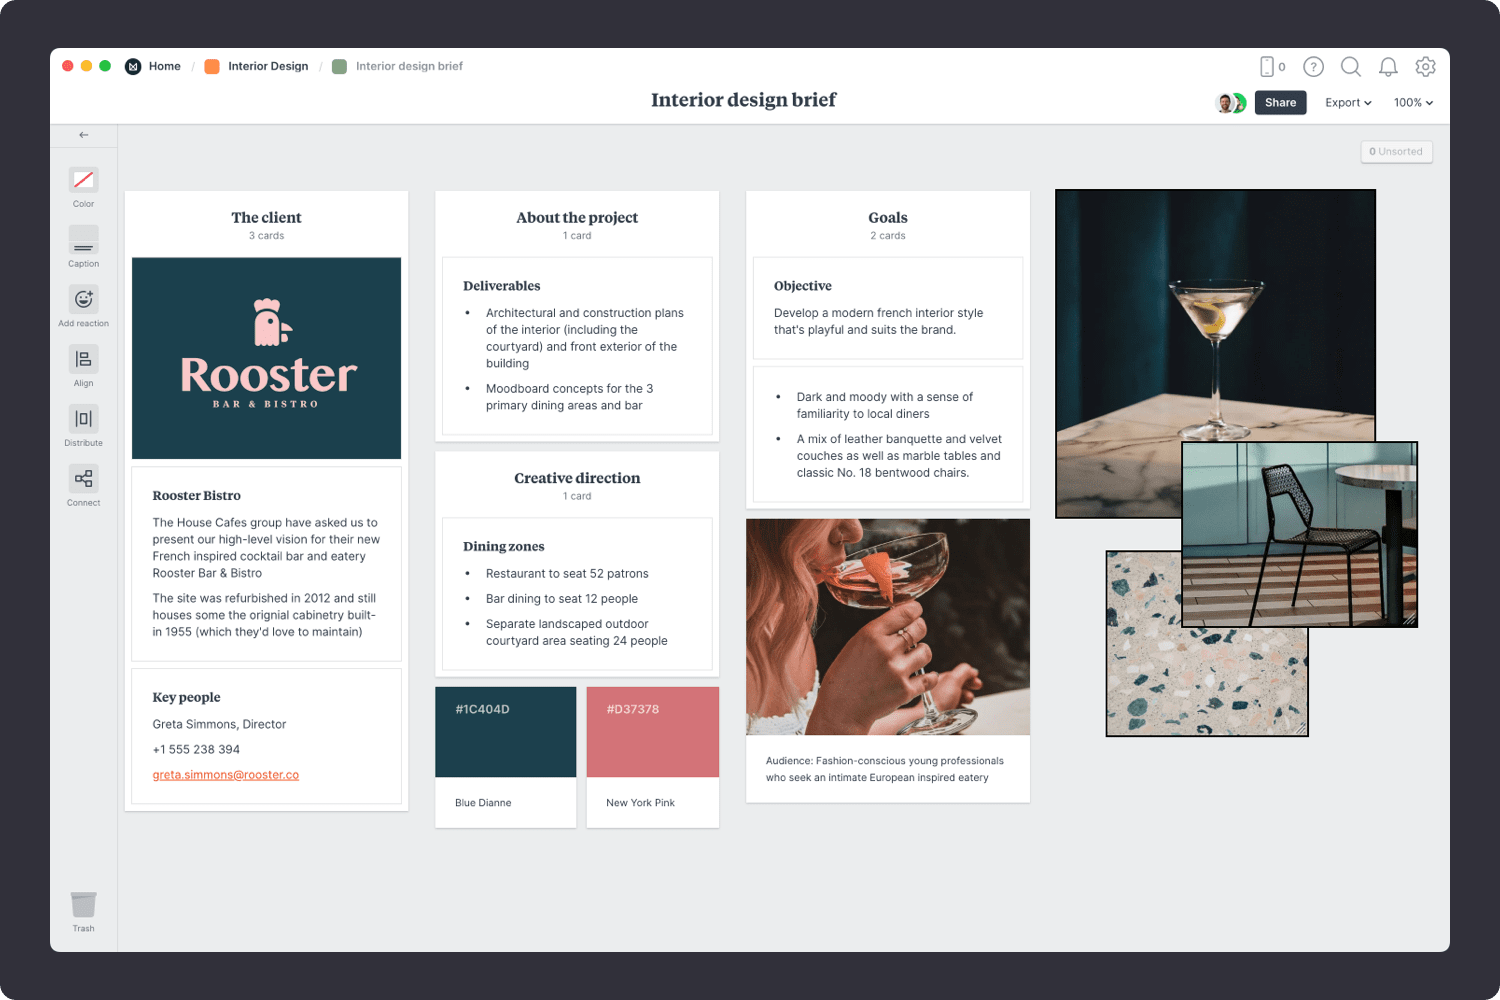
You’ll find the board to create your brief on the project plan board. Double-click the Brief to open it and start adding the goals, style preferences, and deliverables.

Double click the Brief board to open it.
The first thing to define is why the project is happening. Spend time with your client, have them lead you through the vision in their own words, and ask questions like... What problem is this project trying to solve? What do you want to keep? What needs to change?

Add a note to define the background of the project.
Start typing then use the formatting tools in the left hand toolbar.
This is the part that you'll revisit throughout the project, so try and be as specific as possible. List each space or room that needs to be designed, alongside the goals for the project.

Create a new to-do list for the specific deliverables.
Start typing then press "Enter" to create a new item. Add a title to your to-do list using the left hand toolbar.
Your client likely has a vision for the style of space they're trying to create. Add any visual references they've provided to your brief. This might include specific products, furniture, colors, materials, or textures.
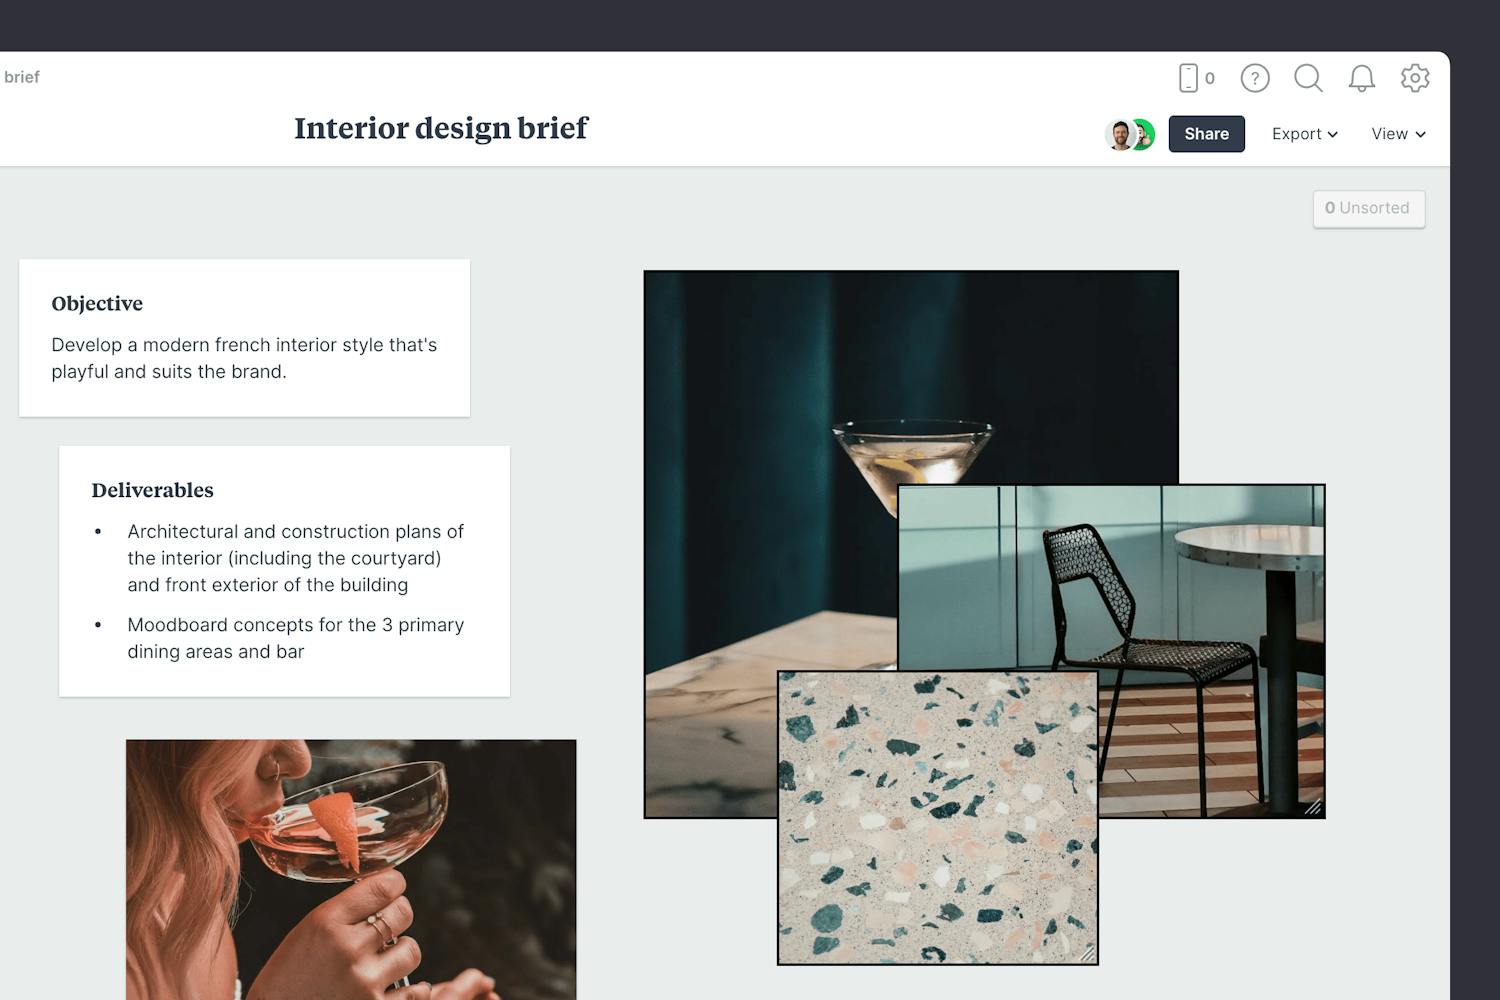
Add images to your brief.
Click the "Upload" button or just drag a file onto your board. You can add images, logos, documents, videos, audio and much more.
Find inspiration in the built-in library.
Search over 3 million beautiful, free photos then drag images straight onto your board. Powered by Pexels.
Once you’ve made any final tweaks, it’s time to share the completed brief with your team so everyone's on the same page. If you want to learn more about writing an interior design brief, check out our dedicated step-by-step guide: How to write an inspiring interior design brief.

Publish and share the brief.
Click Share in the top right of your board. You can add a Welcome message for viewers, allow comments, set a password or embed the board in another app or website.
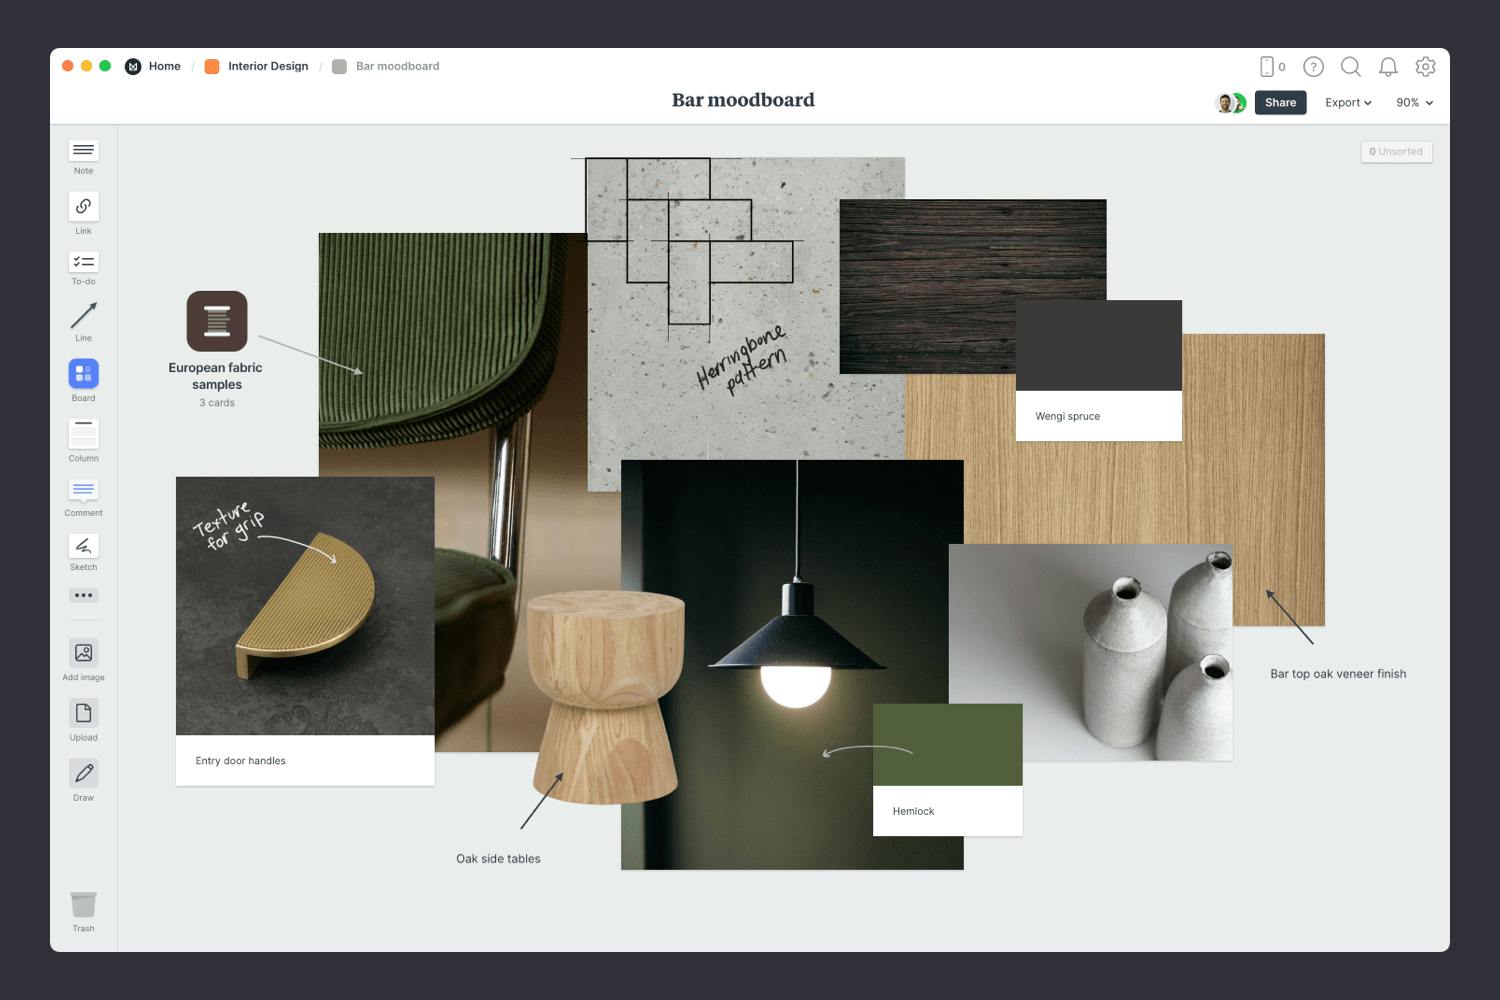
In the brief, you set the goals and deliverables for your project. It's time to start exploring some visual directions with a moodboard. A moodboard is a collection of visual materials that evoke a certain style for a space. Interior designers use them to communicate which colors, materials, and furniture would suit a project.
You’ll find the board to make your moodboard on the project plan board. Double-click the Moodboard to open it and start adding your inspiration.
Double click the Moodboard to open it.
Start by adding any existing material you have—this might include specific products or references you've received from your client. This is a great way to anchor the visual style to a direction you know your client will like.

Drag image from your computer.
Click the "Upload" button or just drag a file onto your board. You can add images, logos, documents, videos, audio and much more.
The imagery you choose to include in your moodboard can have a big influence on the look and feel of your project, so choose carefully! These images can define things like tone, mood, lighting, and color.
Start by searching for visual elements from around the web. There are lots of fantastic sites where you can find great visual inspiration for free, like Pinterest and Designspiration. Interior moodboards often include materials and fabrics, flooring, fittings, textures, furniture, and even artwork.

Use the built-in image library.
Search over 3 million beautiful, free photos then drag images straight onto your board. Powered by Pexels.
Install the Milanote Web Clipper
Save images from other websites straight to your board.
With the Web Clipper installed, roll over an image (or highlight text), click Save, then choose the destination in Milanote. Return to your board and find the content in the "Unsorted" column on the right.
Color can be a great way to express a particular feel, personality, or energy. As painter Johannes Itten said, “Color is life.” Tools like Kuler can be a handy starting point for finding colors that complement the space you're working with. Another trick is to pick colors directly from the images and photos you've added to the board.

Add color swatches to your moodboard.
Drag a Color Swatch card onto your board from the left-hand toolbar. Double-click the swatch to choose a different color.
With any creative technique or project, it’s important to be open to constructive criticism. Now that the first version of your moodboard is done it's time to ask for specific feedback on color, tone, mood, and products. Make sure you stay open to suggestions and improvements and try not to take criticism personally.

Invite someone else to edit to your board.
Open the "Share" menu from the title bar of your board. Add email addresses of the people you'd like to collaborate with—they'll receive an invitation via email.
Start a comment thread.
Drag out a comment from the toolbar on the left and place it on your board. Other editors can reply to your comment.
If you're designing multiple rooms or spaces, it can help to have separate moodboards for each one. Just repeat the process above for each space in your project.

Now that you have a clear direction for the style of your space, it's time to list the actual products and materials you need to buy. A product shopping list (or specifications list) is a handy way to link to the products with a visual list.
Save links to your furniture, artwork, lighting, rugs, flooring, glassware, and more. Then check them off as they're purchased. It'll help you make sure nothing falls through the cracks.
This template can be shared with your team or client and everything updates in real-time. No more emailing spreadsheets!

Hopefully, this guide has helped you become more organized and given you the space to let your creativity shine. If you're just starting a new project, use the Interior Design Project Template below to get set up in minutes.